one-off projects
- If you can imagine it, we can build it.
- I specialize in the esoteric.
- I am highly creative and I've built a lot of cool things.
Designers and builders often run into conflict caused by a lack of compatibility between conceptual ideas and real-world constraints. Working in both realms leads to an overall understanding of design parameters, less proof revisions, and smoother production flow.
Tallbike with Built-in Light Show and Sound System
USB Syntax Error
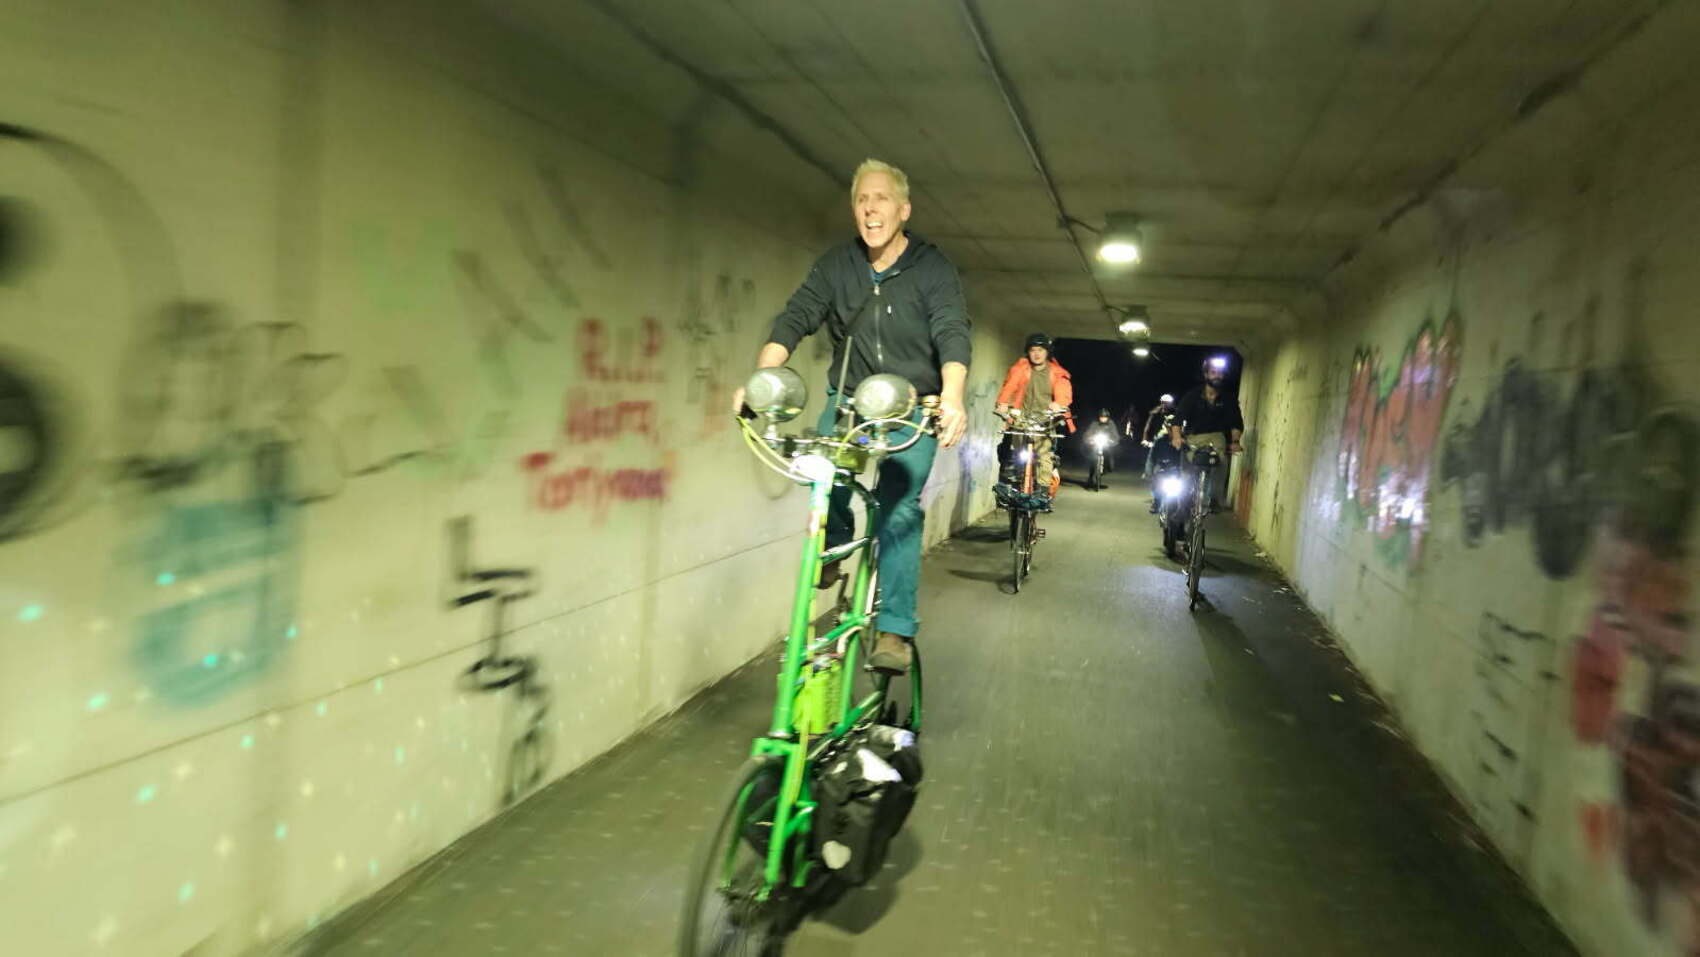
This is no ordinary tallbike — this one is made from new tubing, not cut up existing bikes.
USB Syntax Error is a double-tall bicycle made from new 4130 steel tubing. It has a large-capacity LifePo4 battery to power it's lights and sound system, and internal electric wiring for a clean aesthetic.
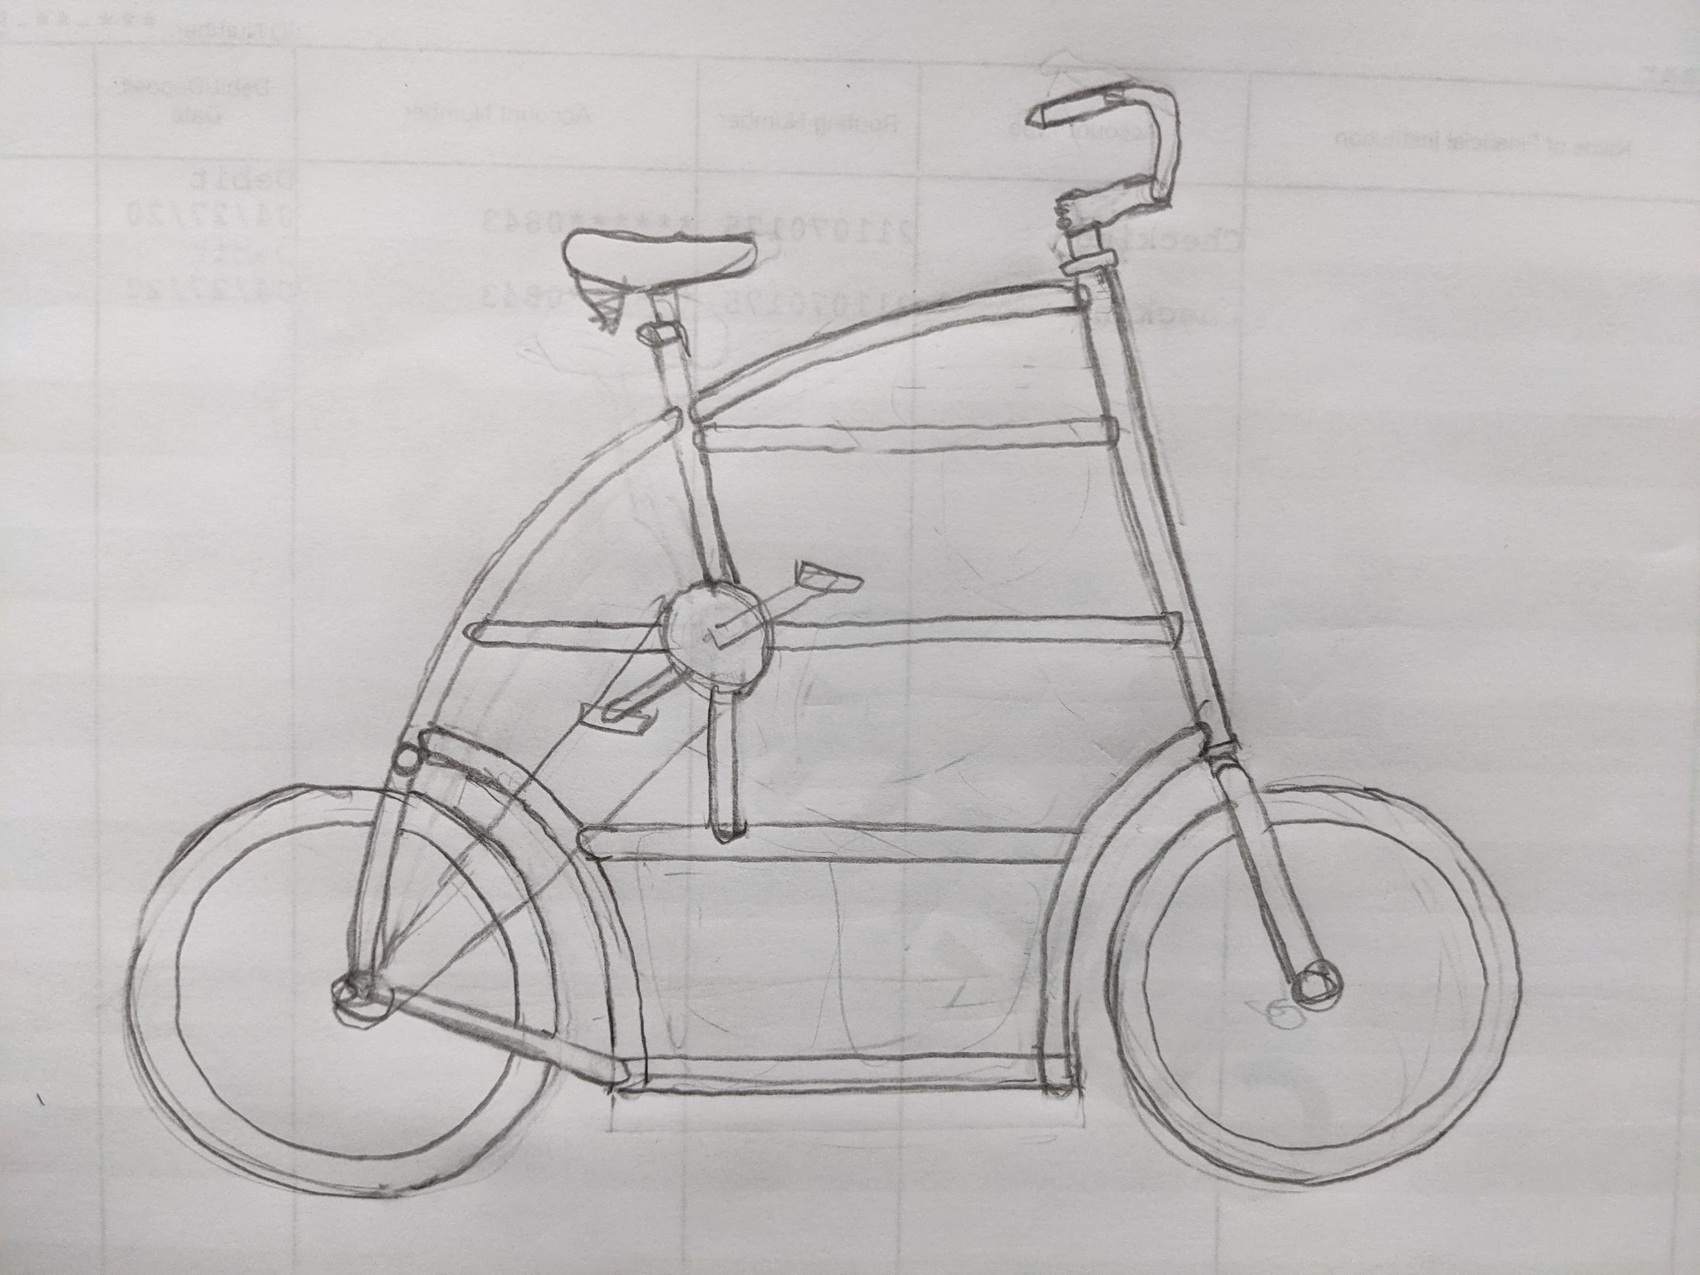
One fateful morning I pondered "What would a tallbike look like if it weren't made from other bikes?" — so I made this sketch. I used a lot of curvy, cruiser-style frames as building blocks for my previous builds. While straight tubes make lighter bike frames than curved ones, curves seems to make sense on a tallbike.
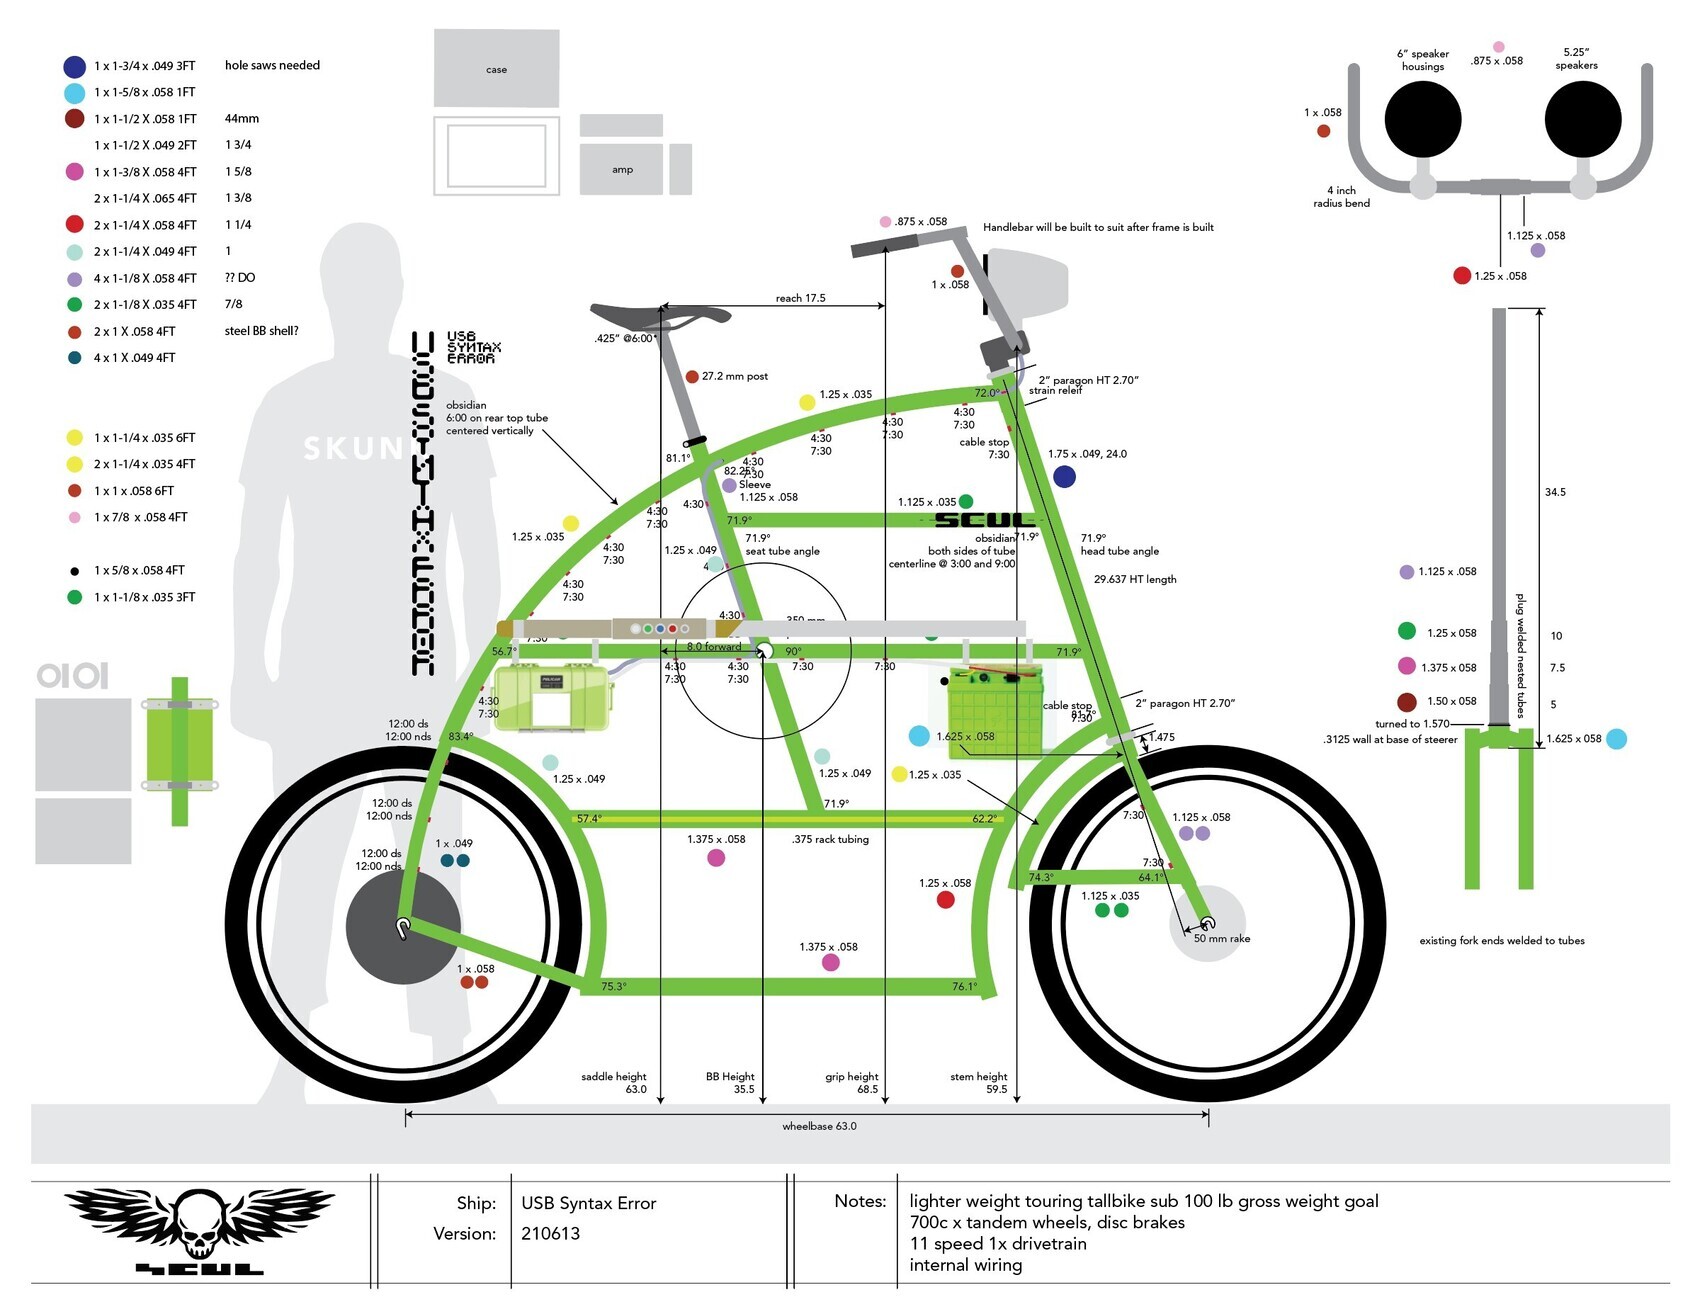
I spent the next few weeks expanding and evolving my simple sketch into a full-scale Illustrator template, complete with cut list. I used the line tool and set the width to the tubing diameter to draw the tubes. I do all my design work at actual size and scale.
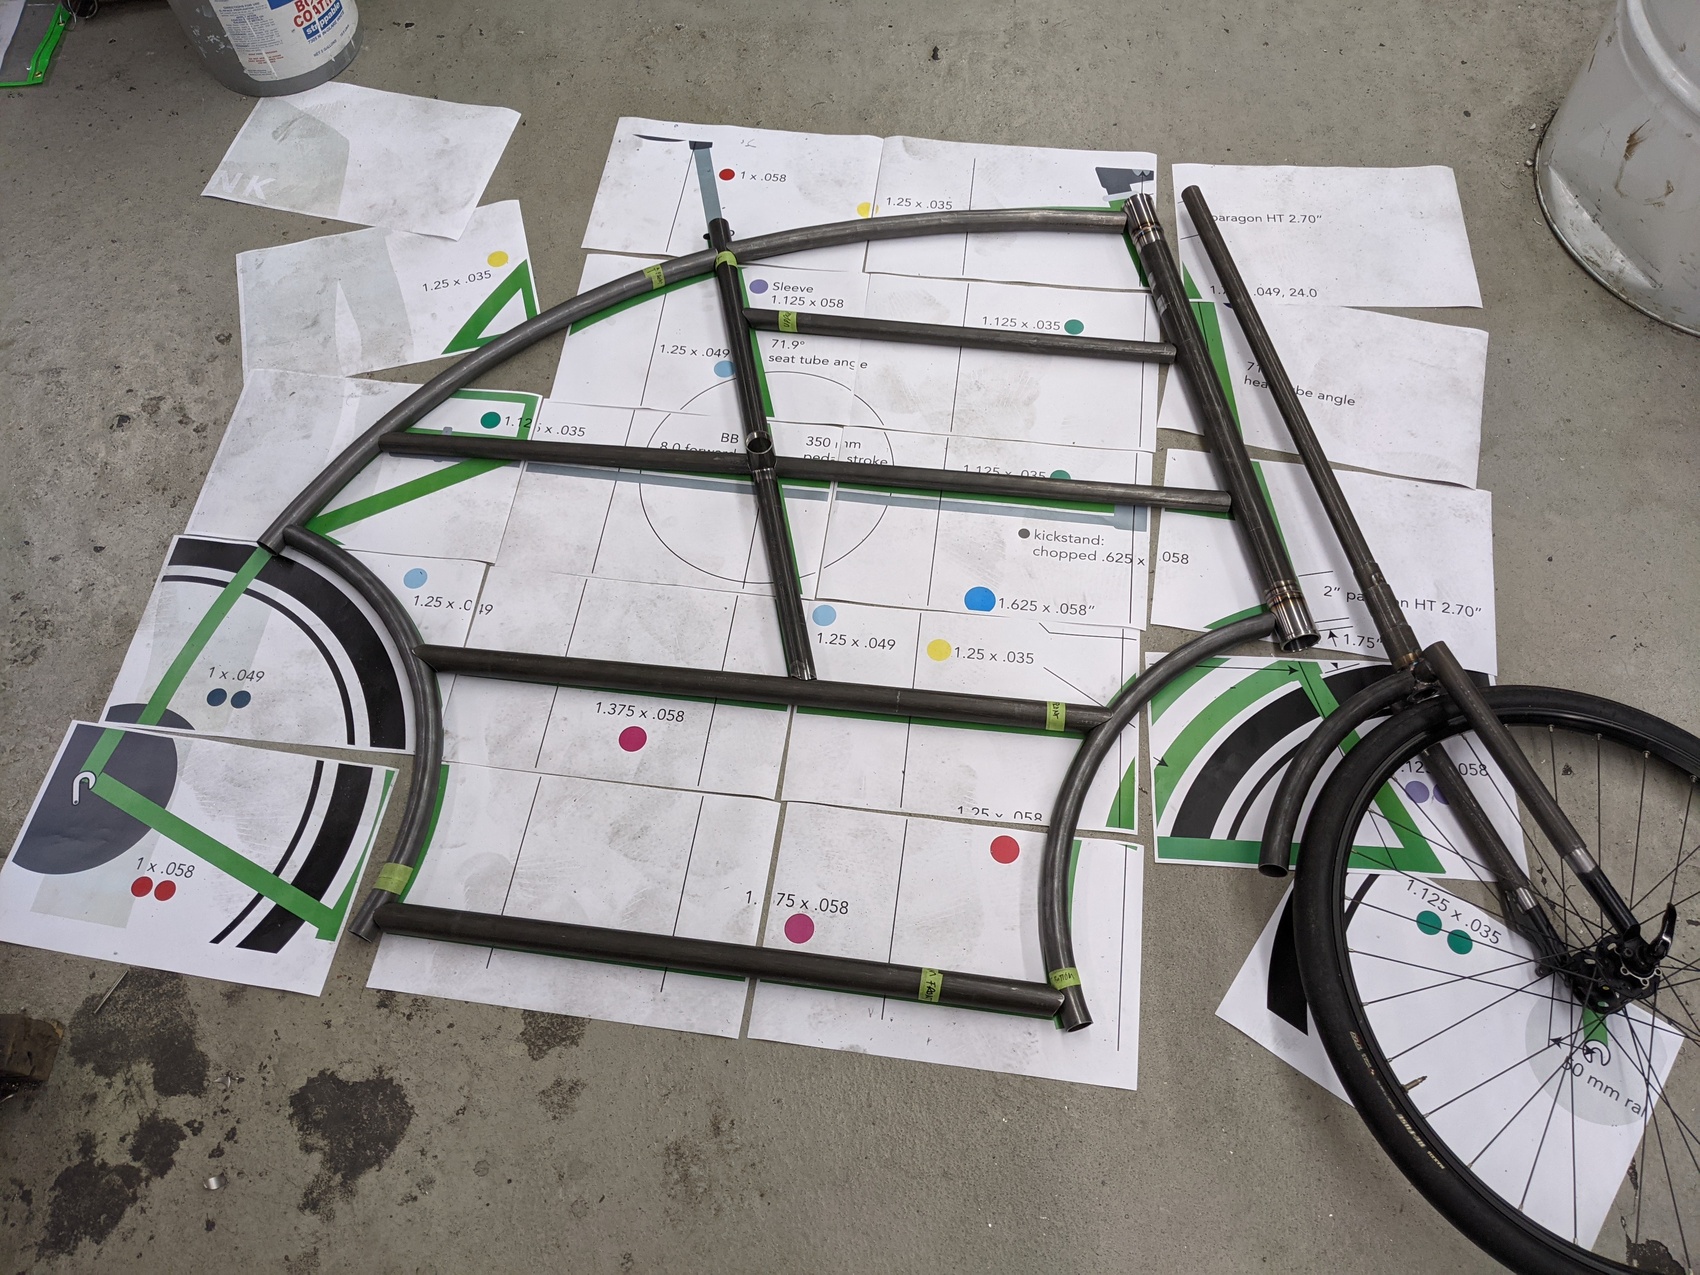
Tile printed on tabloid-sized paper, the blueprint was laid on the shop floor for reference to assure that the bends were correct and everything fit as I cold-formed and machined each tube one at a time.
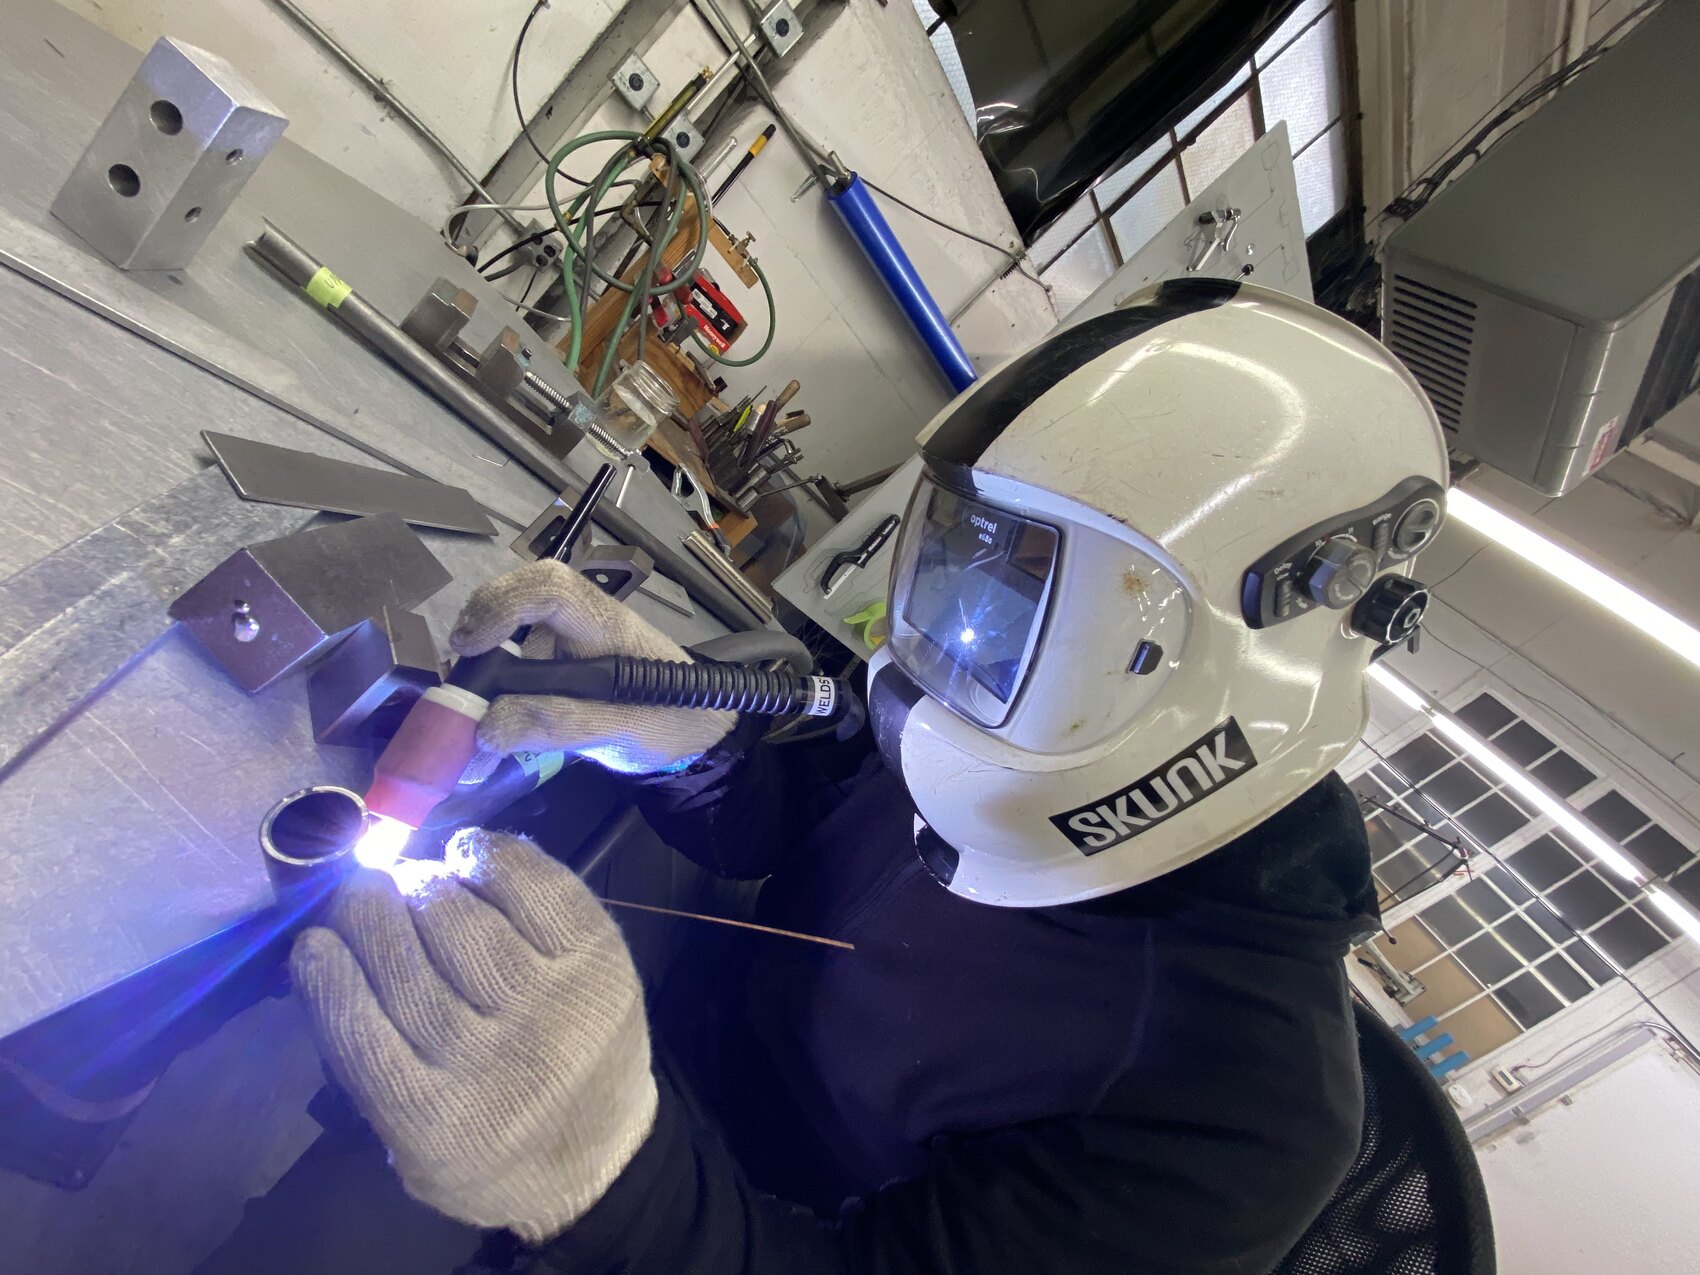
I've welded hundreds of bicycle frames, but alignment is a lot more tricky when you have no fixtures or jigs, particularly the rear triangle of the frame.

After weeks of nights and weekend sessions, it was thrilling to see this project literally leap off the page.
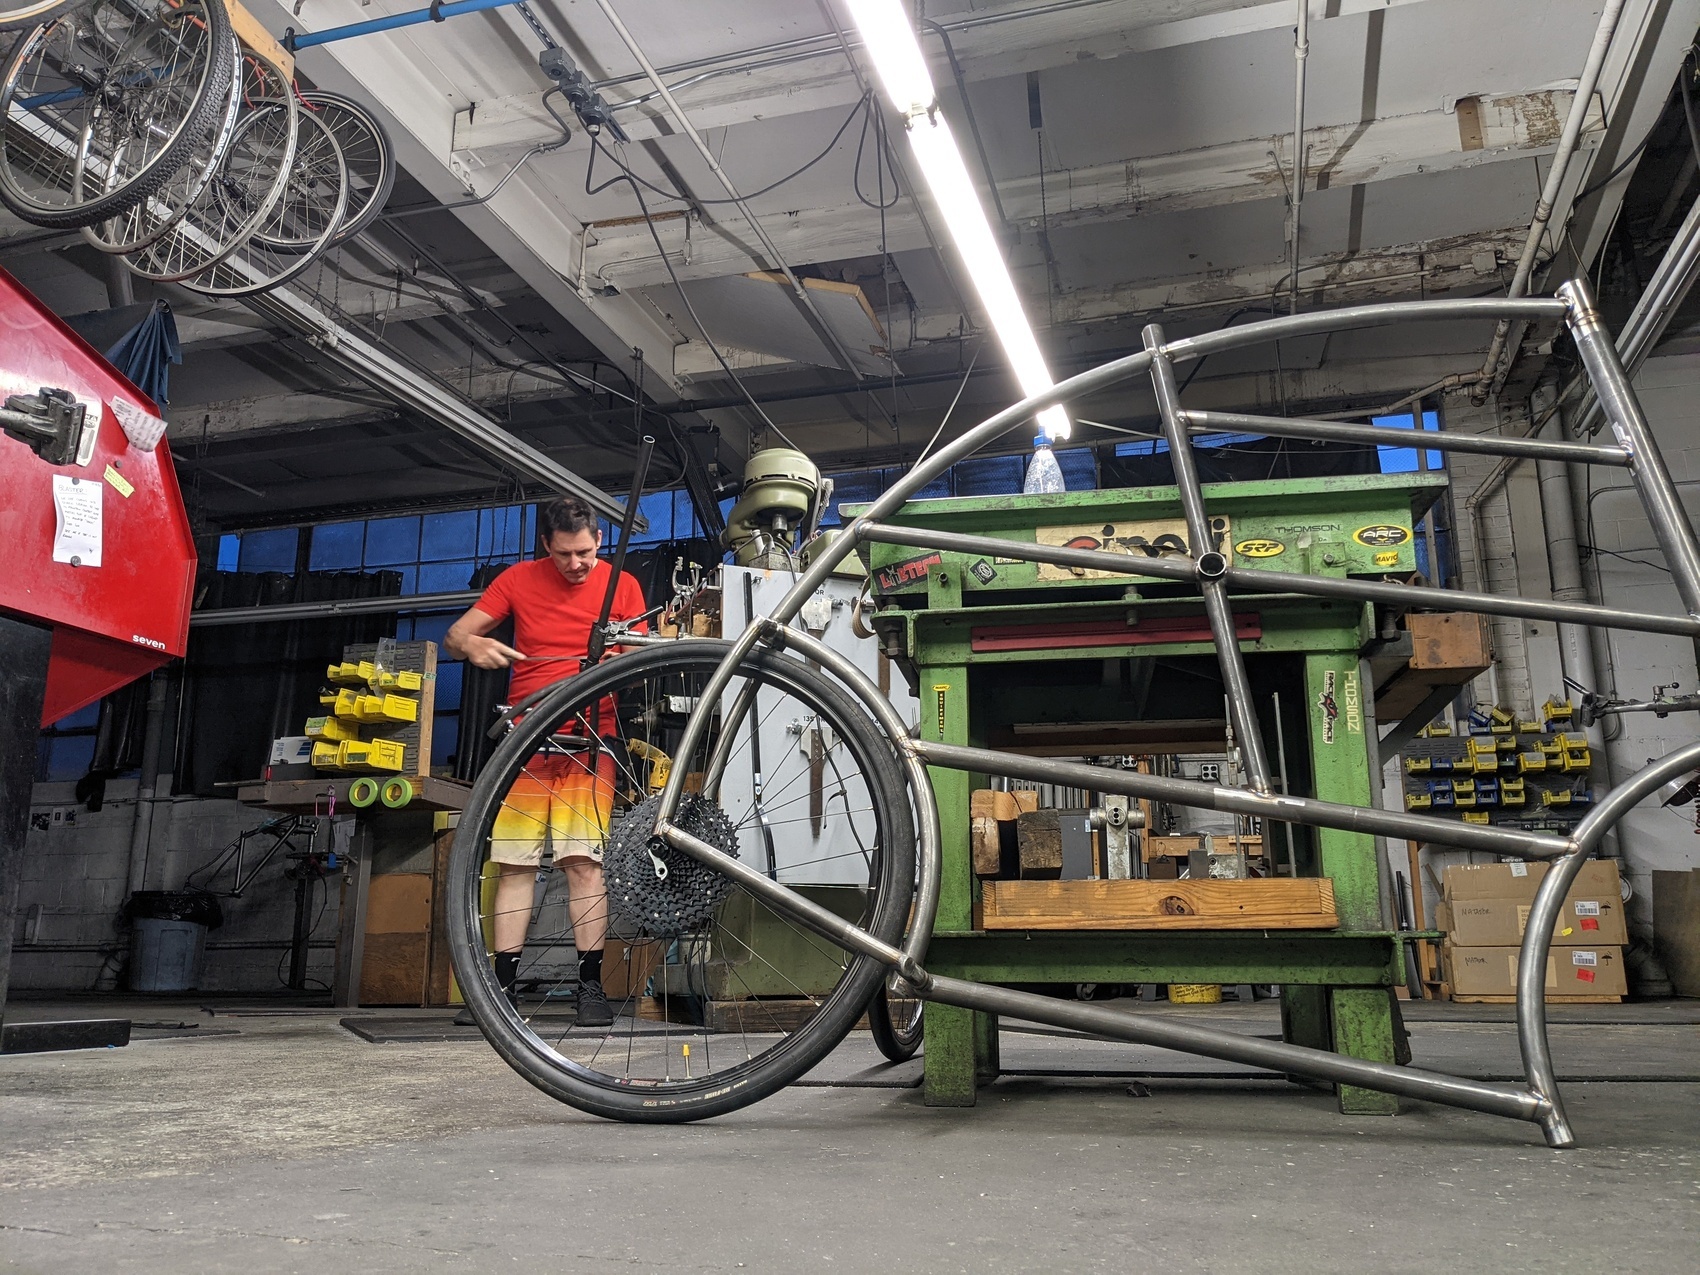
This tallbike was a build of epic proportions. If I wasn't working, sleeping, or eating, I was at the shop making progress — nights, weekends and holidays.

I wanted the headbadge for this bicycle to be something special, so I put a great deal of work into it. Starting with pencil drawings, I used a light board to ink the illustration before digitizing and then vectorizing the image in Illustrator. The image needs to be made negative: the toner acts as a resist for the copper etching. The design needs to be horizontally because it's applied face-down on the copper.
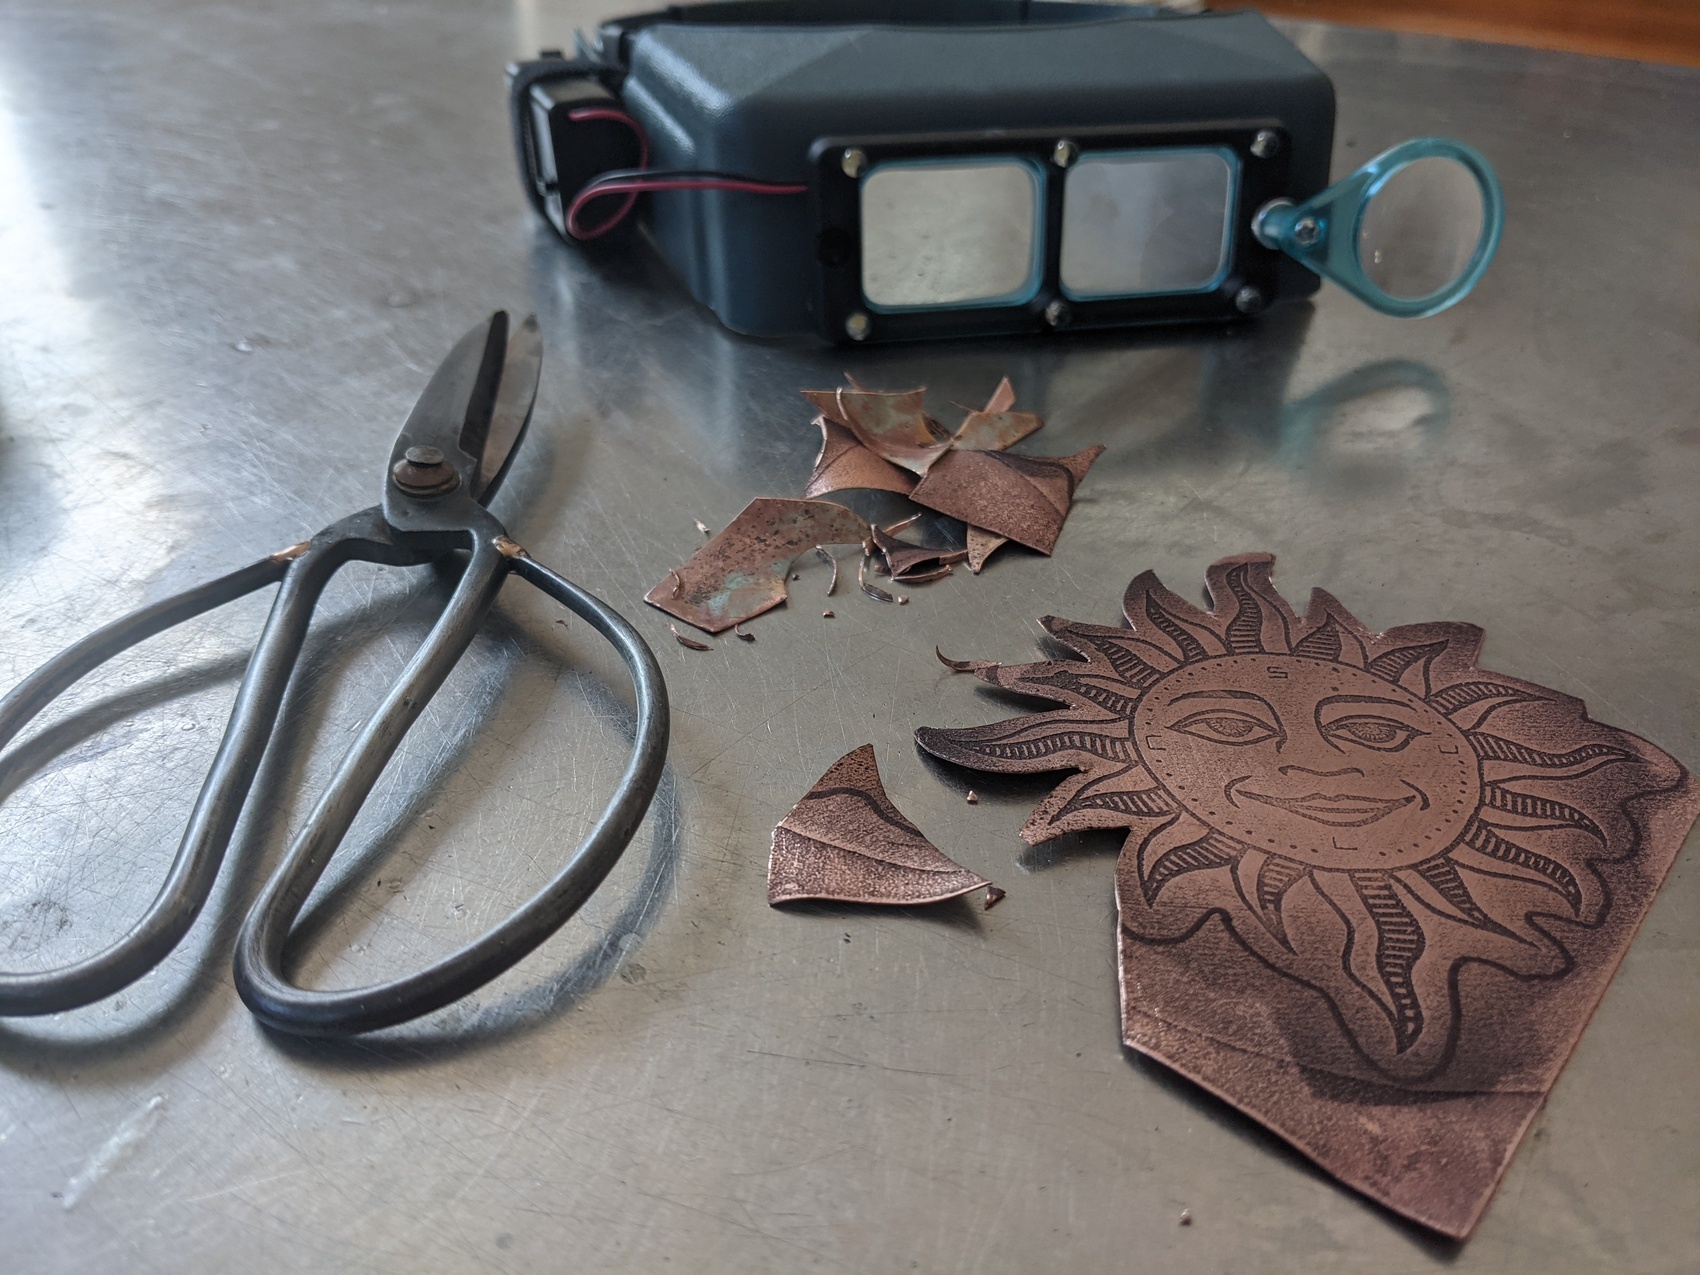
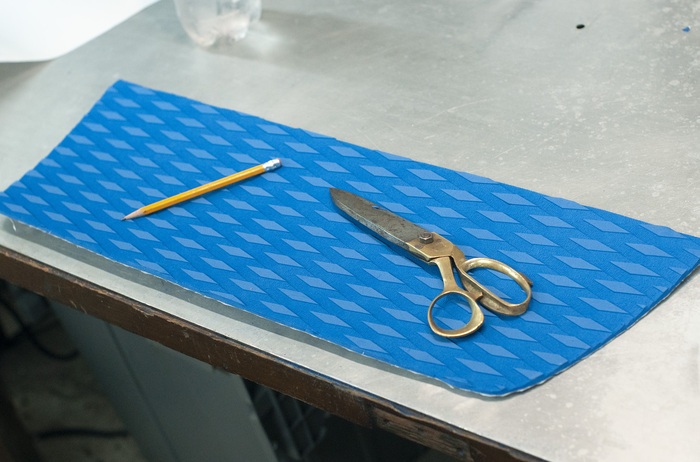
The toner was heat-transferred to the copper using a lamination machine, then the badge was placed in an acid bath to etch my design into the copper. Afterwards it was time to cut, bend, polish, epoxy, and fasten it to the frame. Surprisingly, when cutting copper sheet, tin snips were not as effective as my sturdy pair of scissors.
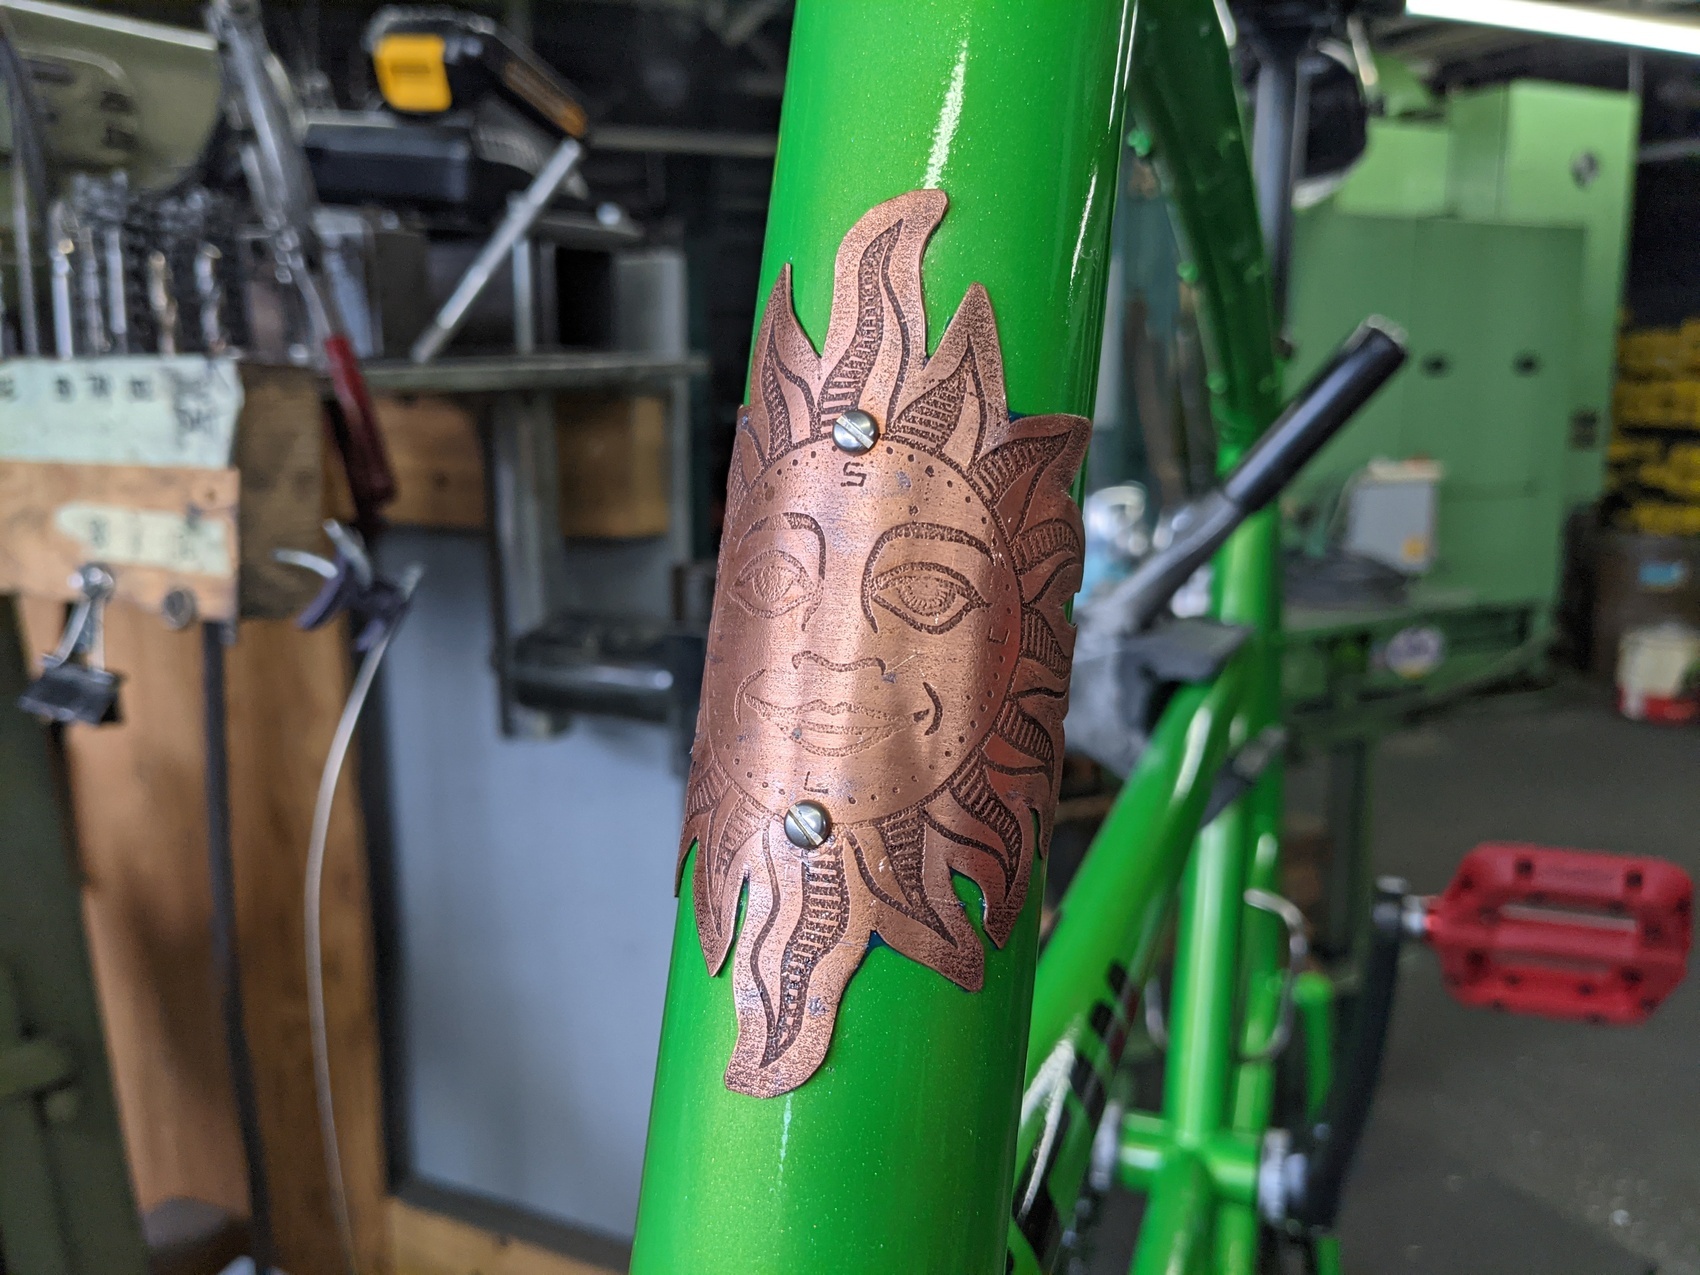
It's not often you get to place your headbadge at eye level. Applying the badge to the bike frame was tricky because it wraps more than halfway around the head tube. I used epoxy and zip ties to hold it in place while the glue set up.

It is nearly impossible for an existing bike to be retrofitted for internal wiring since the all the joints need internal holes for the wires to pass through. Bikes with electronics tend have a lot of messy wiring, but this one's built to be super clean.
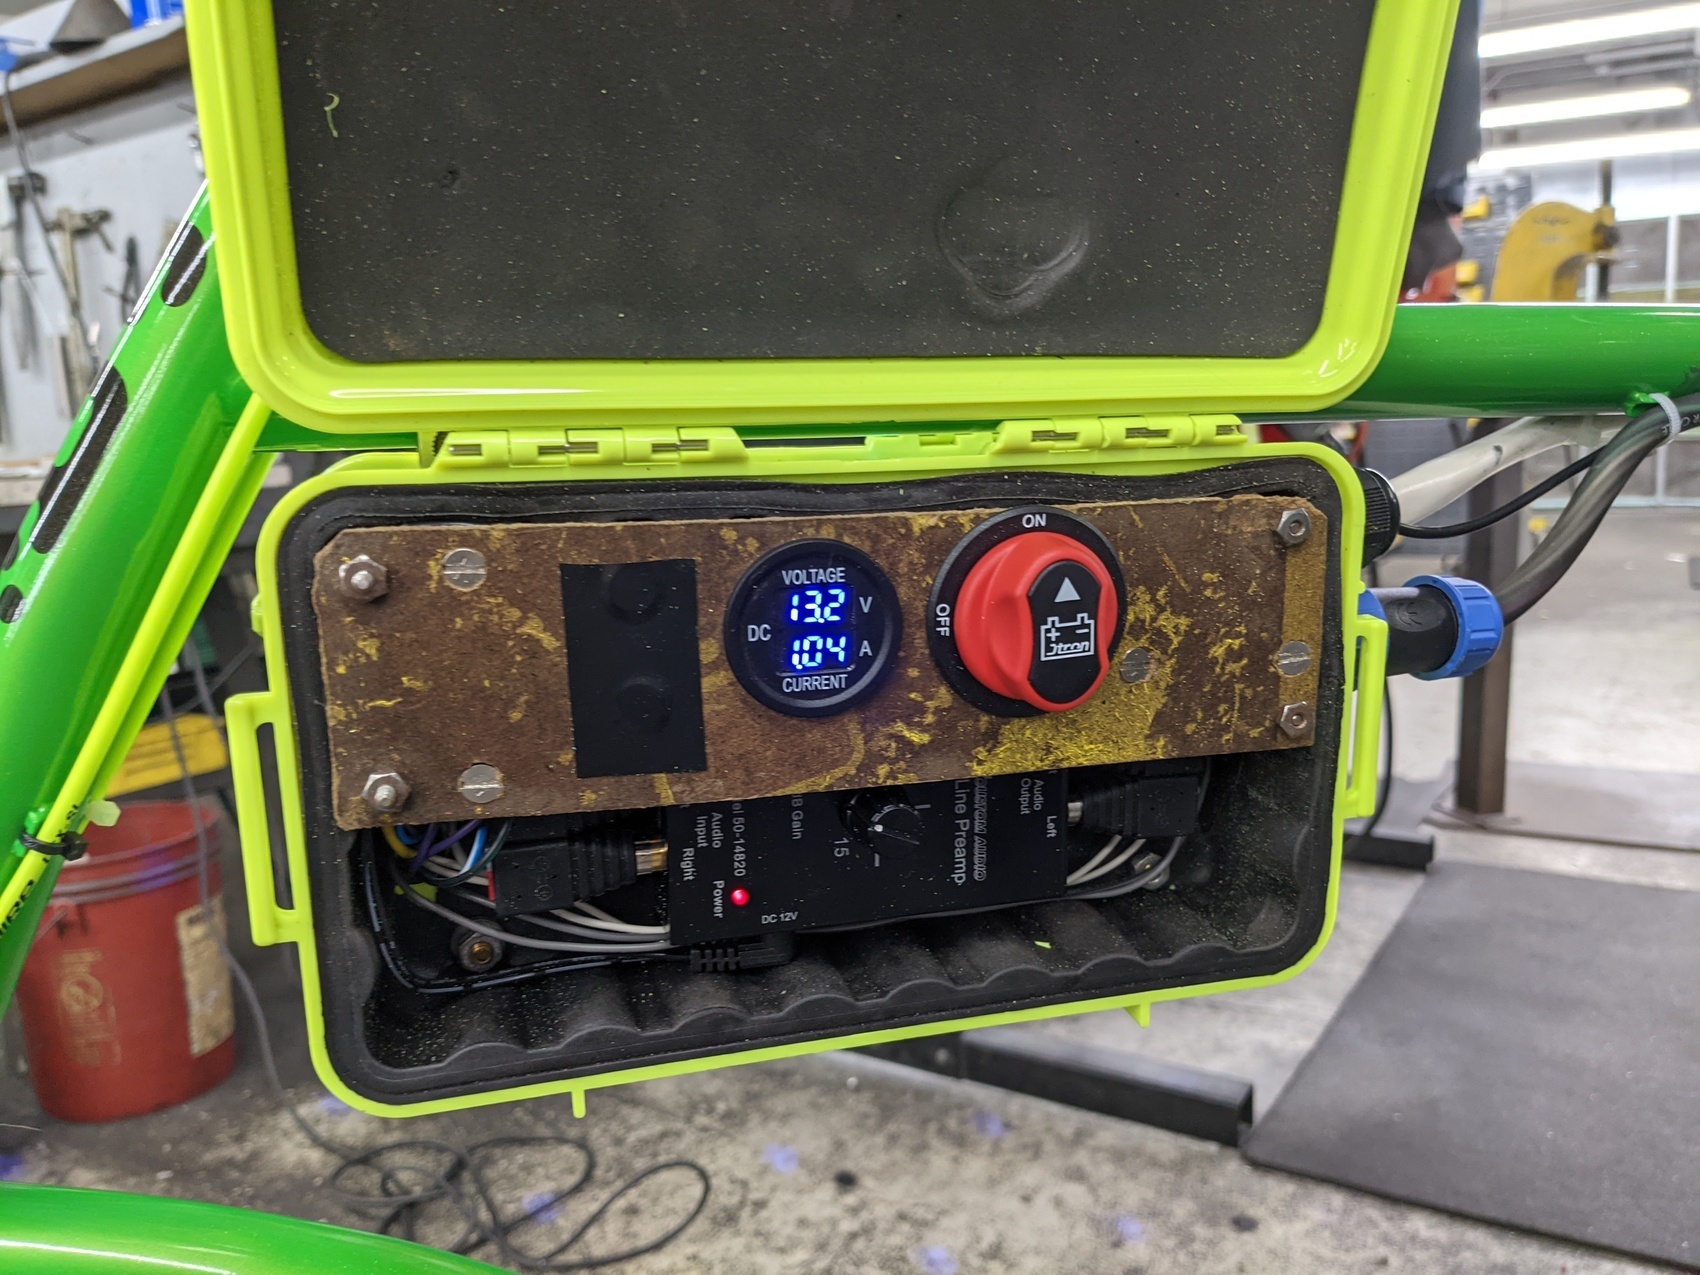
I have built a lot of modified and electrified bicycles over the decades, but this one is exciting because the everything is compact and discreet. This little box houses a master switch, a circuit breaker, a meter, and a preamp for the sound system. There's a stereo amp in an identical box with heat sink on the other side of the frame.
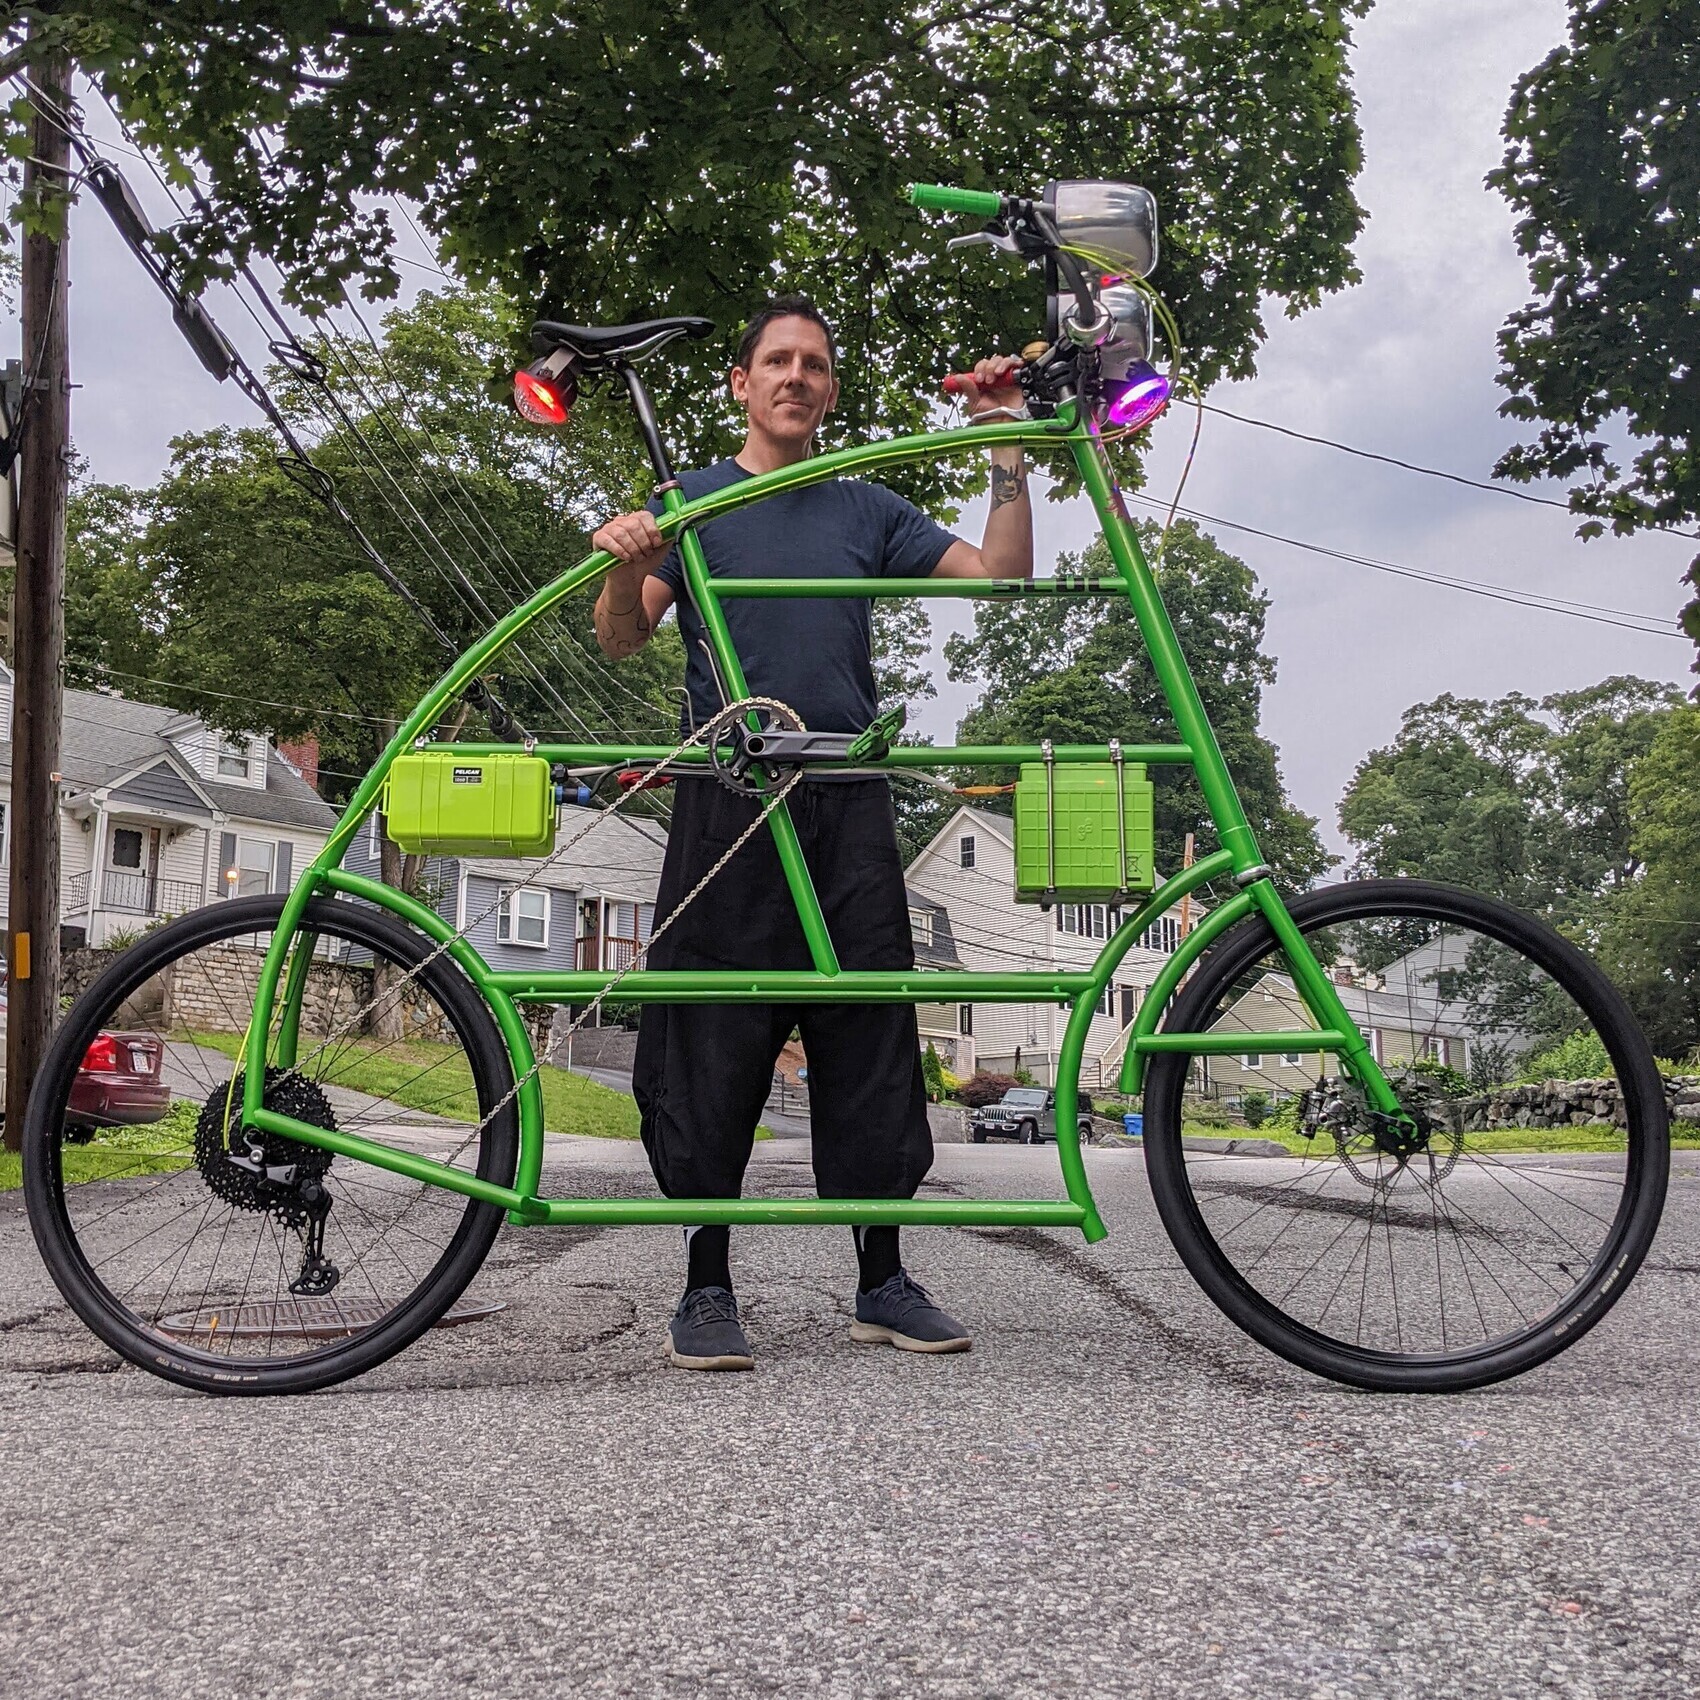
Here is Syntax Error completed, 100% accurate to the design. I did everything except apply the paint. There is no other bicycle like this one on the planet.
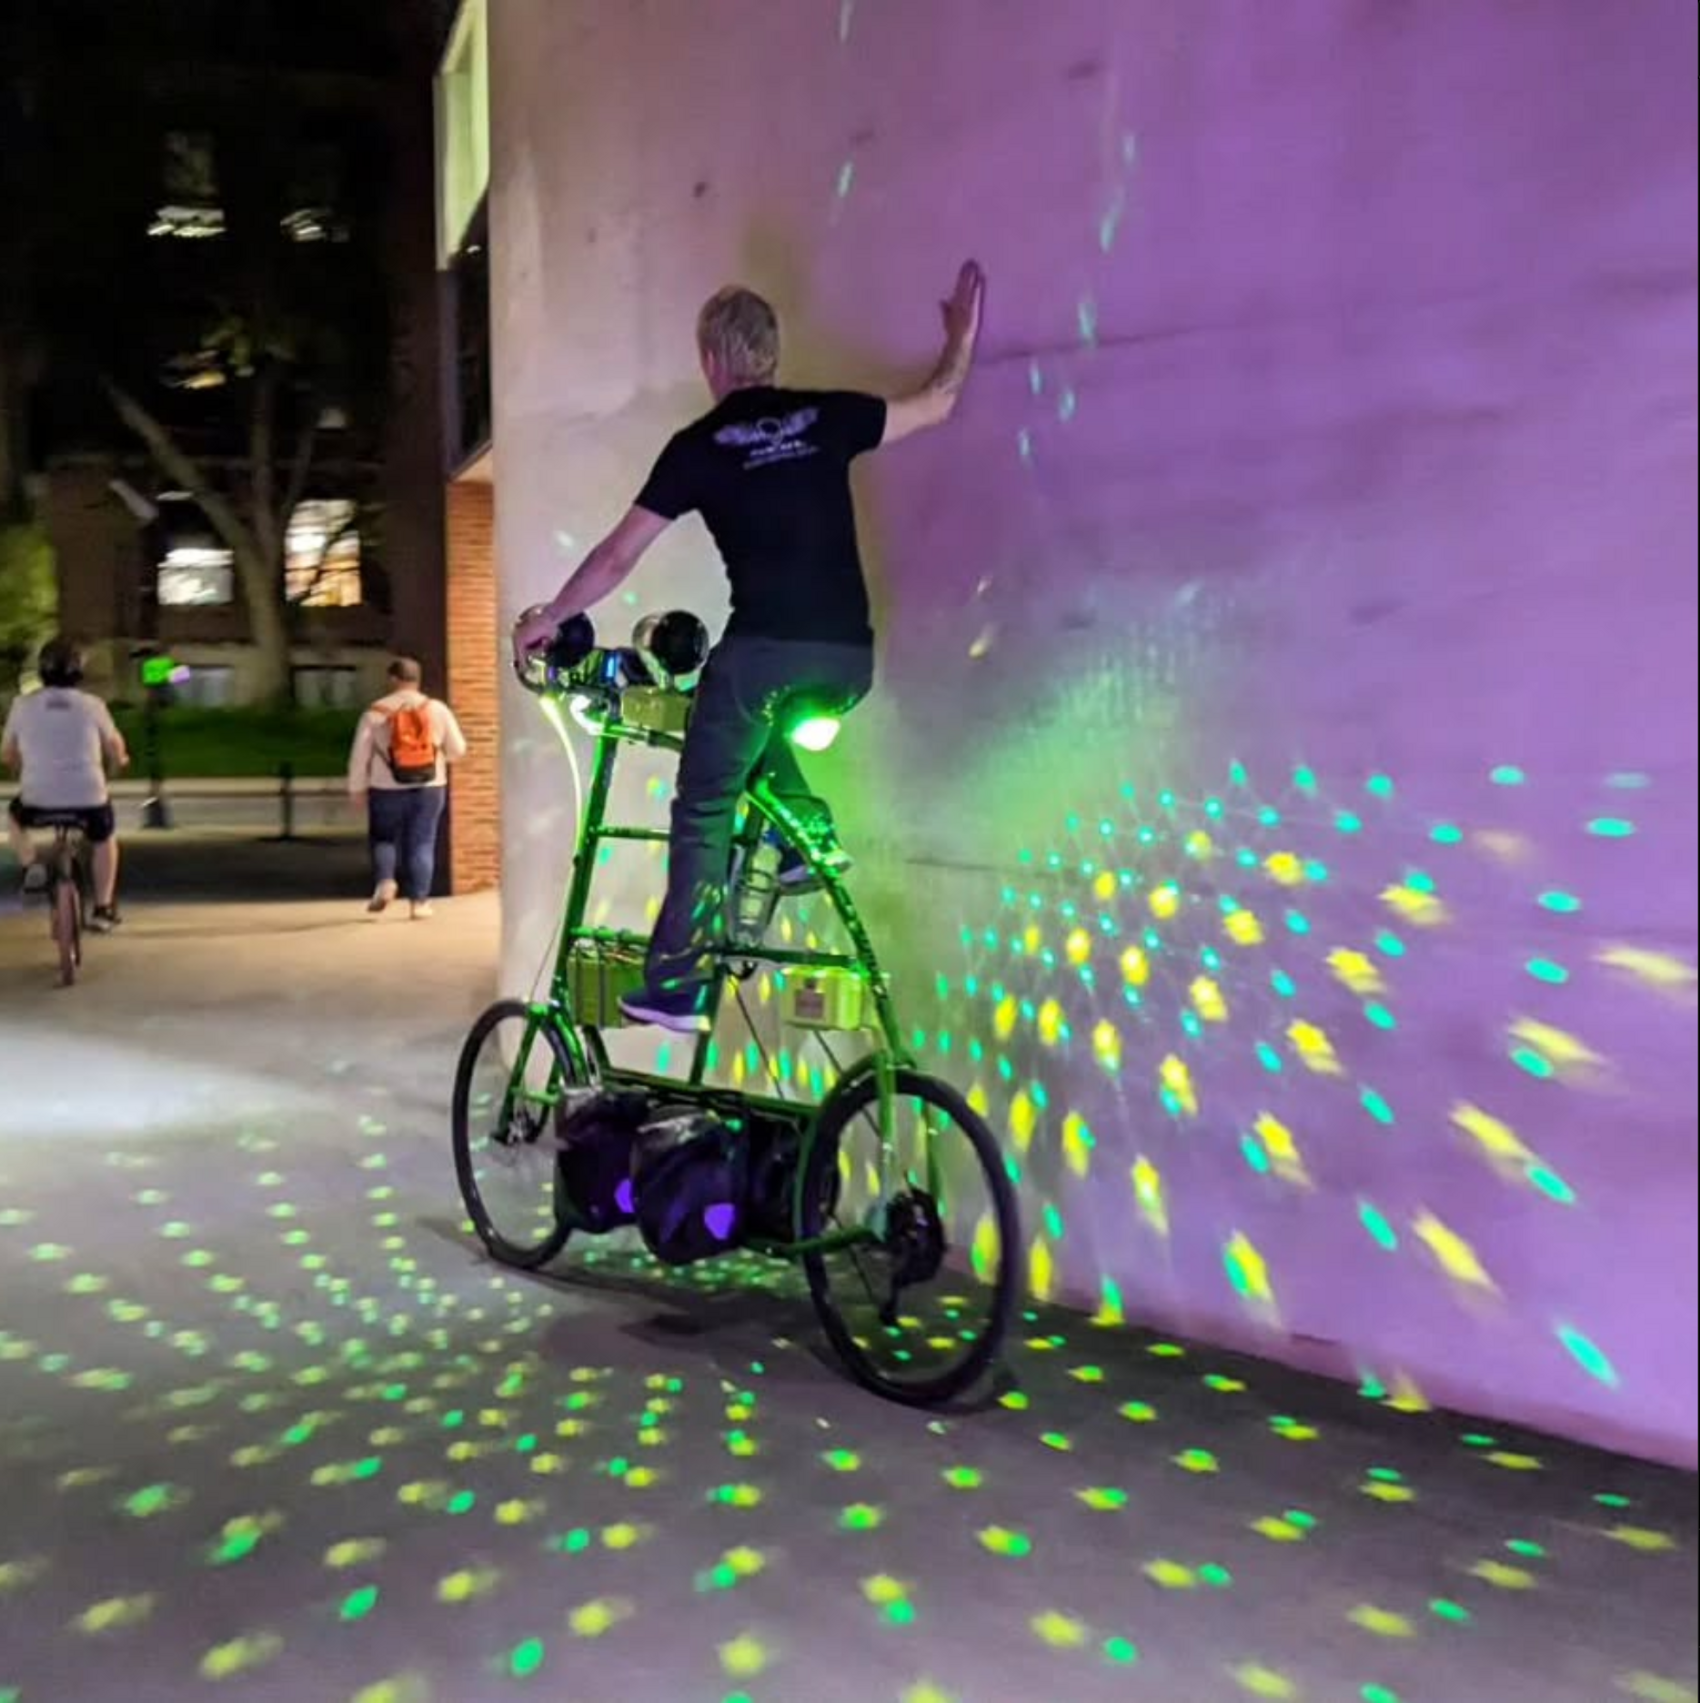
Since it's christening, I have logged over 1,000 official miles on over fifty SCUL missions, including three centuries. Note the addition of panniers — and the subwoofer on the other side.
Here's the first test of the lights and sound system in full-effect.
LP Album Art
Nemobird: Wormhole Life Support
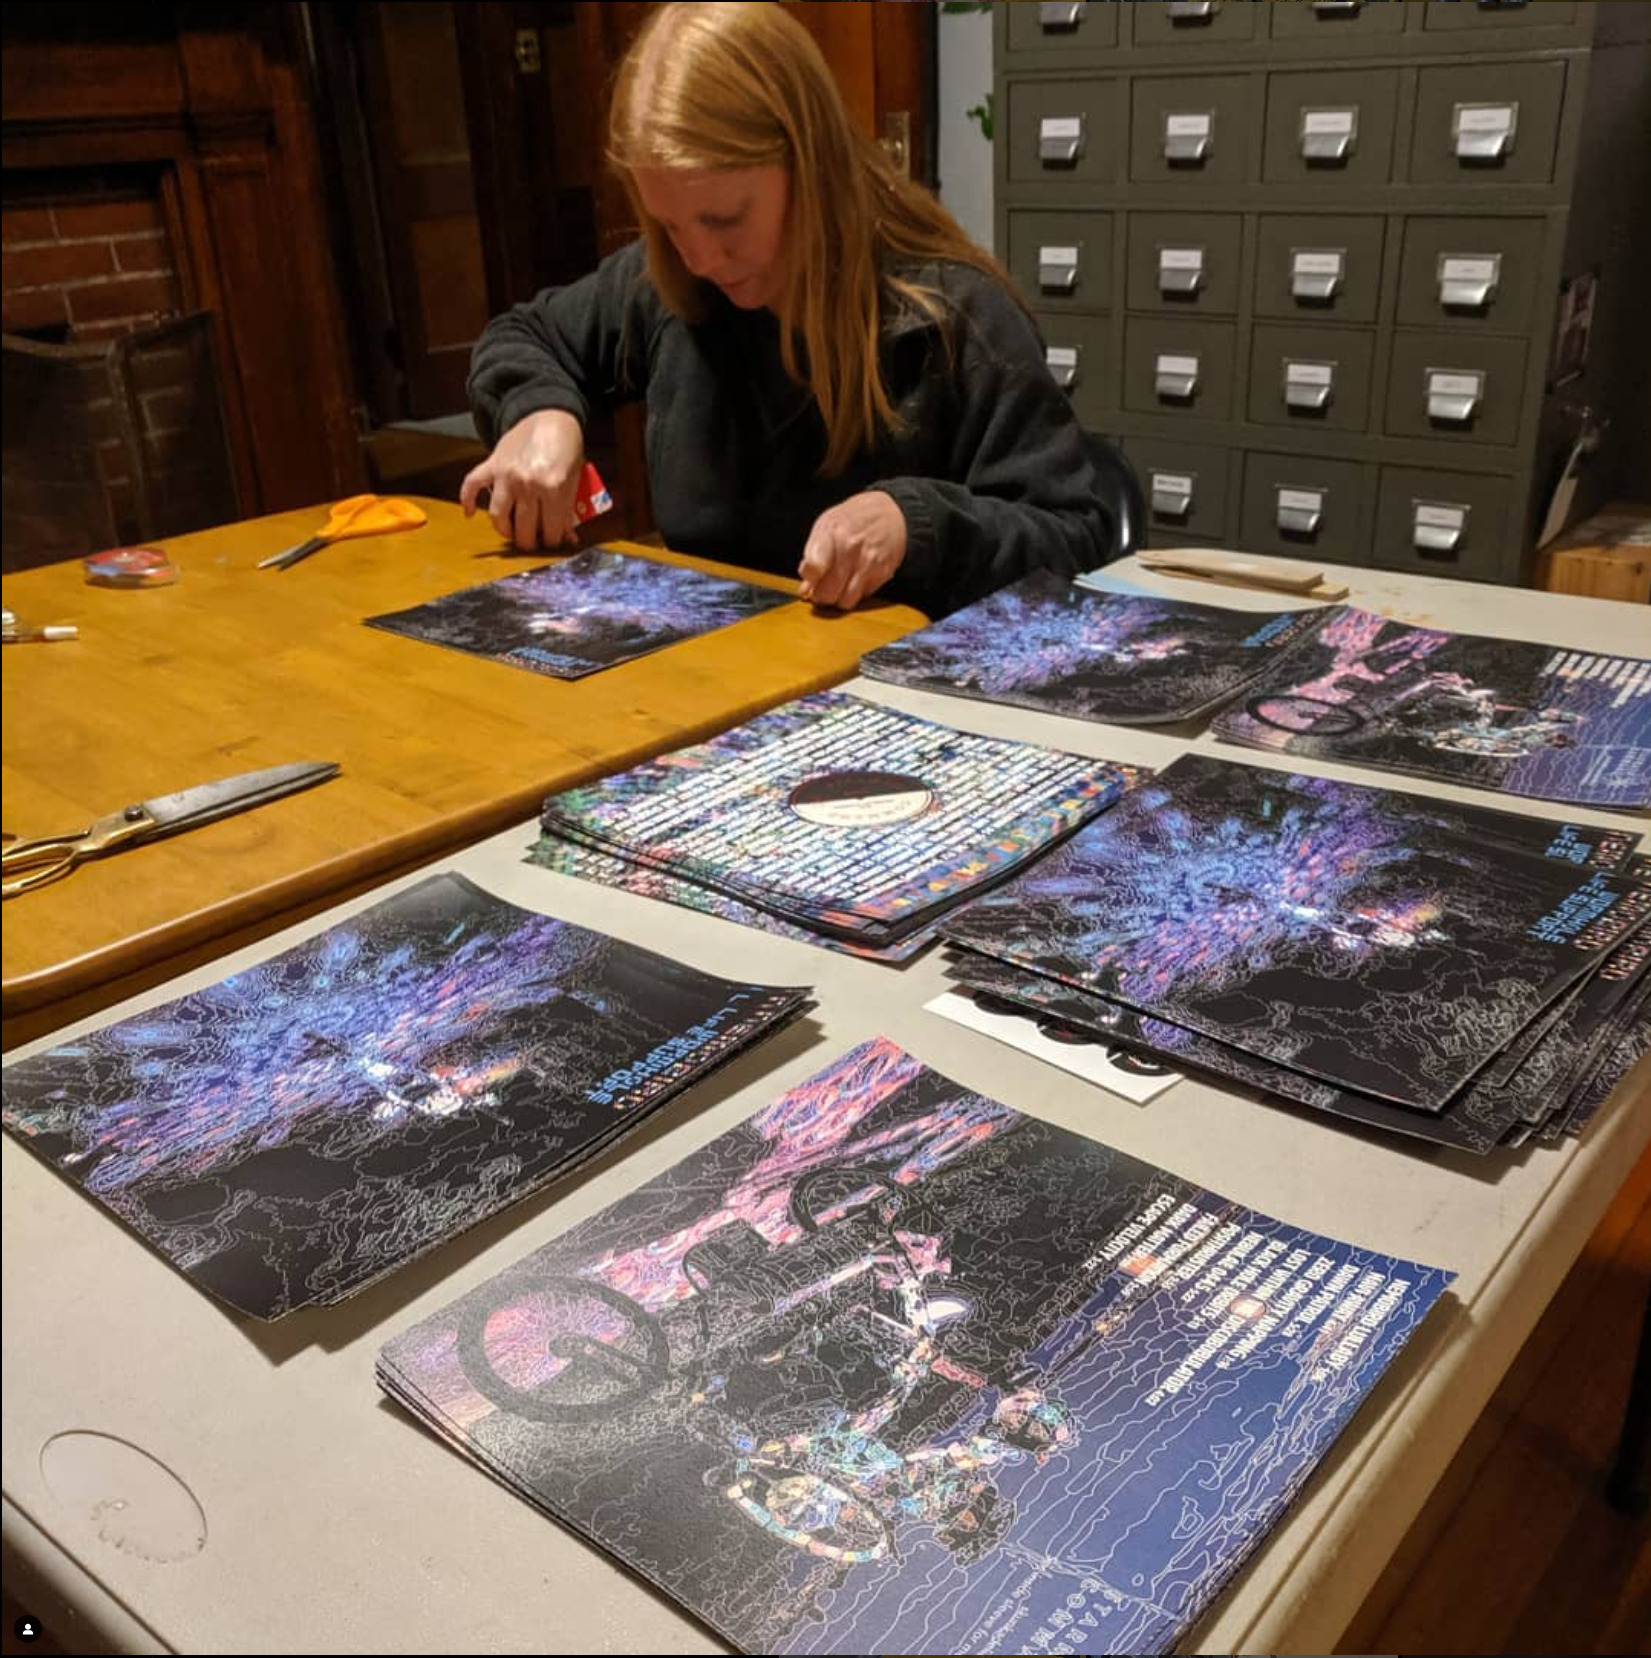
I started writing music back in 1992: I've played out a bunch of times and even recorded, produced, and released several full-length albums. My newest release under the name Nemobird has 'album art' — faux record covers and sleeves given as promotional gifts for those who attended the release party.
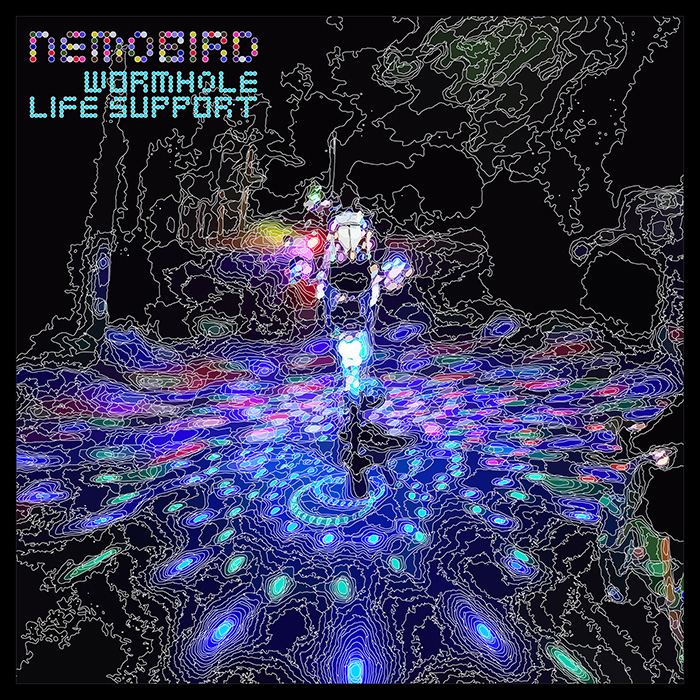
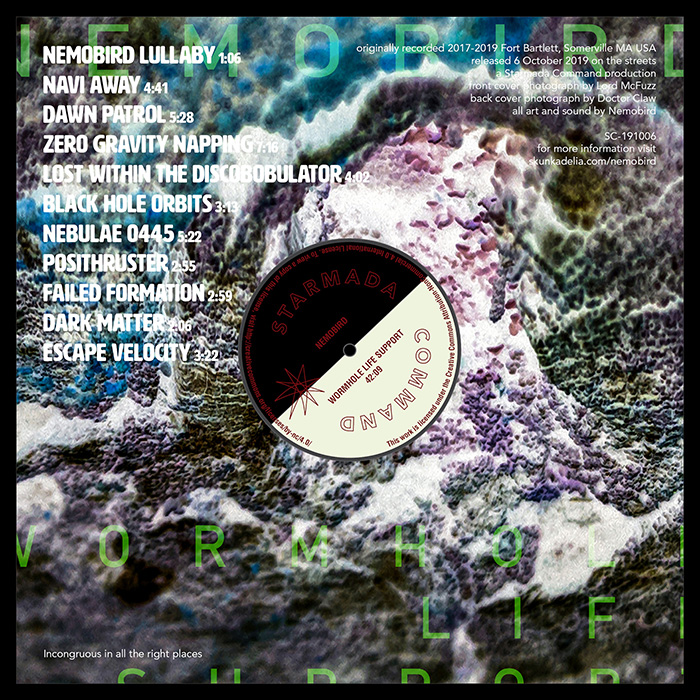
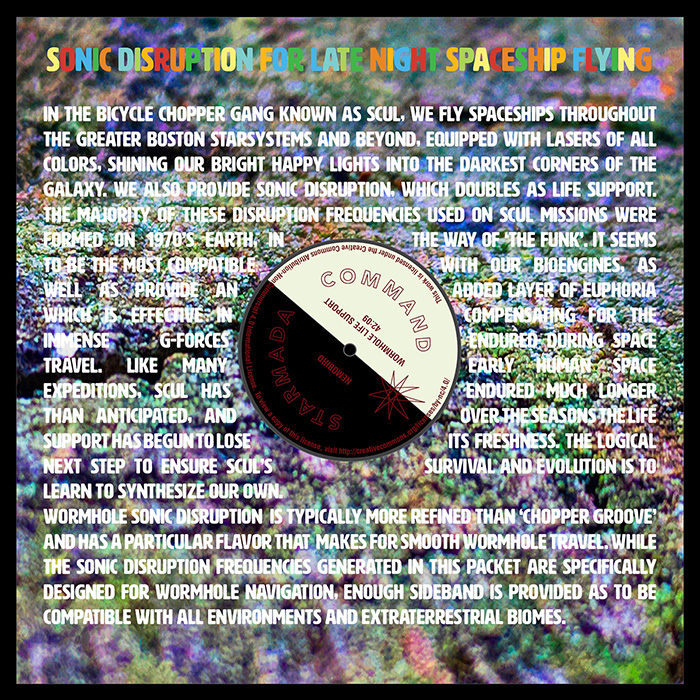
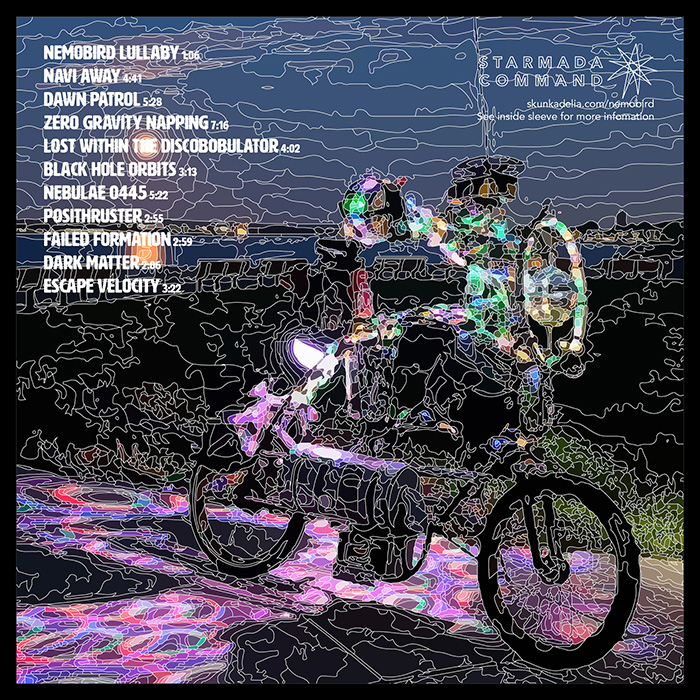
As a musician and visual artist I felt the importance of having album art to gaze at while listening to the music — something that's been lost with digital media streaming.
I enjoy album art that has a lot of details for people to discover. When designing for a logo the message needs to be conveyed almost instantly. Images that tend to be pondered longer such as album art and calendar photos need imagery that takes time to digest. This is design with purpose.
Stand Up Paddleboard Graphics Overhaul
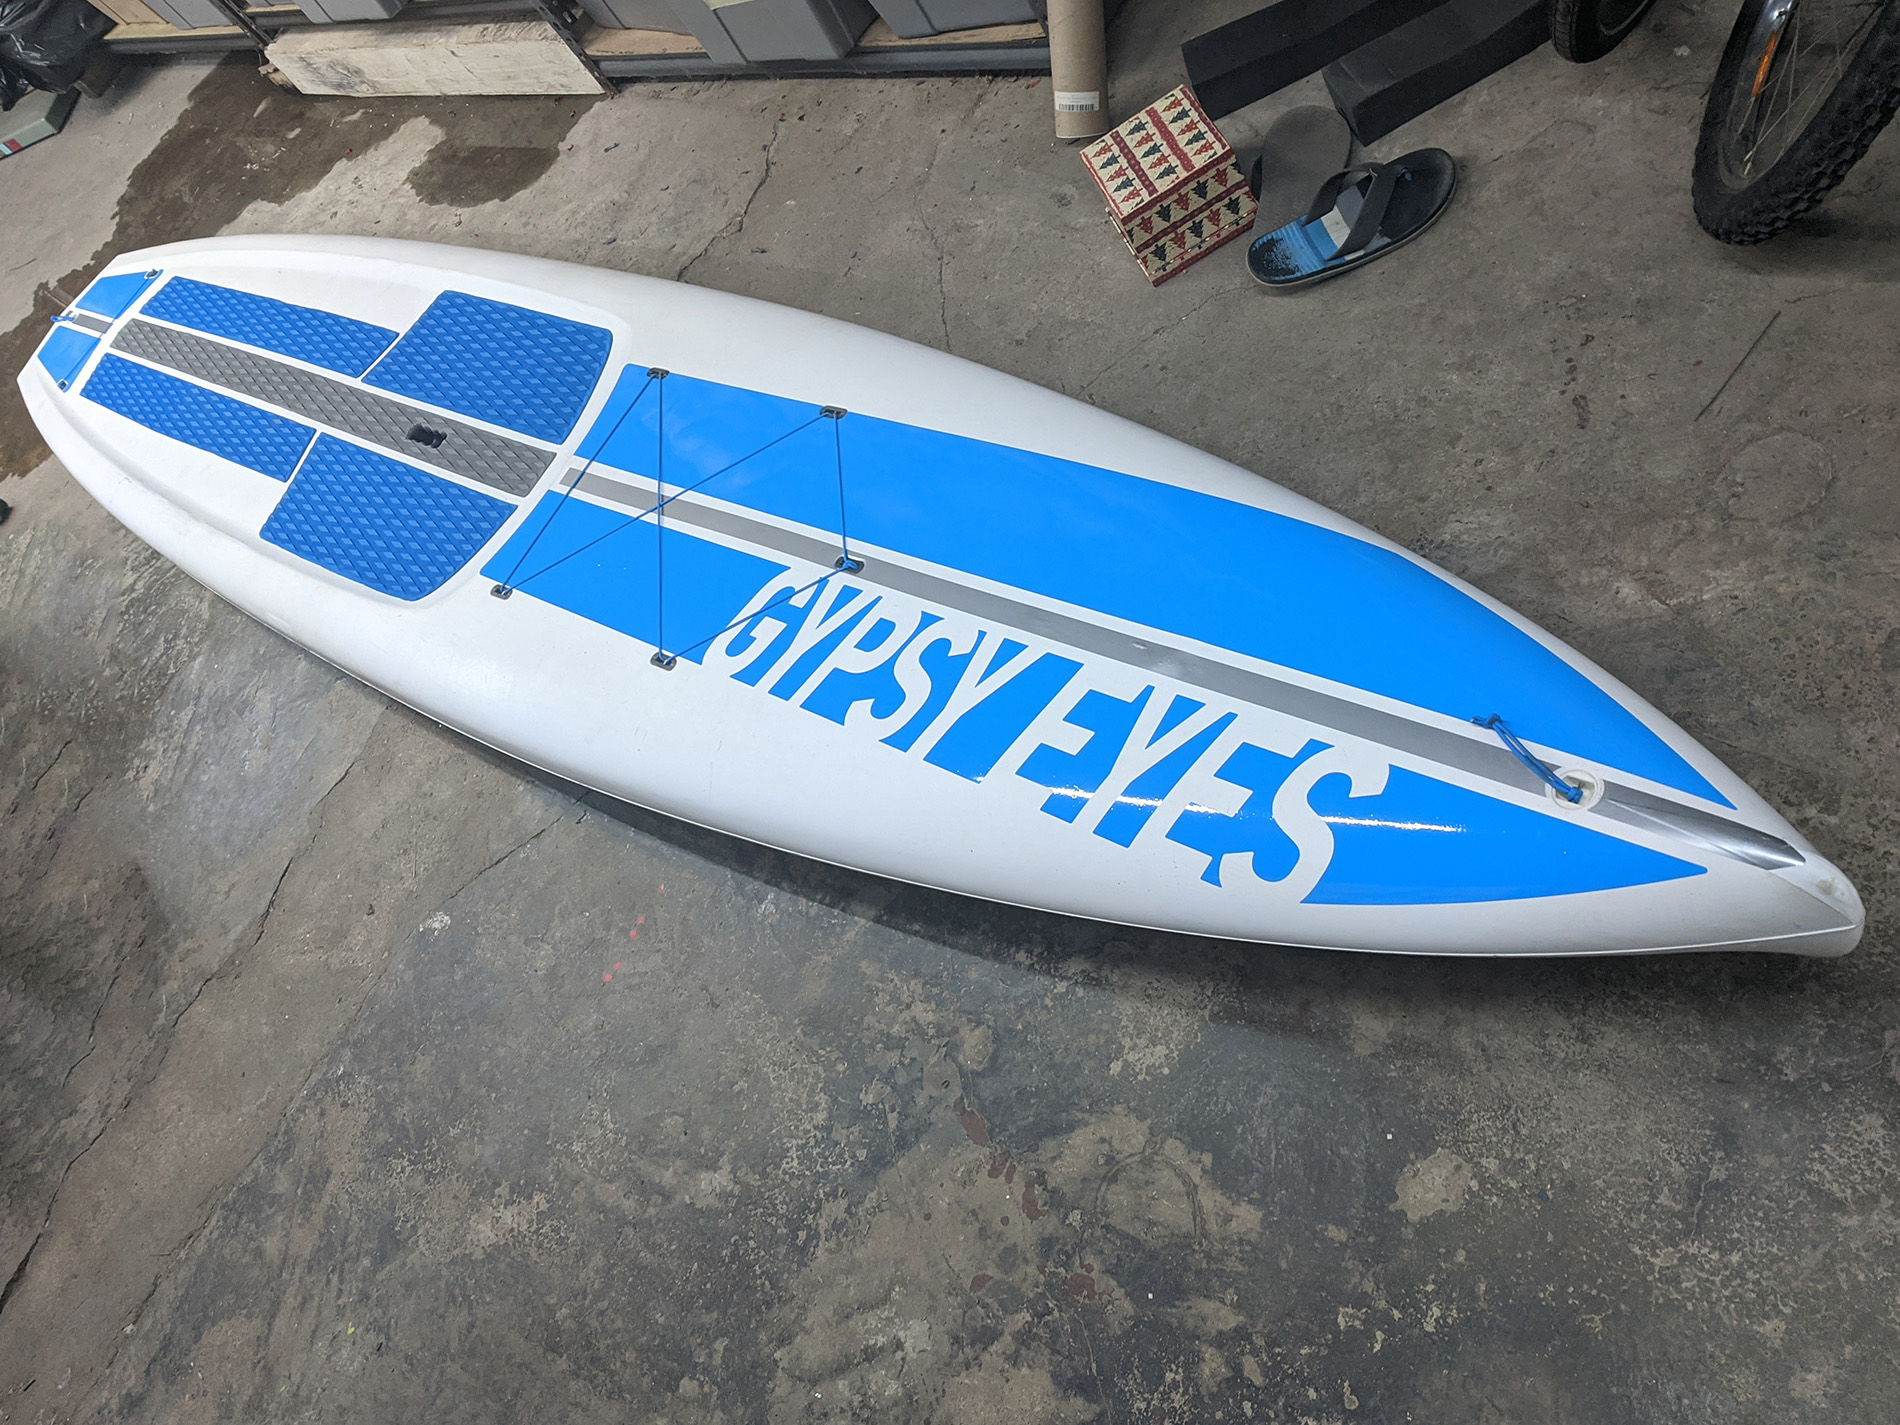
Gypsy Eyes

I like putting my own designs on my things to make them personalized and unique. I also like giving names to my bikes and personal watercraft. I named my SUP 'Gypsy Eyes' after a Jimi Hendrix song.
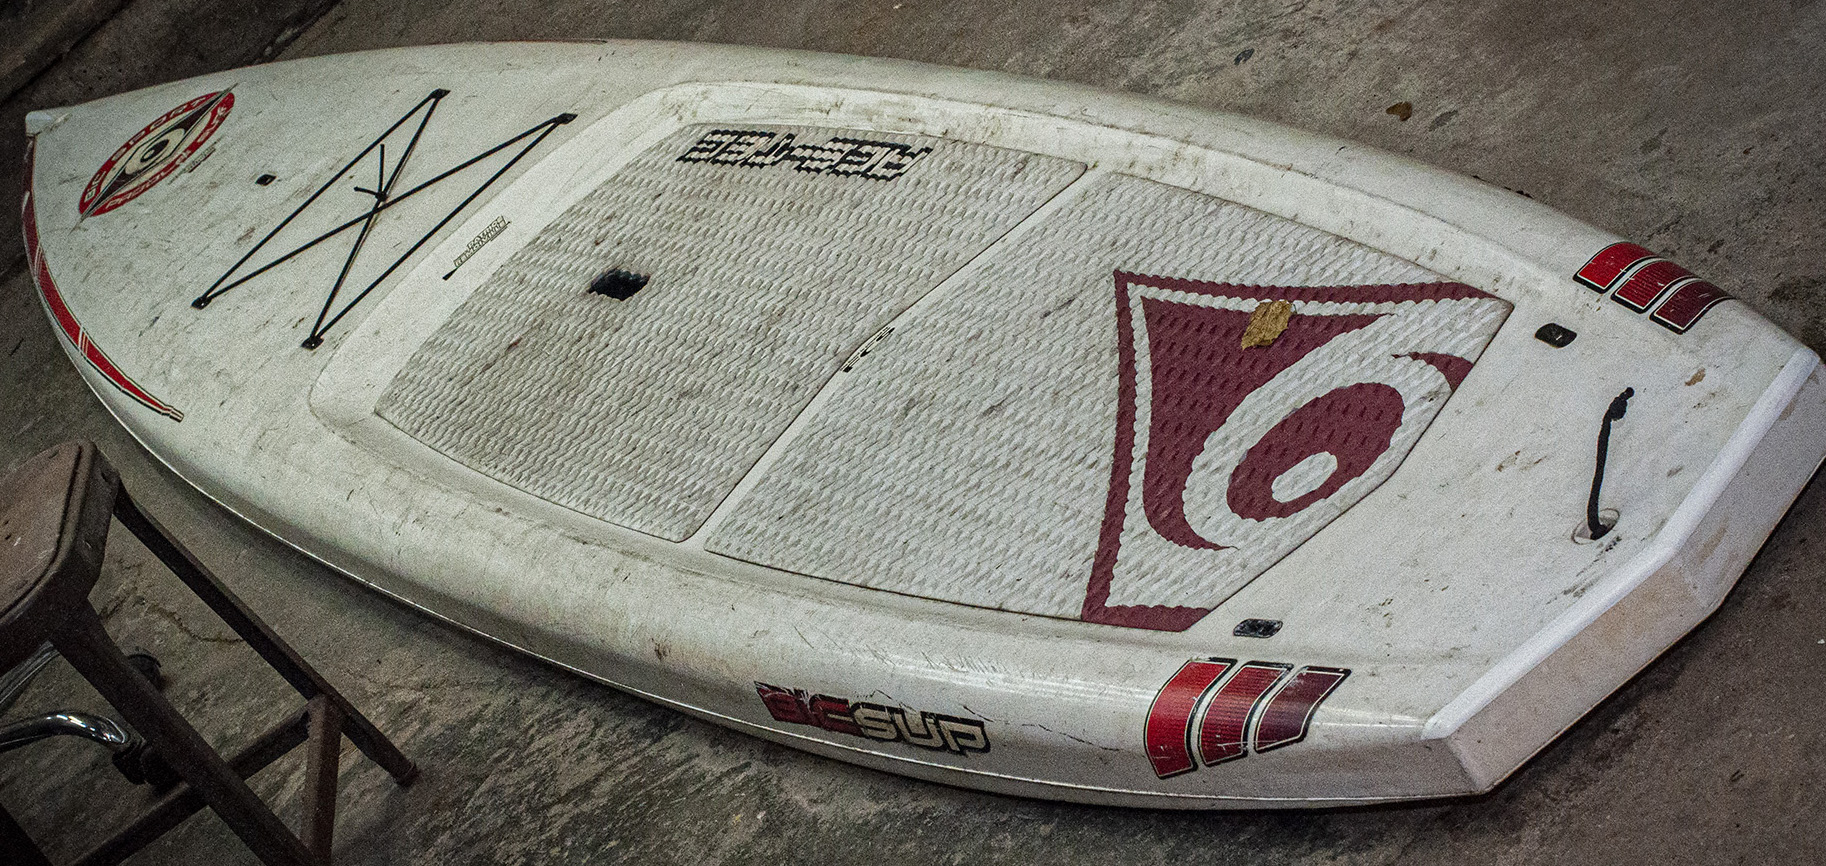
Here lay a very used paddleboard that I picked up from a rental place. It's got plenty of adventures left in it, but it could use some TLC.
The old decals came off reluctantly with the help of a heat gun and a fair amount of patience.
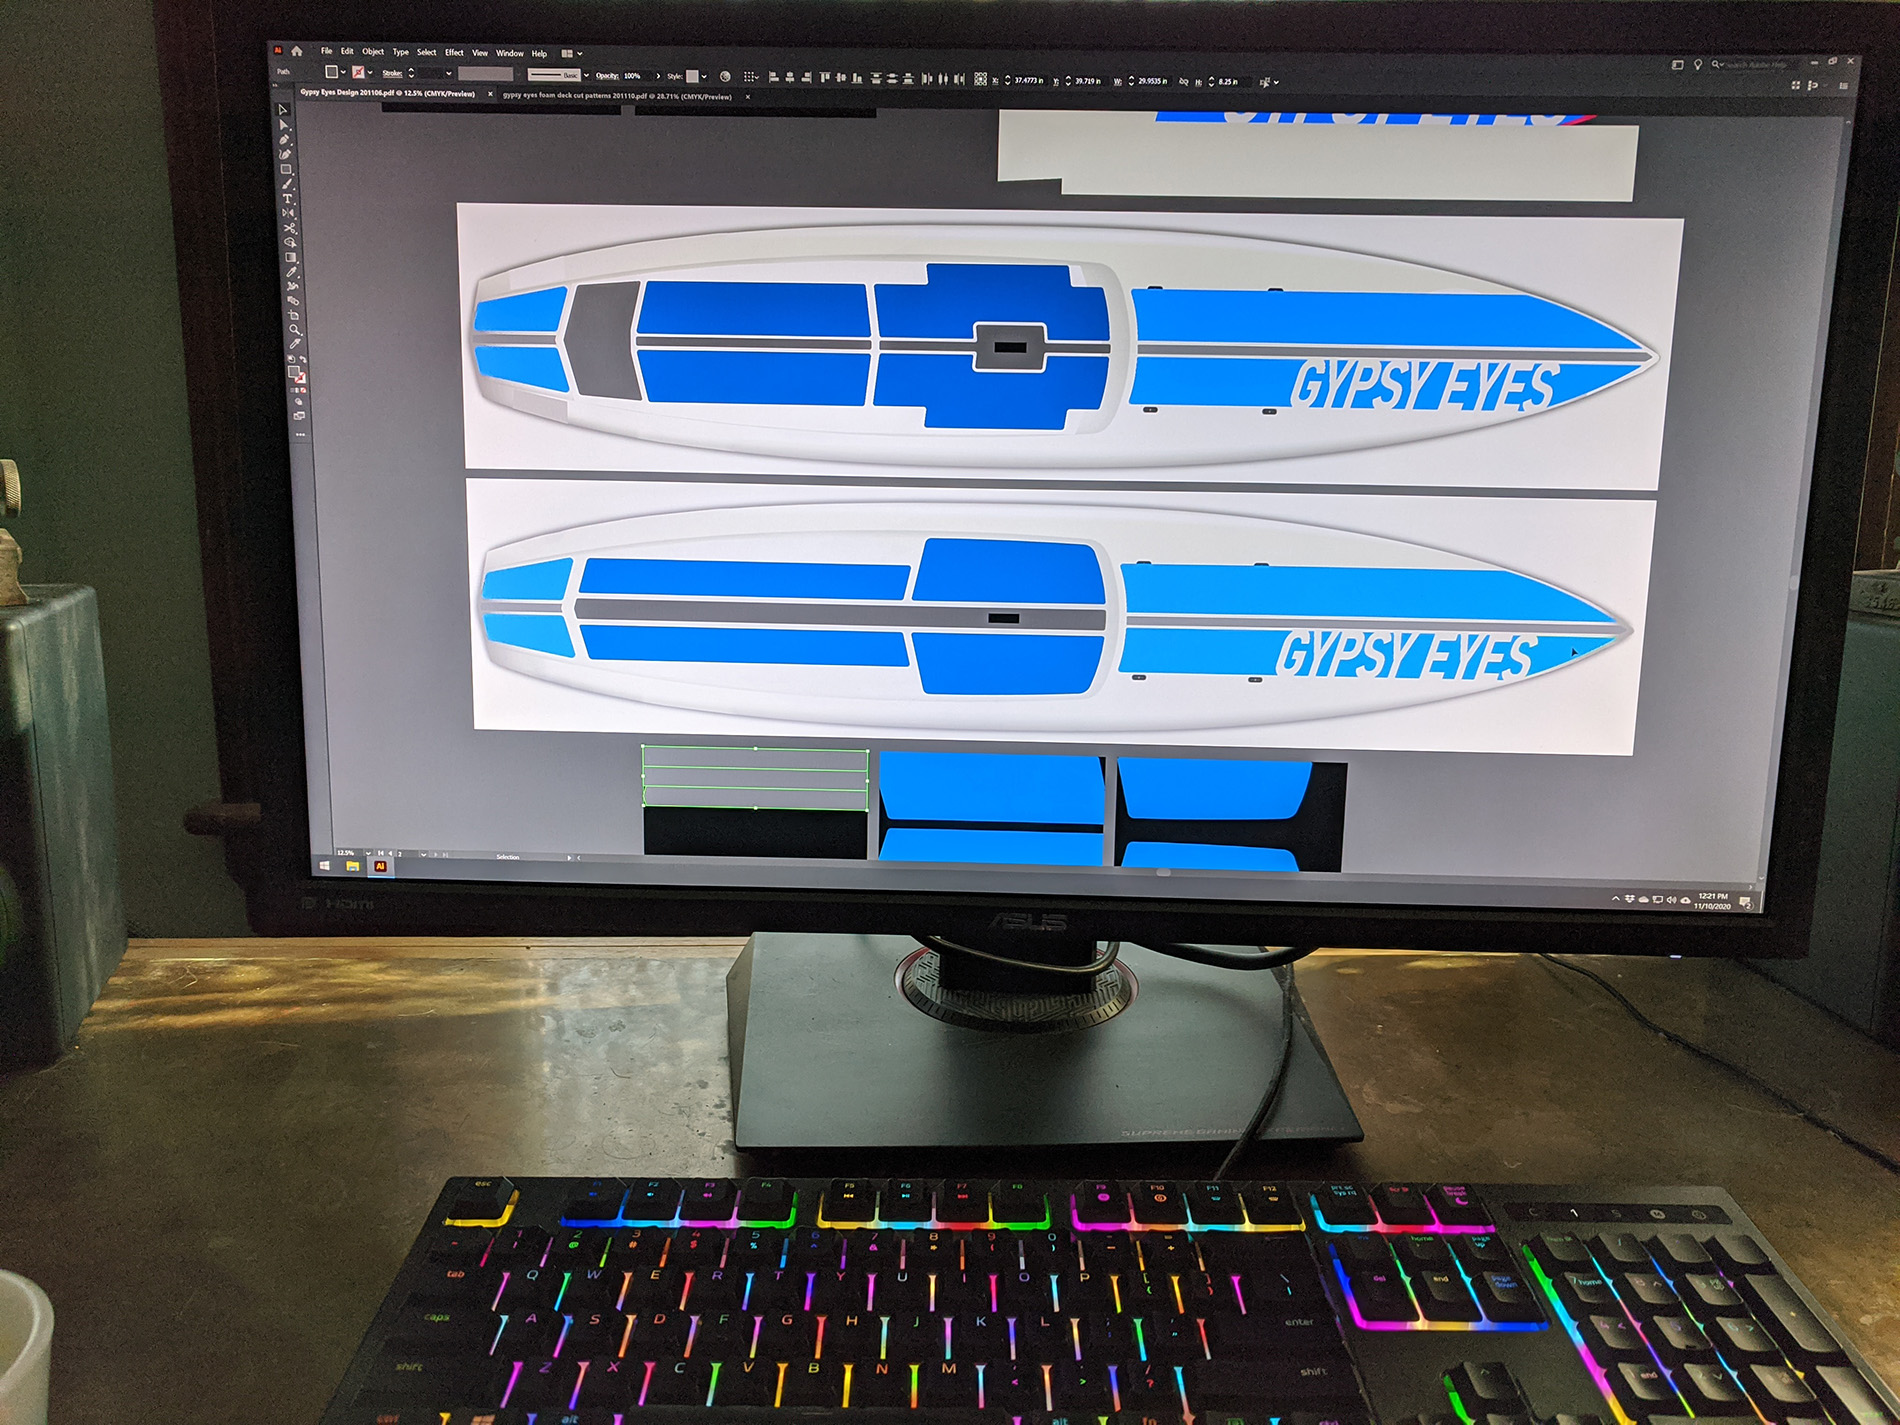
I found a top down view of the board model on the Internet, which allowed me to design for the correct shape of the board. I scaled up the template in Illustrator to actual size: 12.5 feet, and superimposed my graphics on a separate layer.
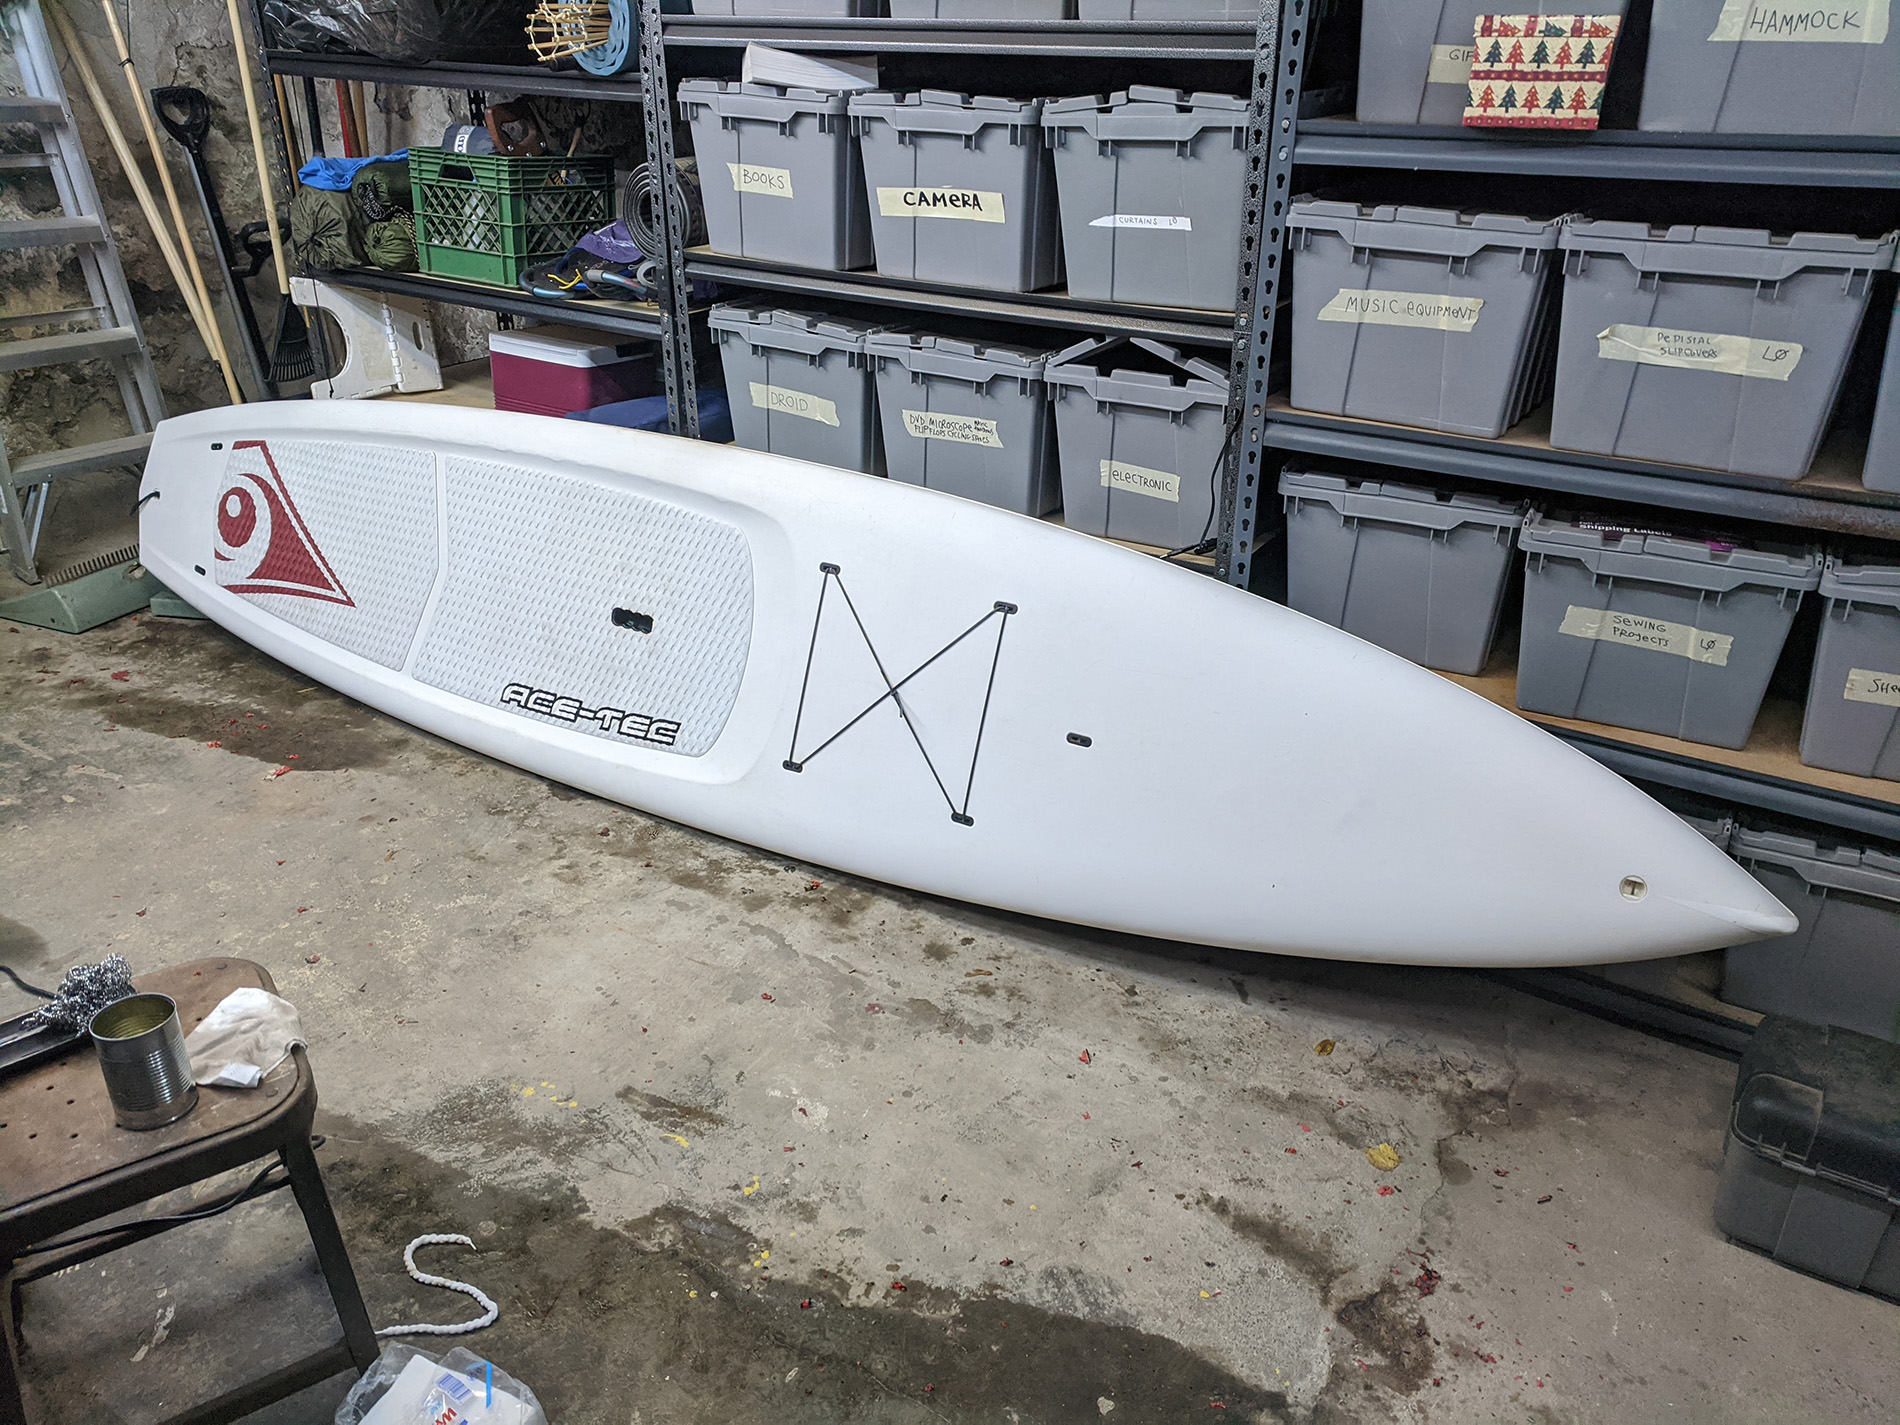
The board needs to be very clean before graphics are applied.
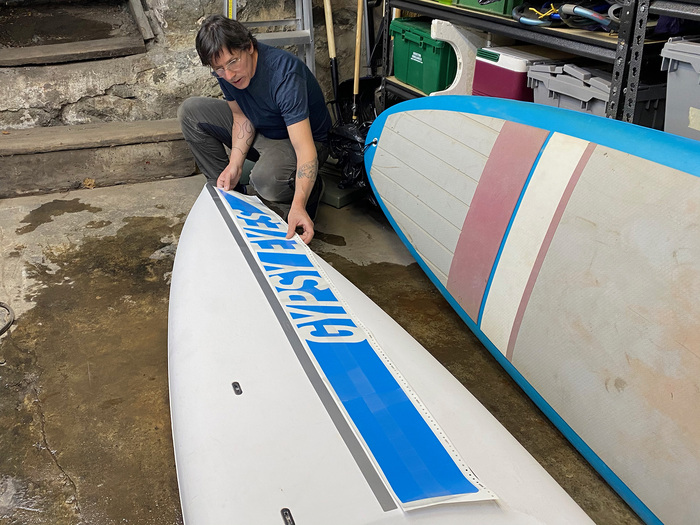
I wasn't certain my digital template was accurate, so I designed the graphics to work around loose tolerances: Fortunately the template I created was spot on.
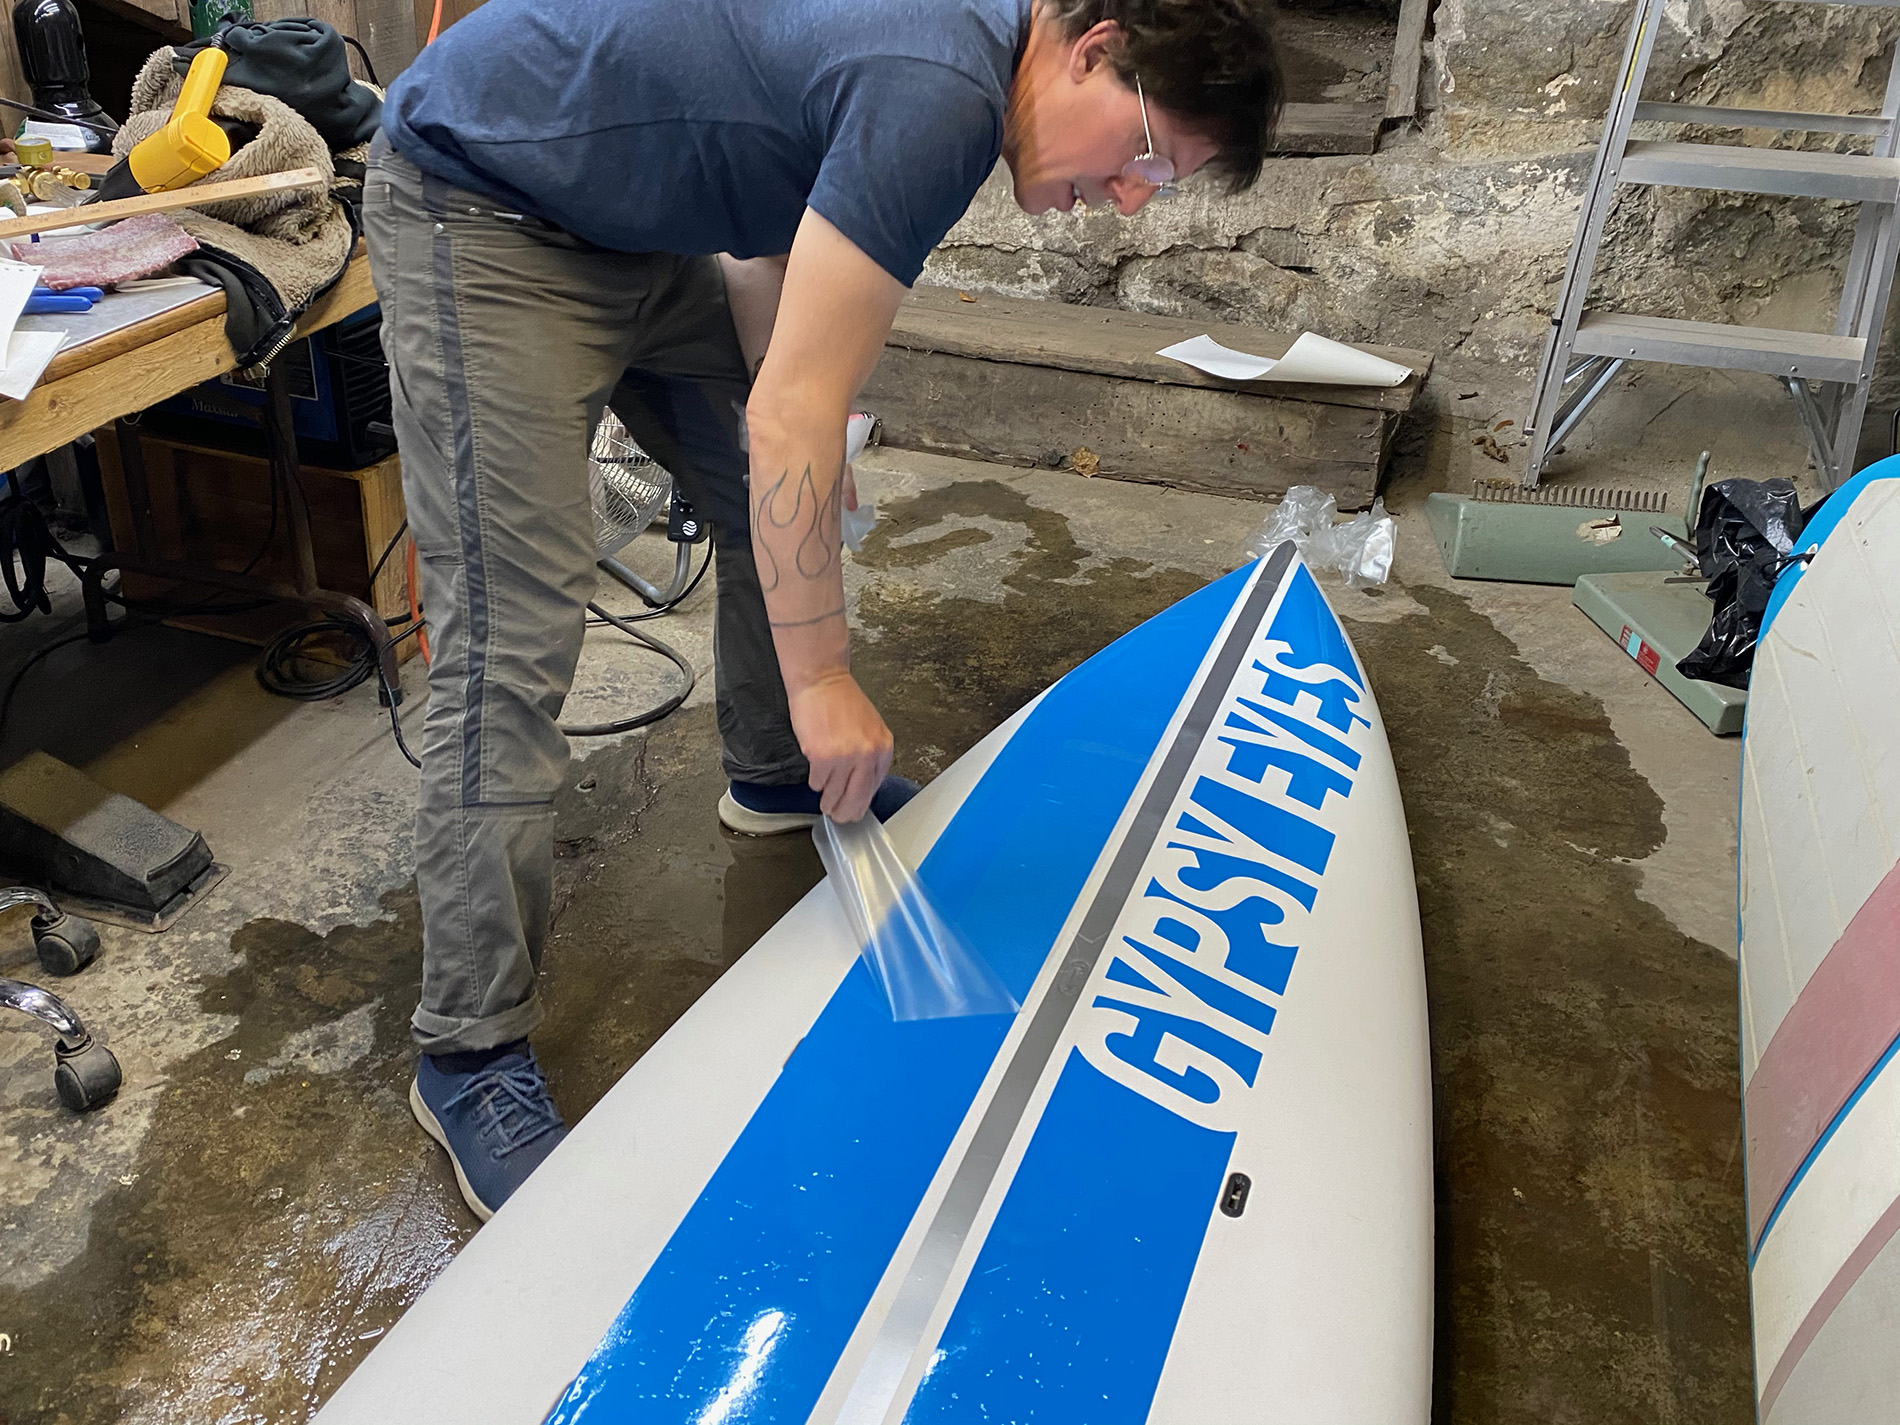
Once the graphics are applied and pressed on with a squeegee, the application tape layer can be removed.
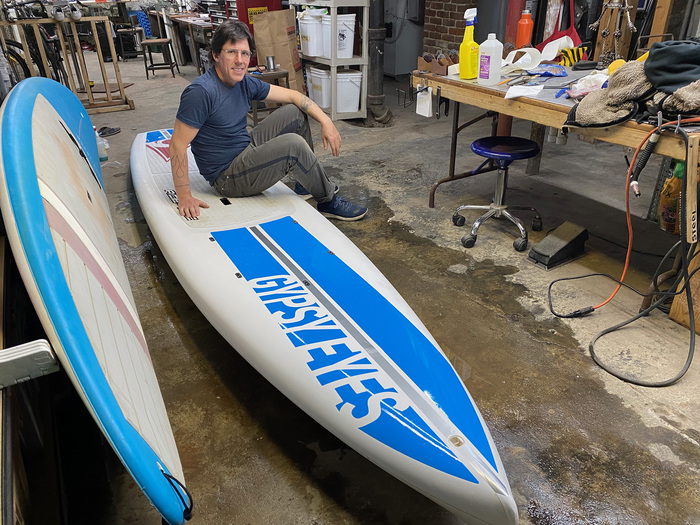
Vinyl application at this scale is very unusual for me, but I was satisfied with the result despite my work being less than perfect.
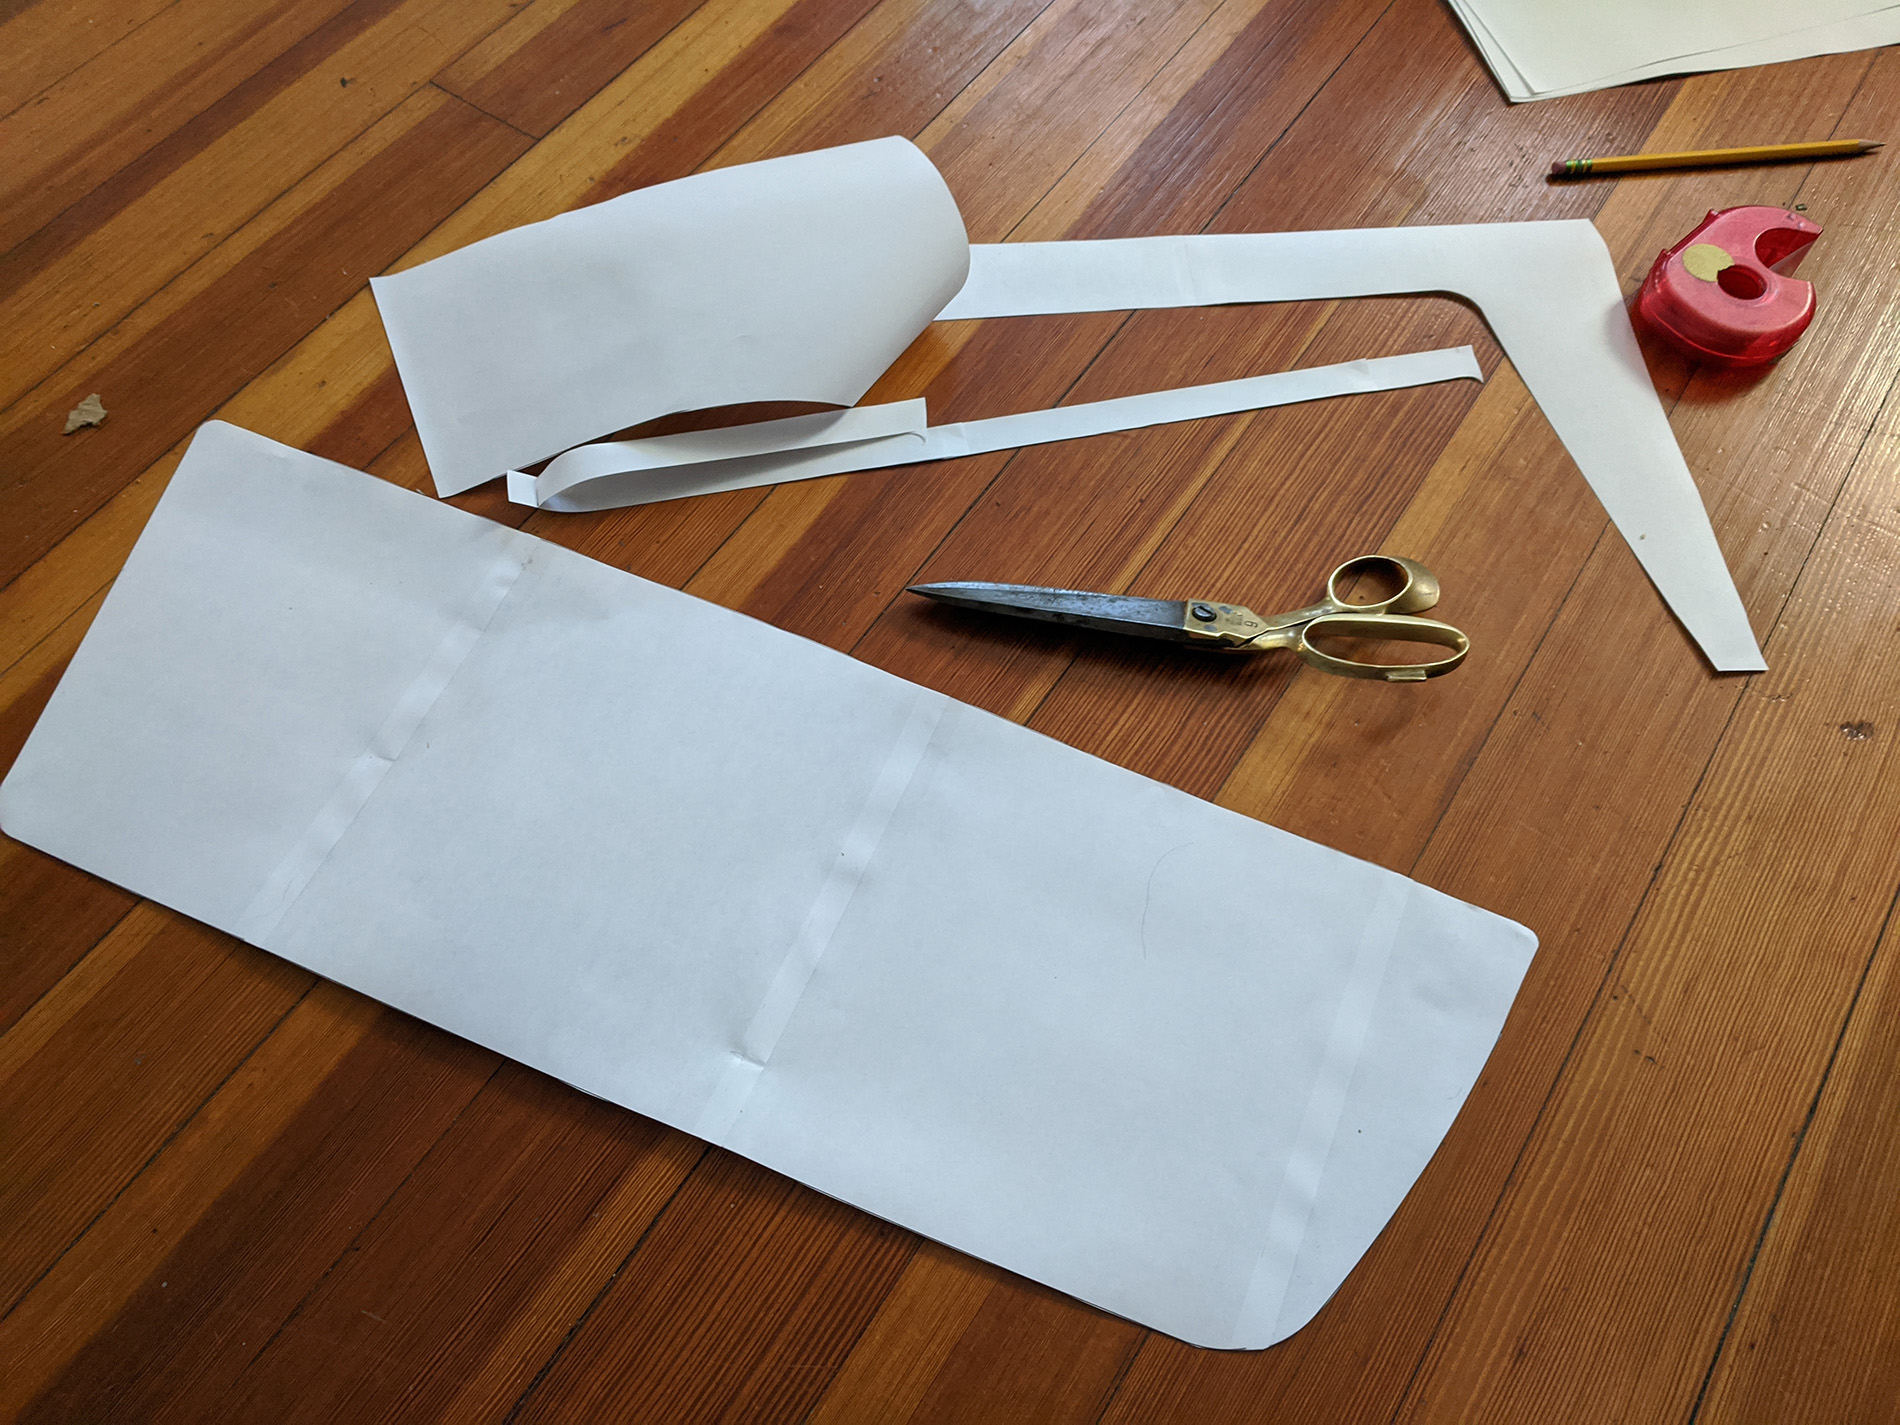
Templates for the pad were tile printed on letter-sized paper with overlap so they could be accurately pieced together.
After cutting the pad, I added the finishing touches with a file and sandpaper for a rounded edge. Details like these aren't consciously noticed most of the time, but details make all the difference in the overall feeling of quality.
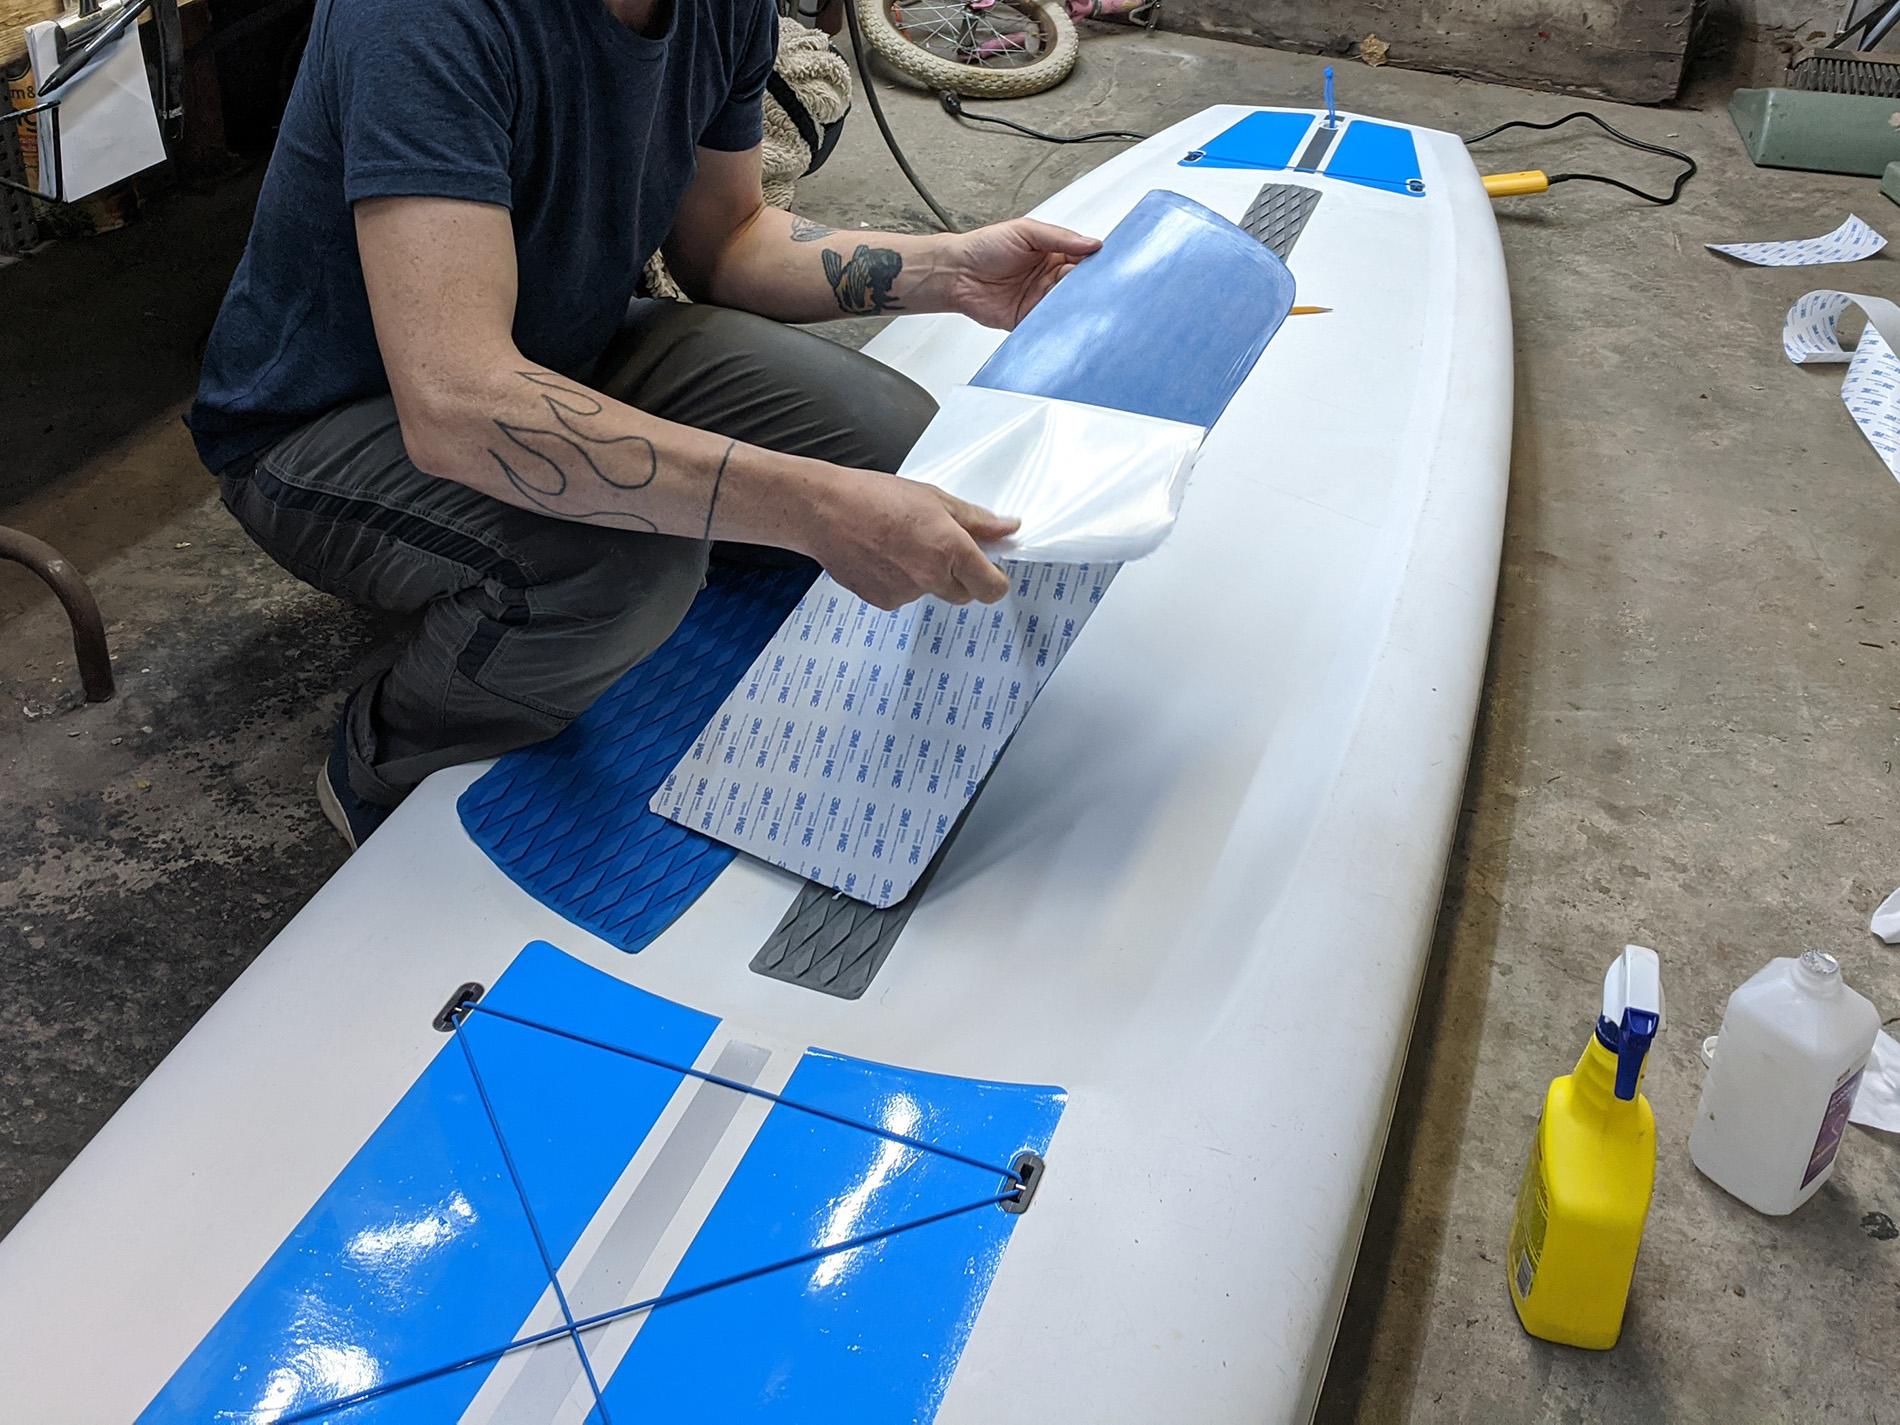
Putting the pad down is a tense part of the build process: this adhesive is incredibly strong and needed to be right the first time.
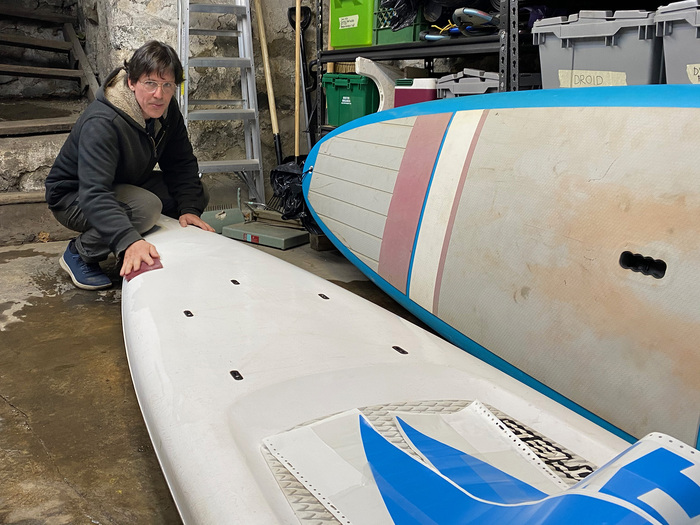
When I shared photos of the board to the rental place I bought it from, they asked if I wanted to do the same for other boards in their fleet.
SCUL Trading Cards
2,700 and growing
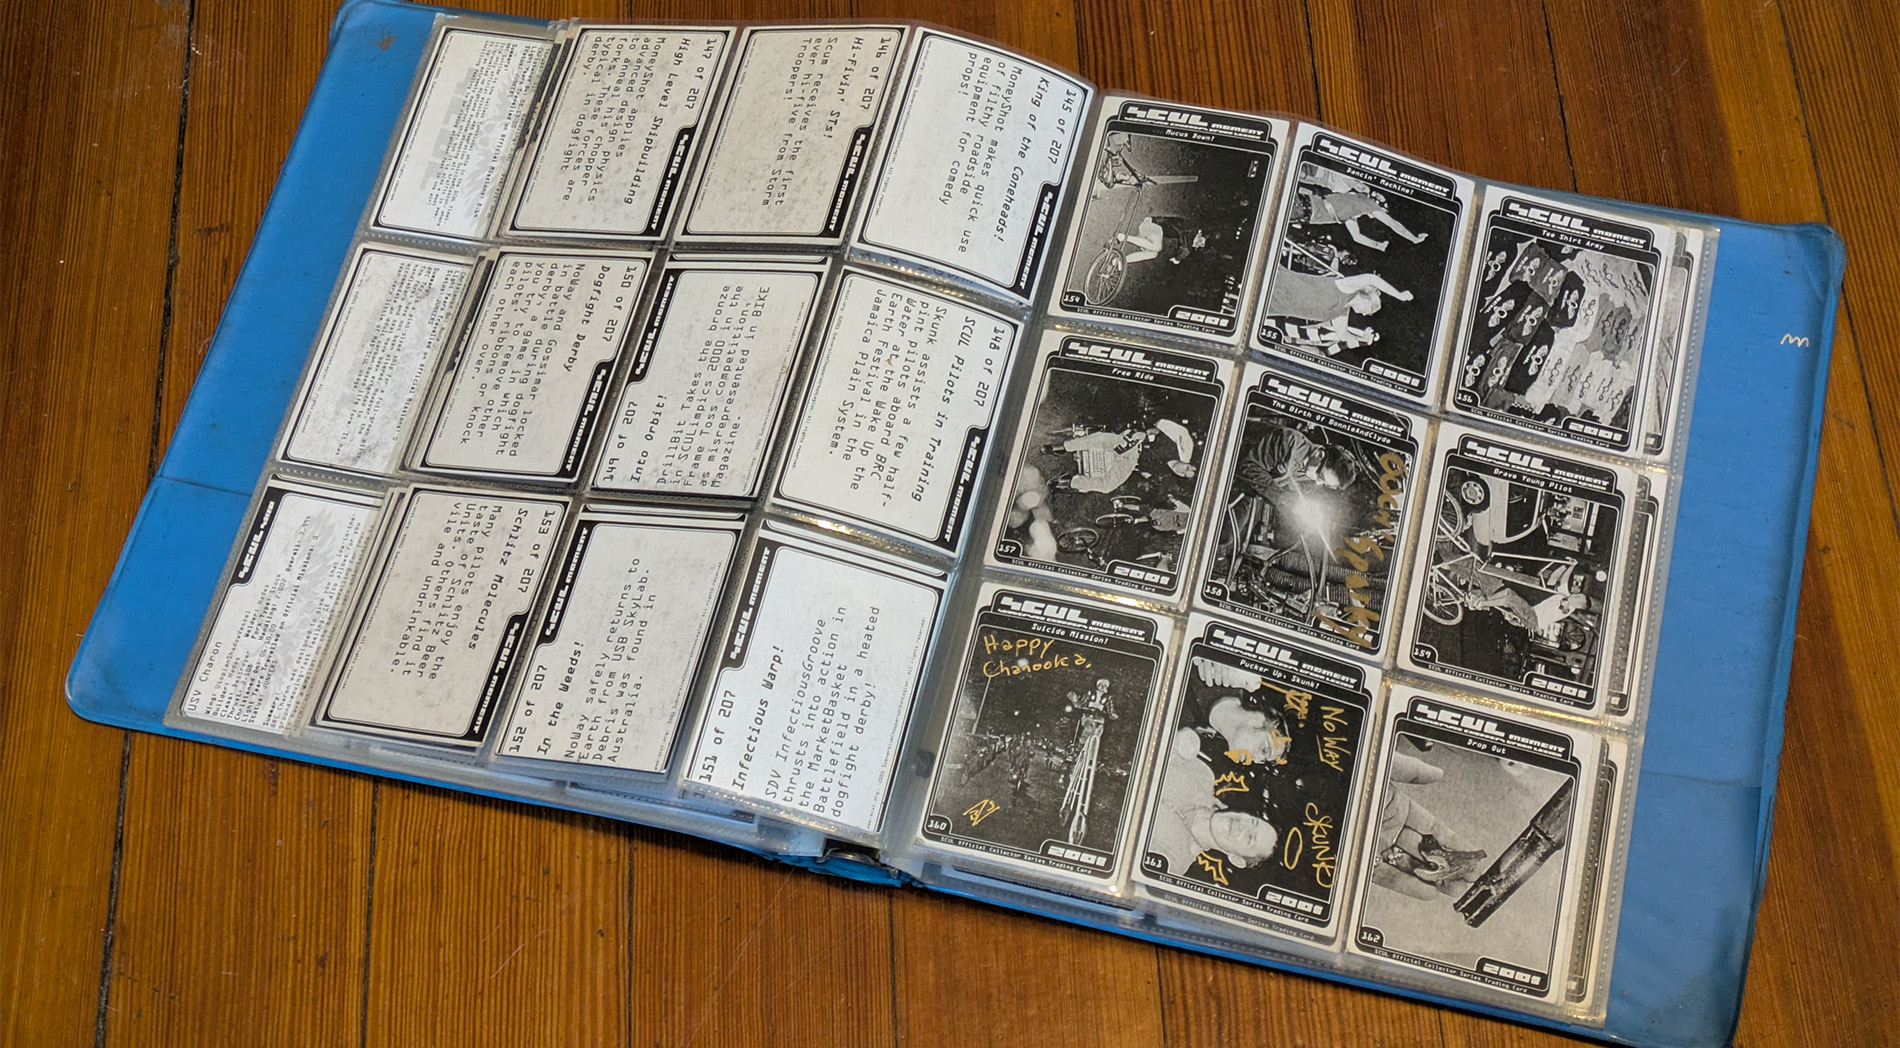
some autographed 2001 SCUL trading cards which aren't probably that collectable
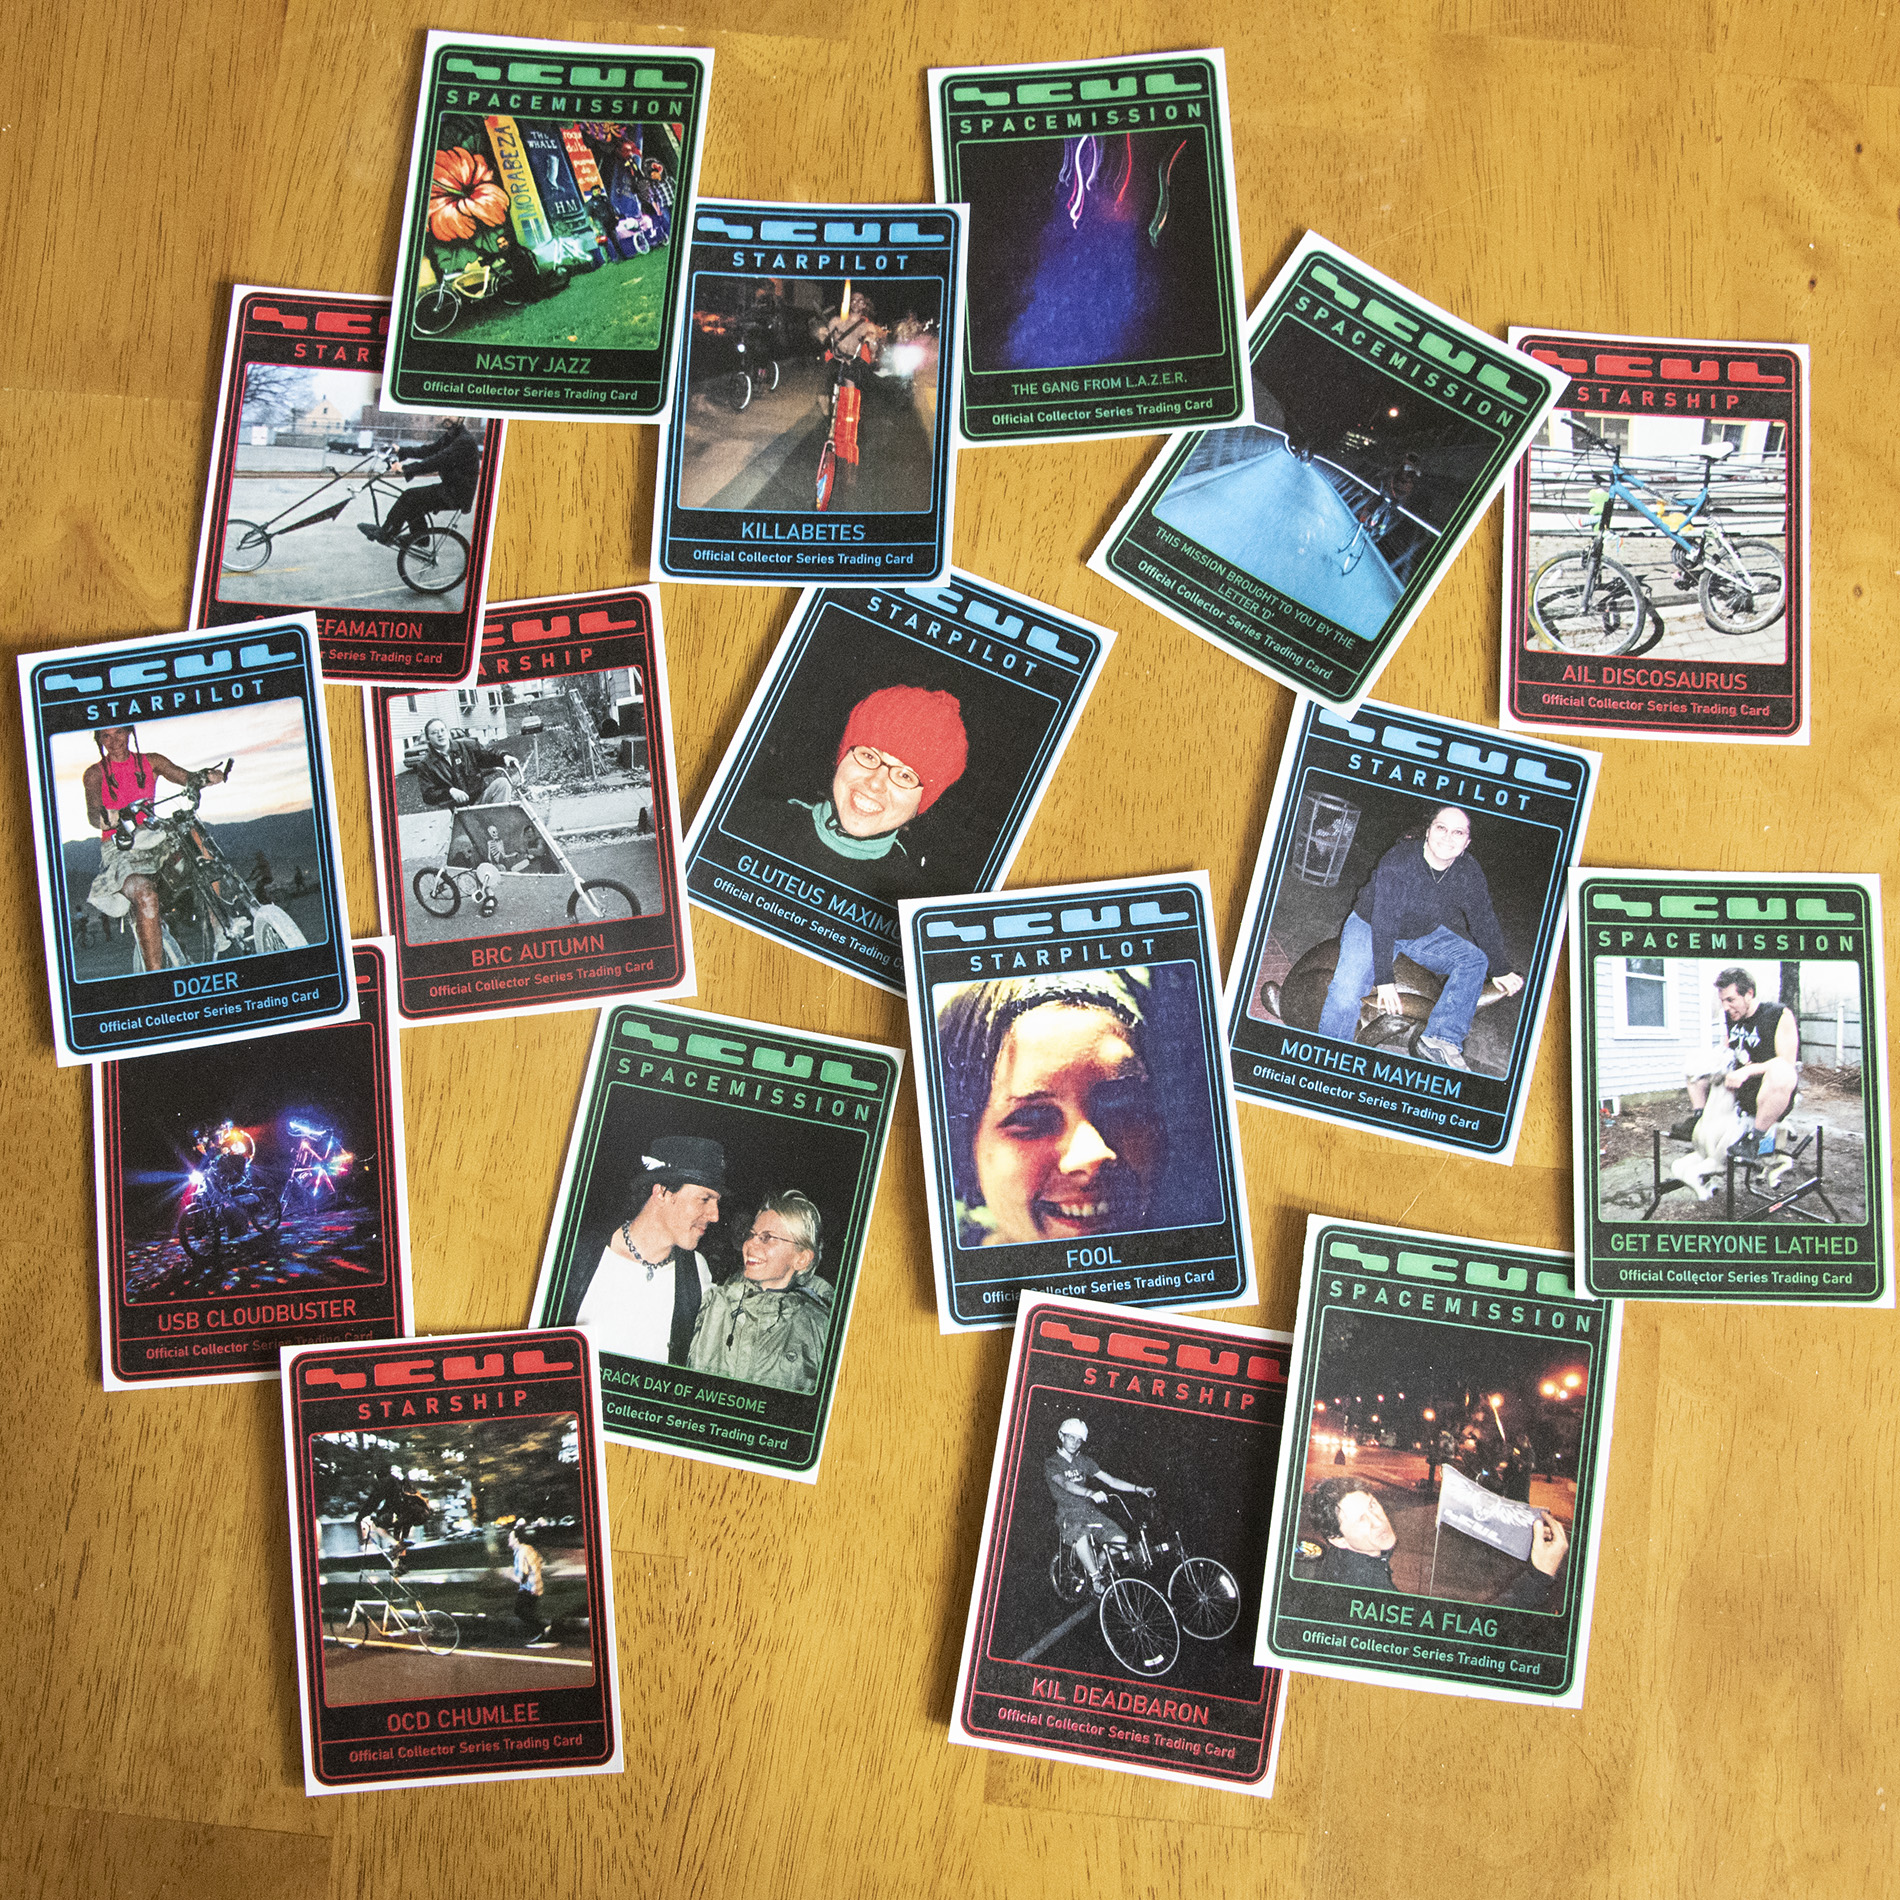
In 2001 I made a set of 209 limited trading cards for the SCUL fleet. The cards were layed out one at a time, and I had to print all the cards in the set and randomize manually just to make one pack. Manually typing stats from web pages to InDesign files wasn't a sustainable method, especially since the stats were constantly changing. However the cards were a big hit — people loved to collect and trade them. I have a personal collection of these cards autographed by many SCUL pilots. When I created the first run of trading cards I decided that I shouldn't give myself a complete set. Collecting them is the fun part, so I bought my own randomized packs and traded with other pilots.
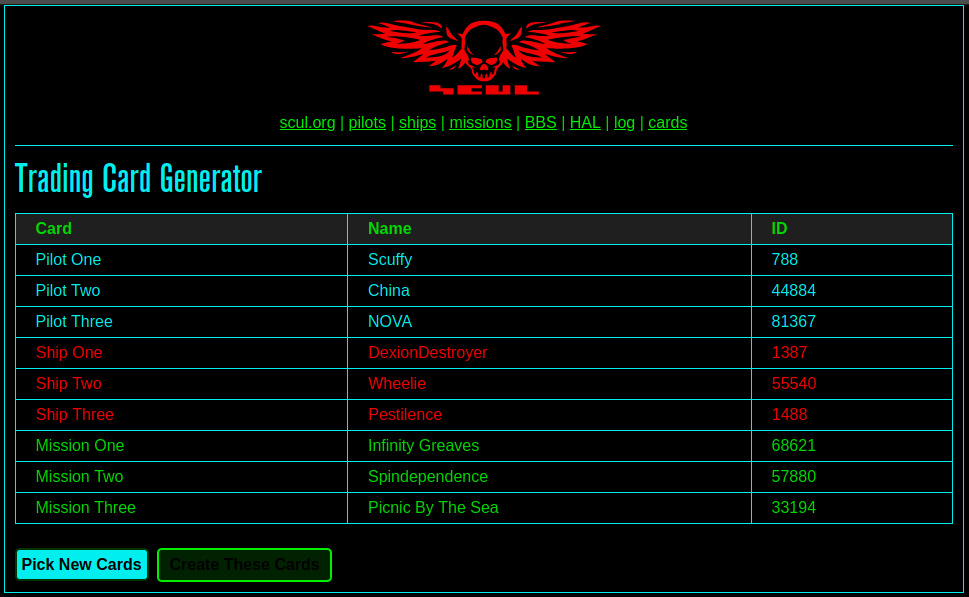
Twenty years later, I was able to use the online SCUL website database to generate randomly selected riders, bikes, and rides to create print-ready trading card packs. This allows for an instant randomized pack of three pilot, three ships, and three missions from a set of over 2,700 cards. Not only that, the cards are compiled from website data collected the moment they are printed, which means when a pilot's stats update so does their personal trading card. This puts the number of possible cards estimated at hundreds of thousands of variations.

Styling elements for print with double-sided printing and very tight registration makes for some very tricky CSS styling and even customization for the printer, but the project was a big success and well worth the effort.
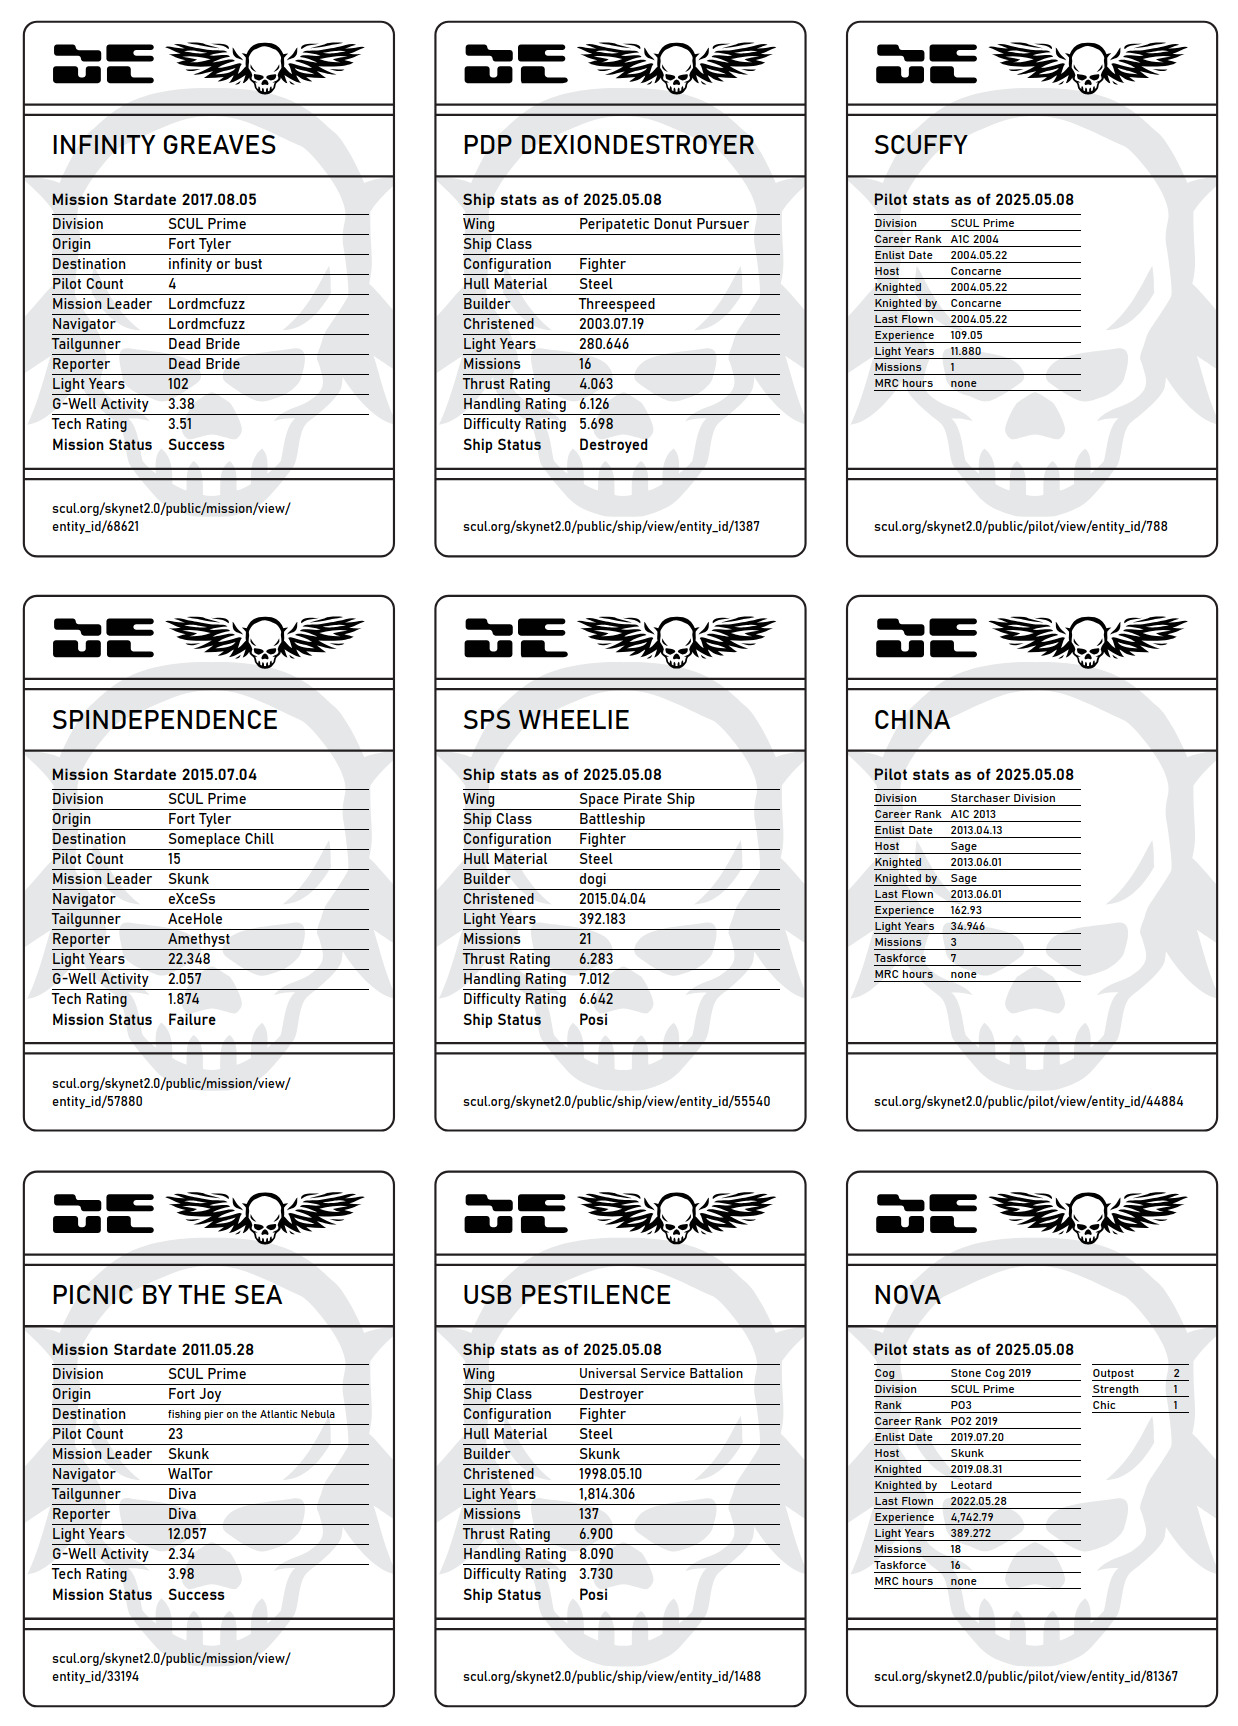
Each pilot, ship, and mission card contains complex and current statistical data, along with a link to their relevant webpage.
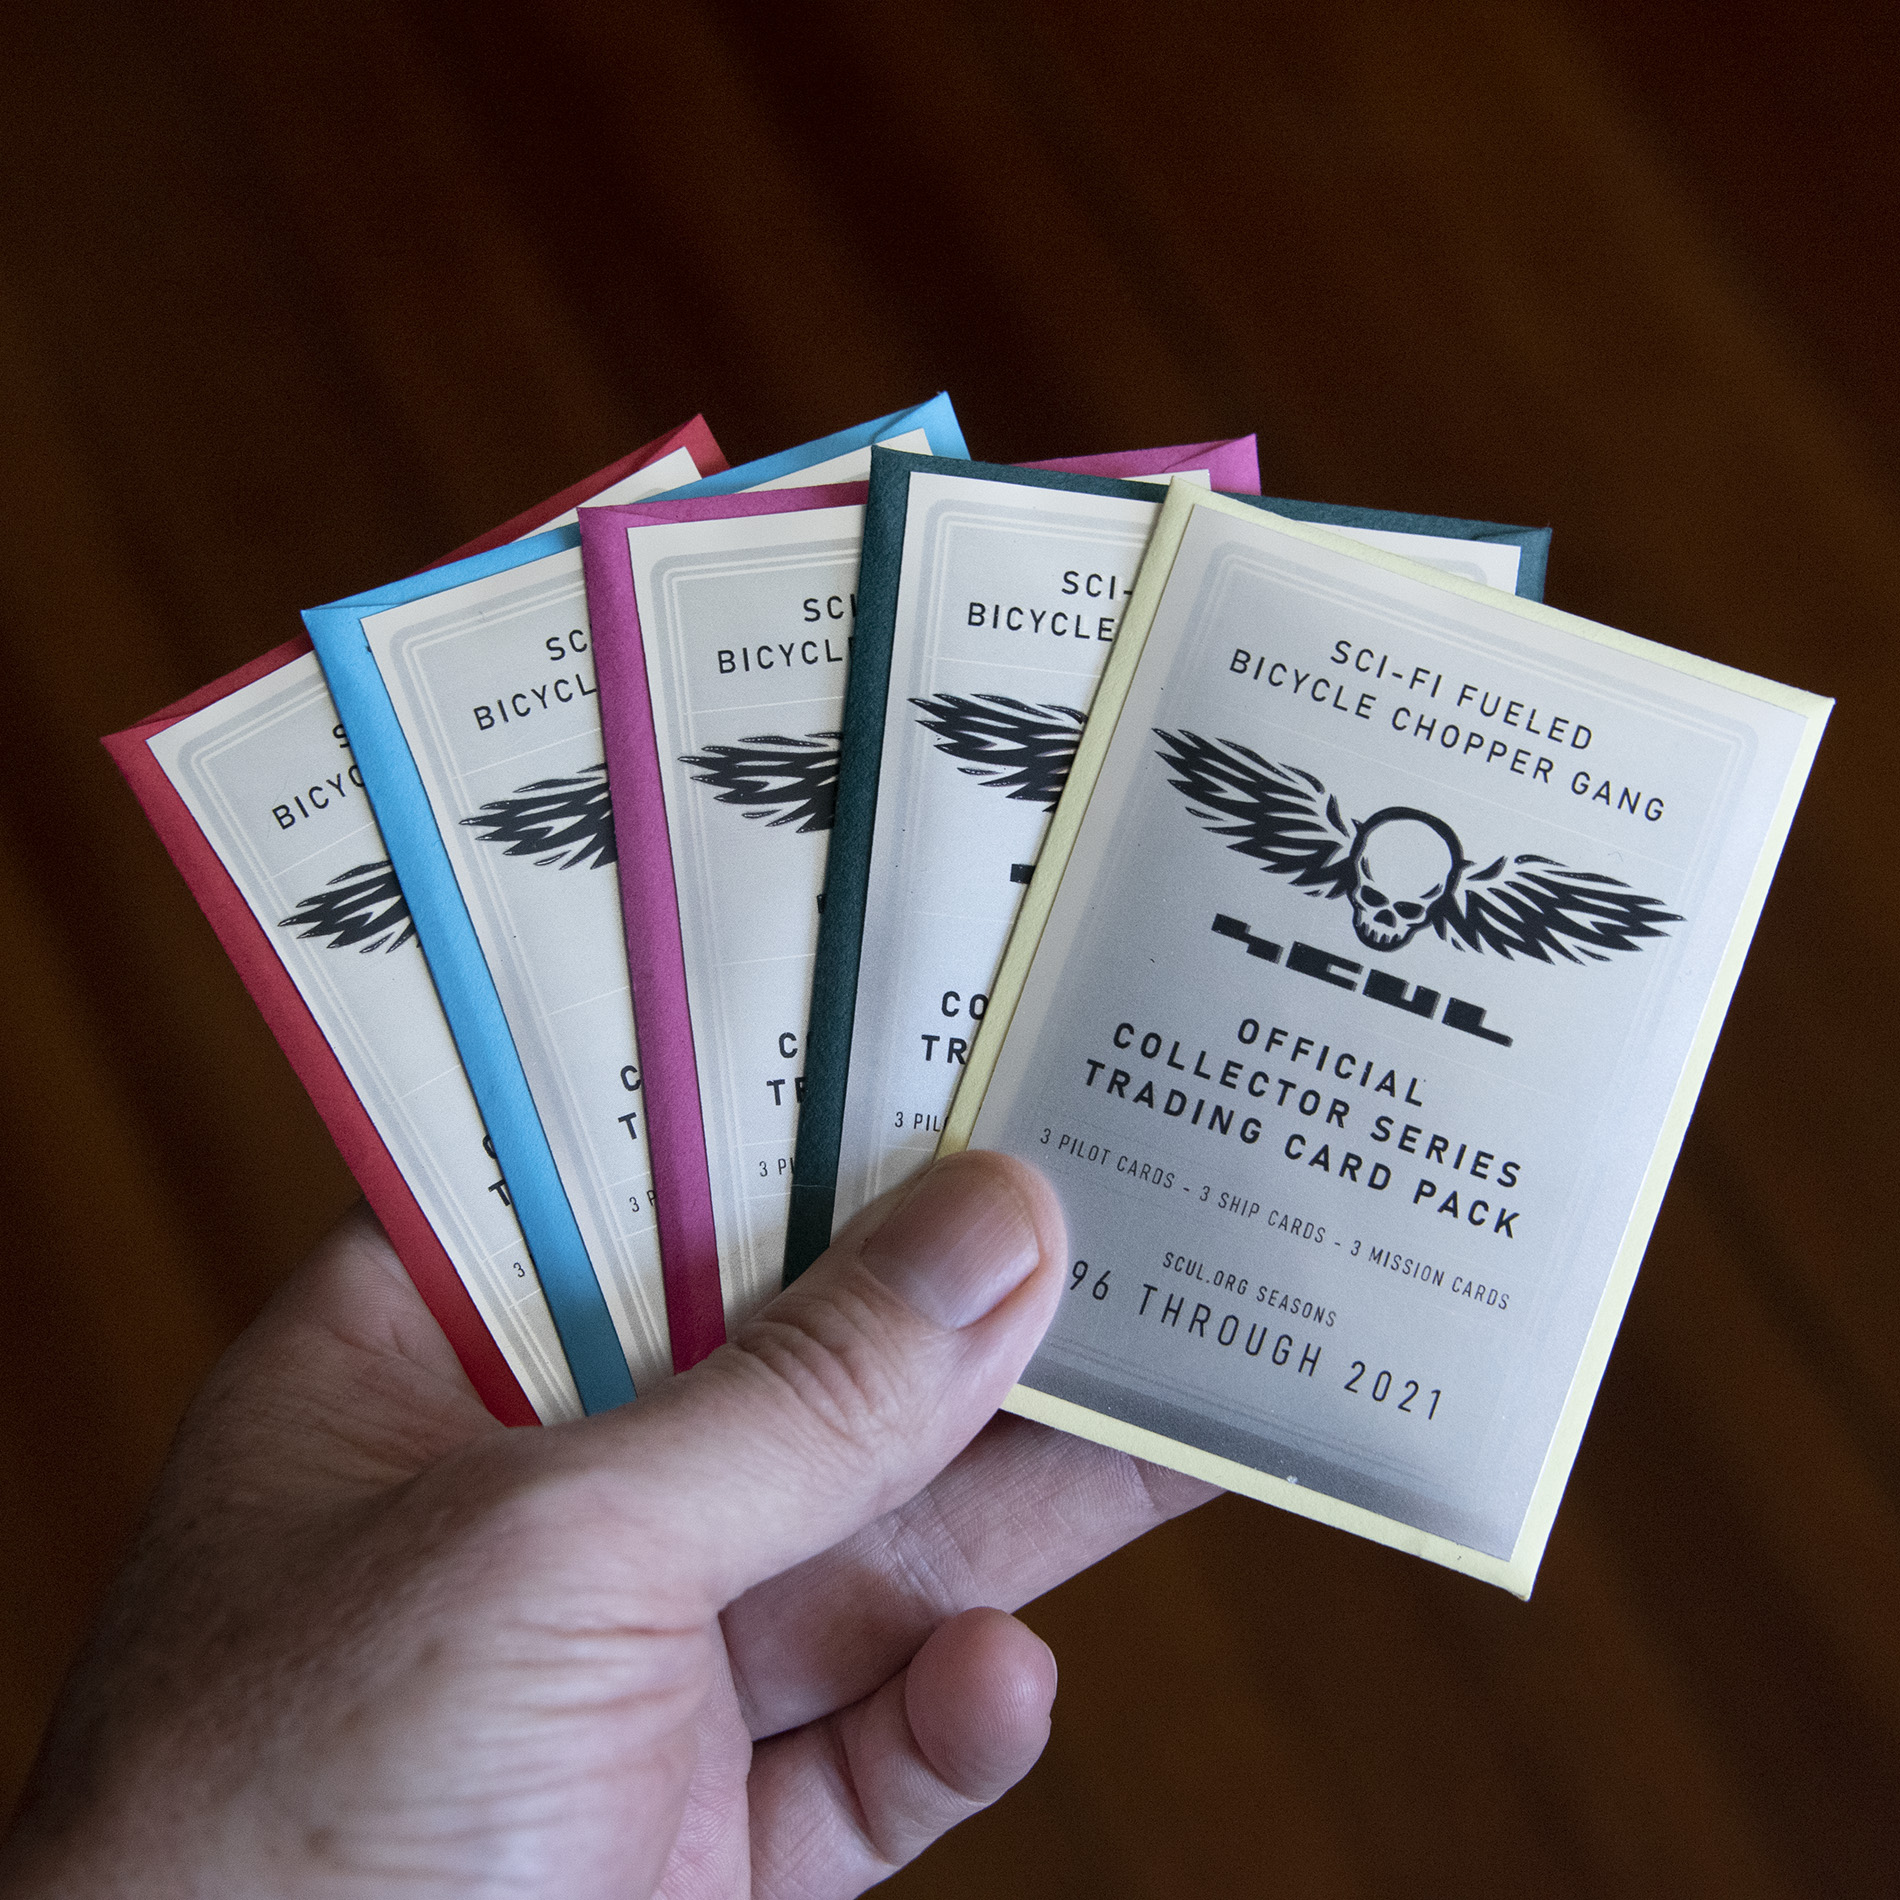
The original card pack wrappers were printed on yellow paper, cut and folded around the pack, which contained nine cards, a sticker version of a card, and gum. The new wrappers are sourced envelopes and a silver foil sticker print to seal it, which are much easier to make.
Every SCUL pilot page, ship page, or mission page with an image has their own corresponding SCUL trading card.
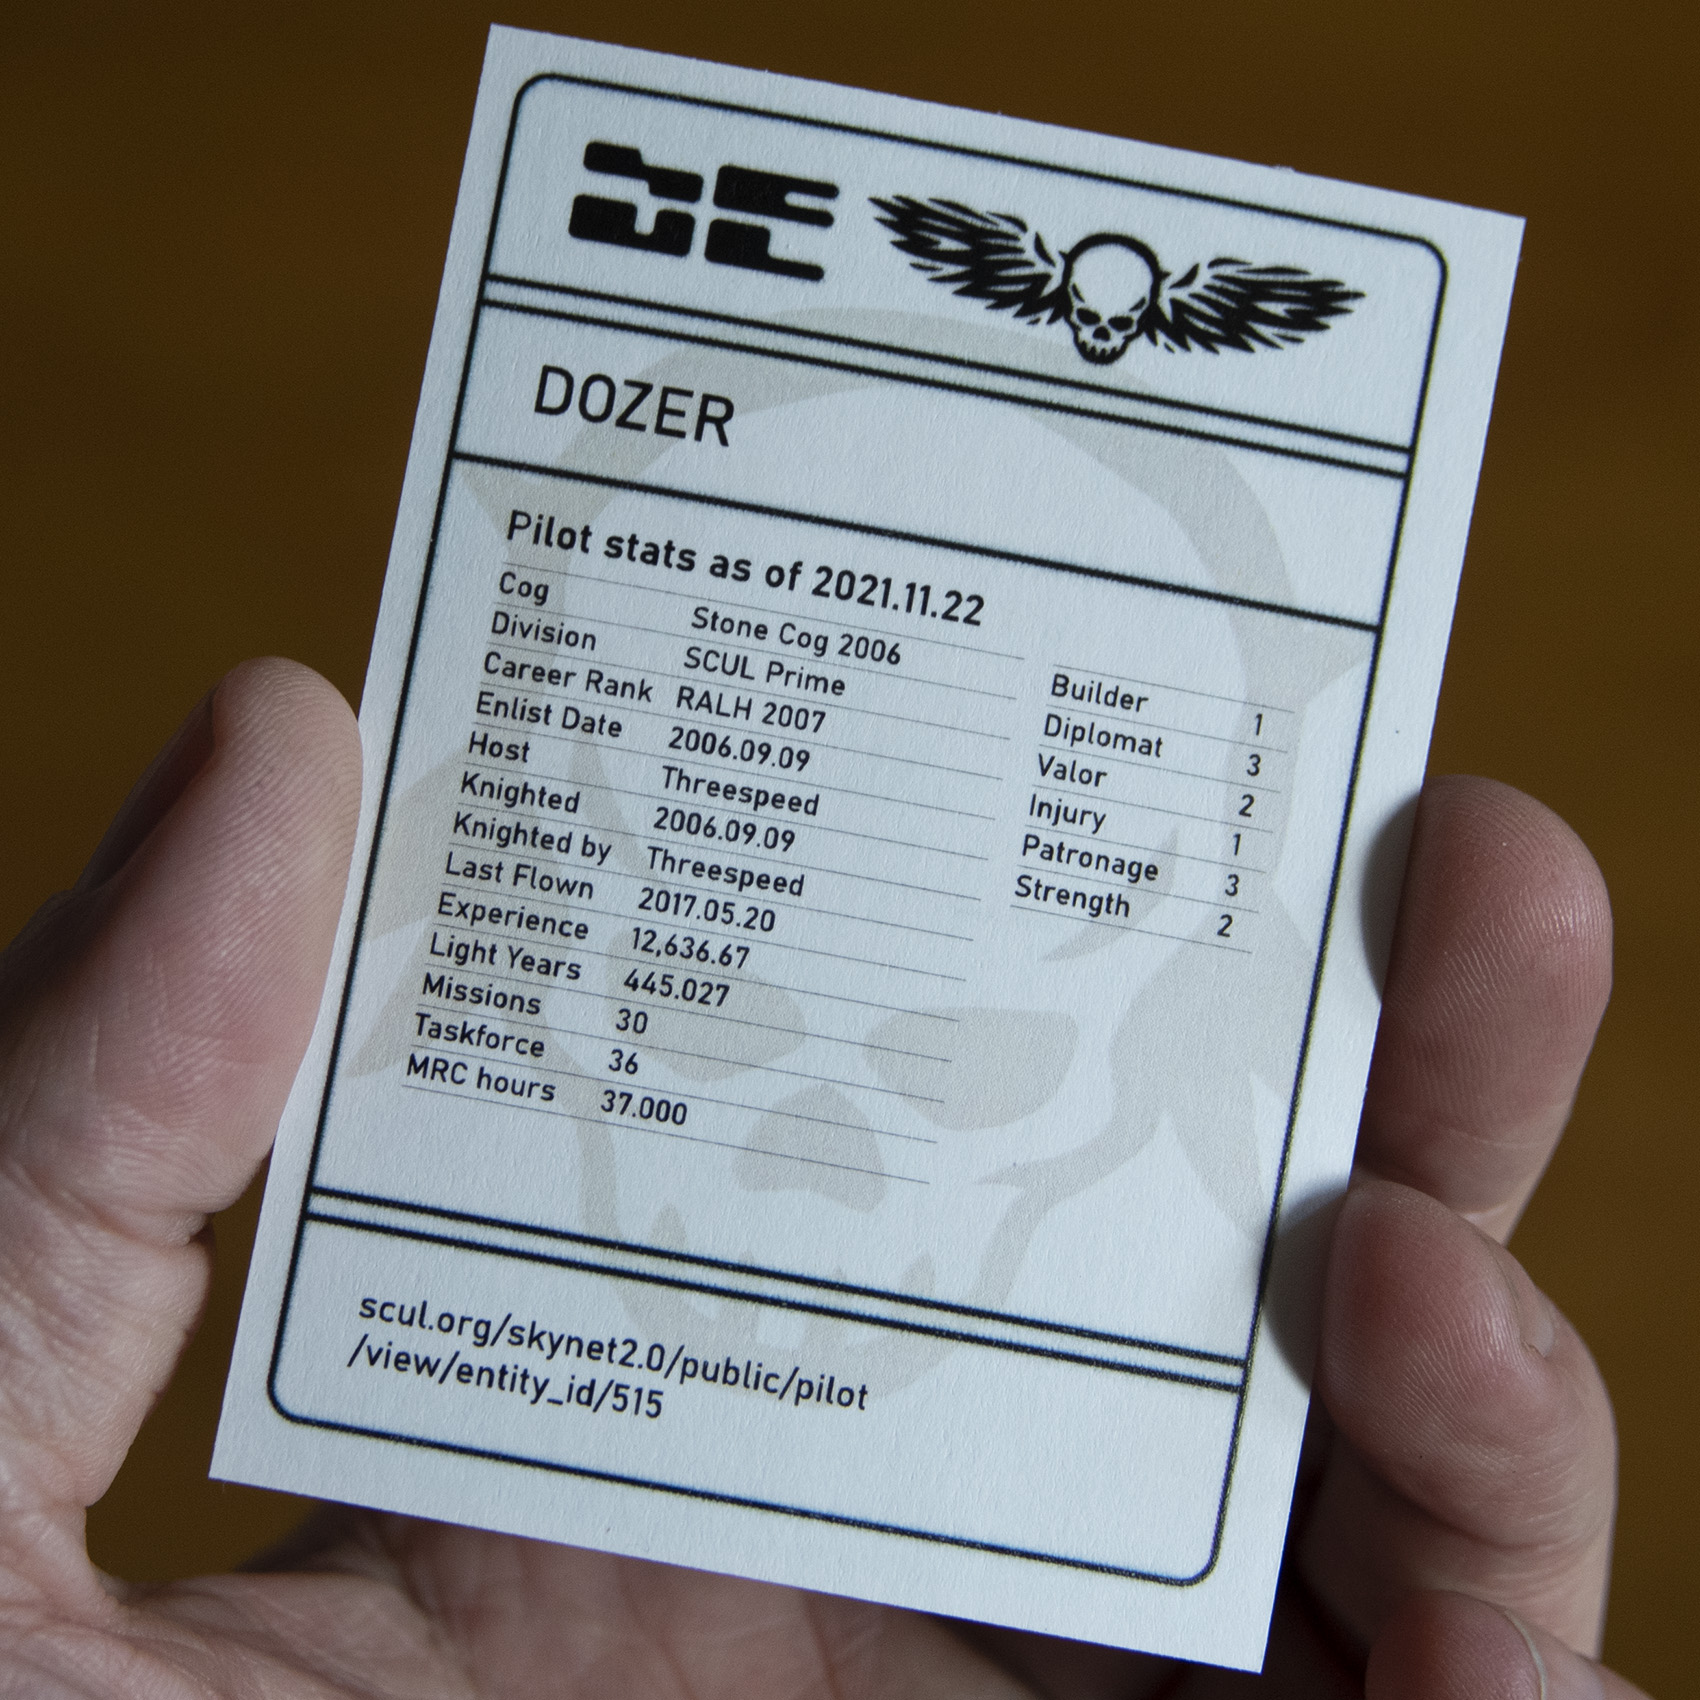
Thanks to our extensive data retention, the total number of trading cards exceed 2,700 — many of which have stats that update to time of printing, giving a snapshot in time for active ships and pilots.

People can order normal, randomized silver packs, or custom-pick their card set pack at the gold-level.
I've heard of people making trading cards for their team, and some even make a few token cards as a laugh — but we actually followed through with the idea and made it a reality.
TIG Welding Bench
The Cradle of Skunkadelia
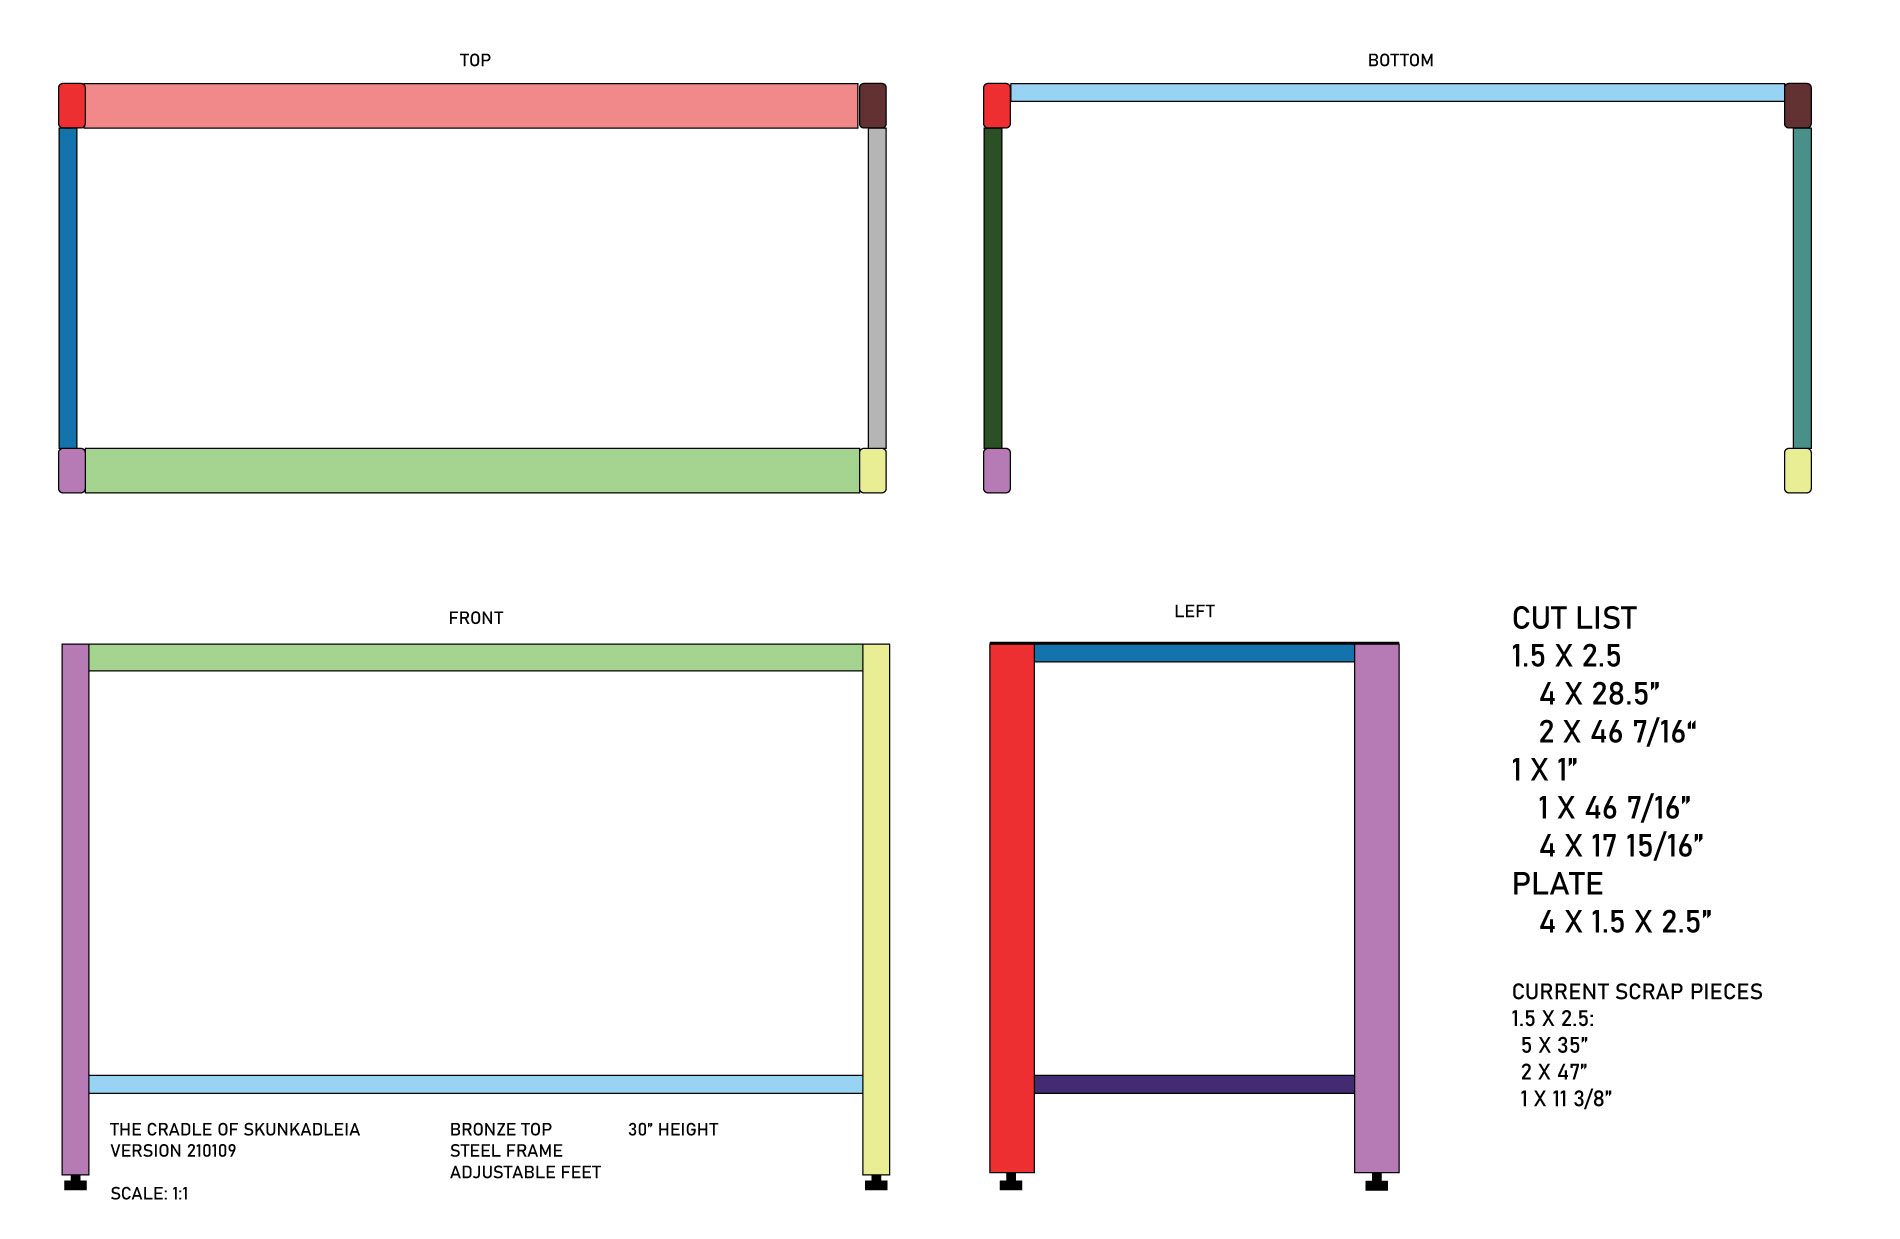
When I moved my studio from the Artisans Asylum to home in 2020, I needed to make a weld bench for myself. I had just enough repurposed rectangular steel stock to make the bench, but only if I was careful to make the right cuts — hence the color coding.
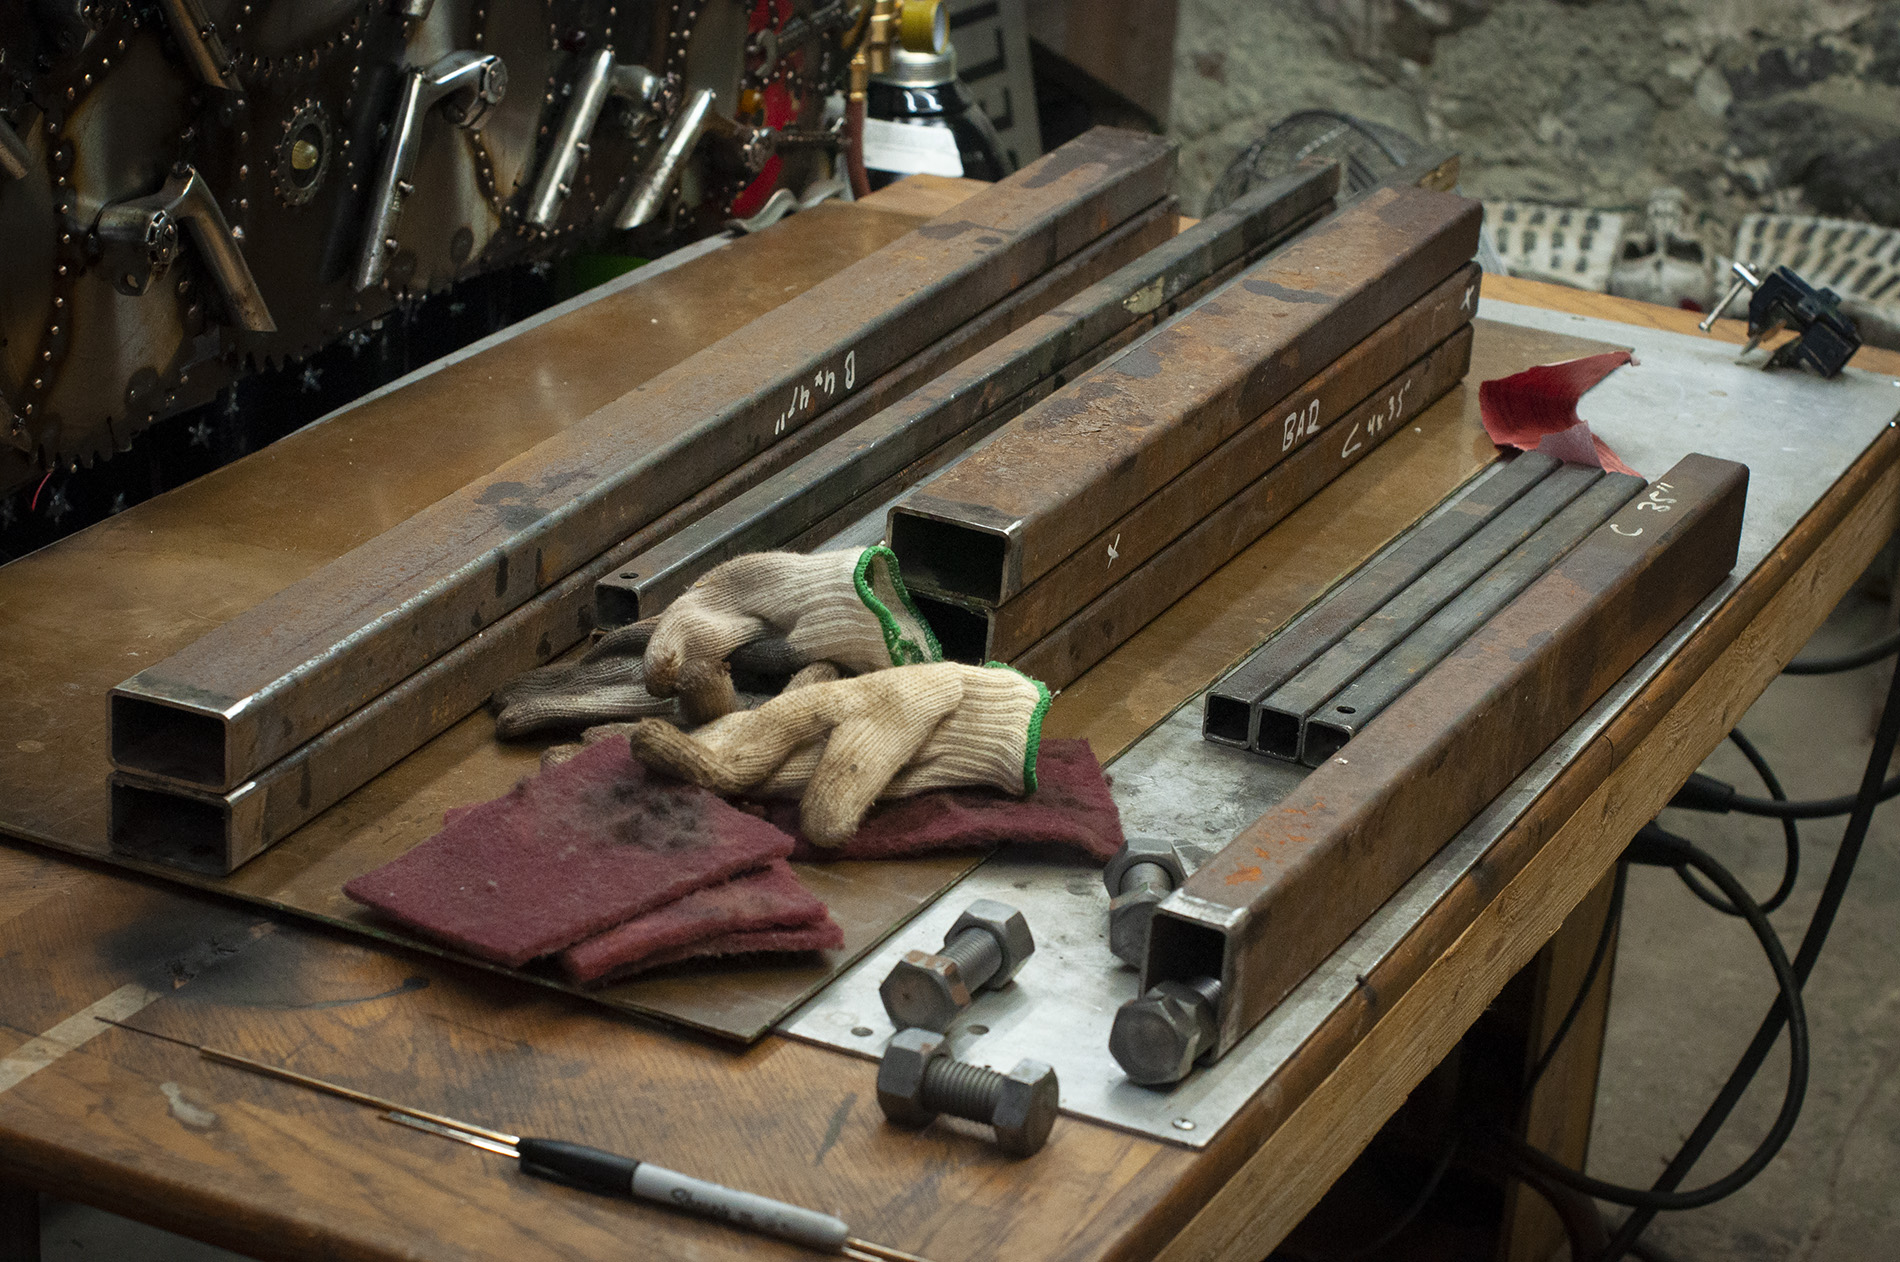
I am happy to say I was able to make each piece without having to weld two leftover ends together, but there was no room for error. Notice the folding table with an aluminum plate on top being used as a temporary weld bench.

A worthy use for a beautiful piece of silicon-bronze plate. I gave the bench the ability to level itself by threading oversized blots into nuts welded to the bottom of each foot.
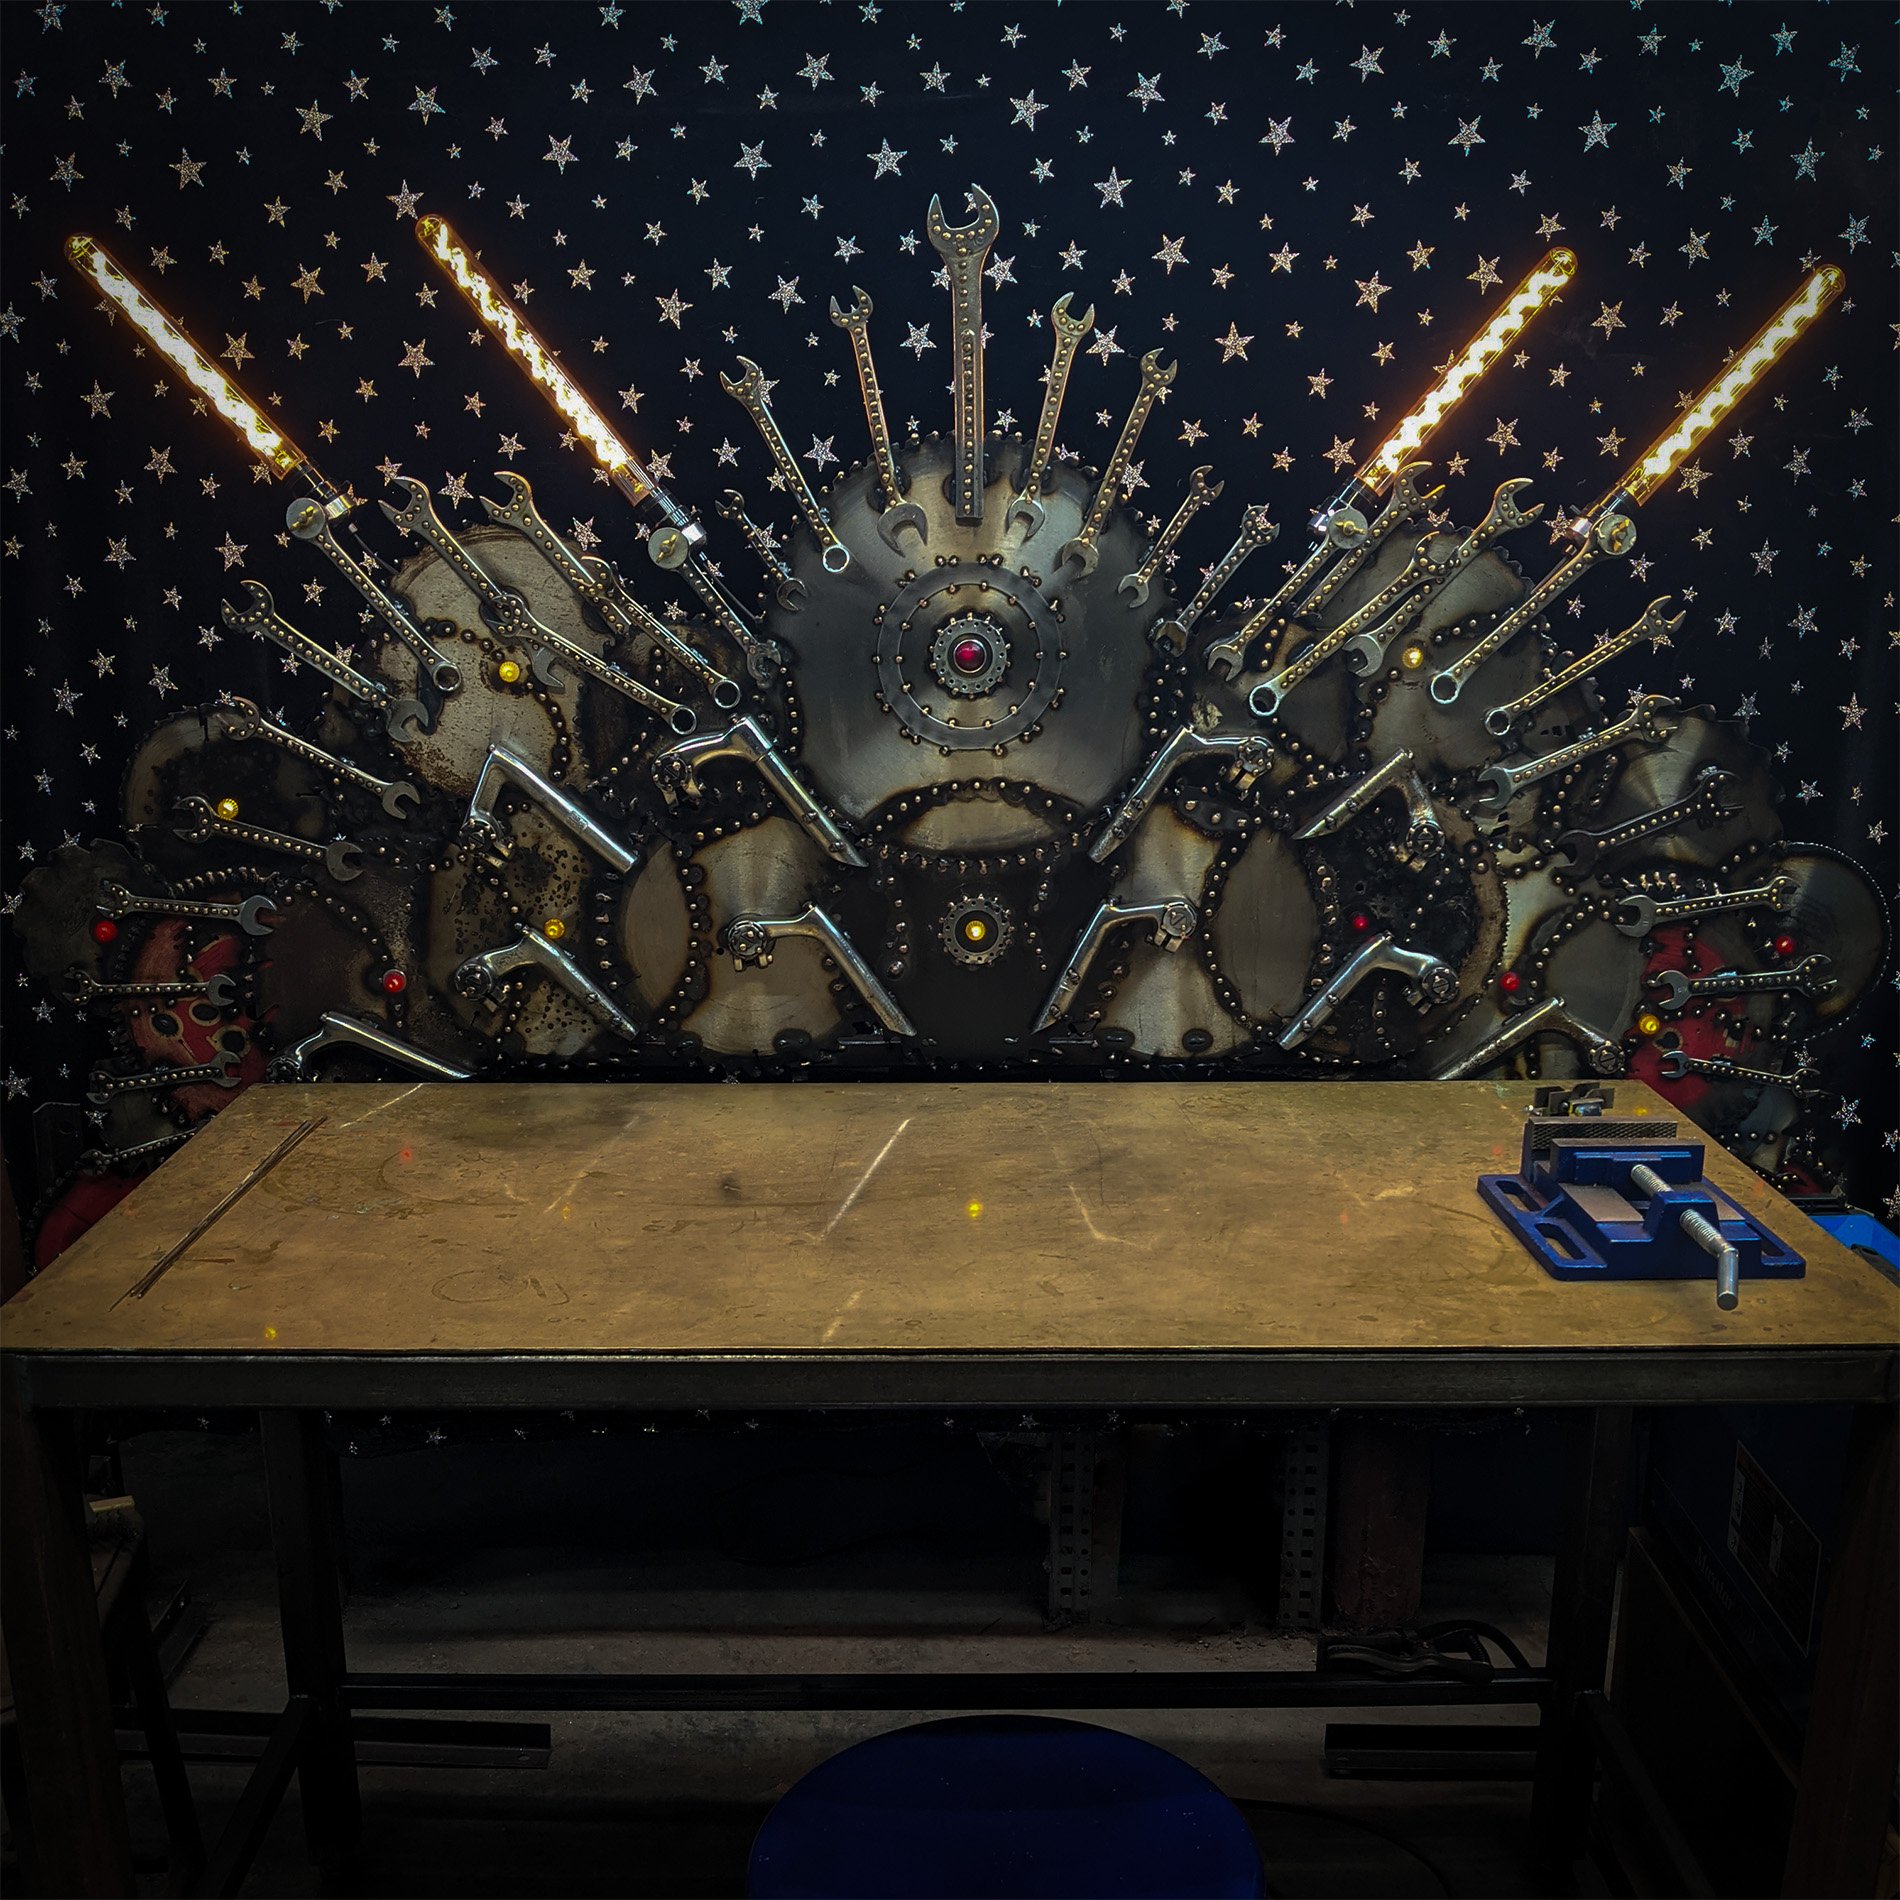
Here's a picture of the completed bench. I repurposed the ornate arch that was once the entrance to my microgallery into a decorative back plate.
To build is to know.
The more ambitious your idea, the more I'm interested in helping you.